A fibrous self-portrait

Over on Aquilino Arts, we planned to lend some personality to our site by creating an artistic version of a photograph of ourselves. As the crafter of the group, my medium was fiber. I’m quite pleased with how it came out.

photo of fiber self-portrait

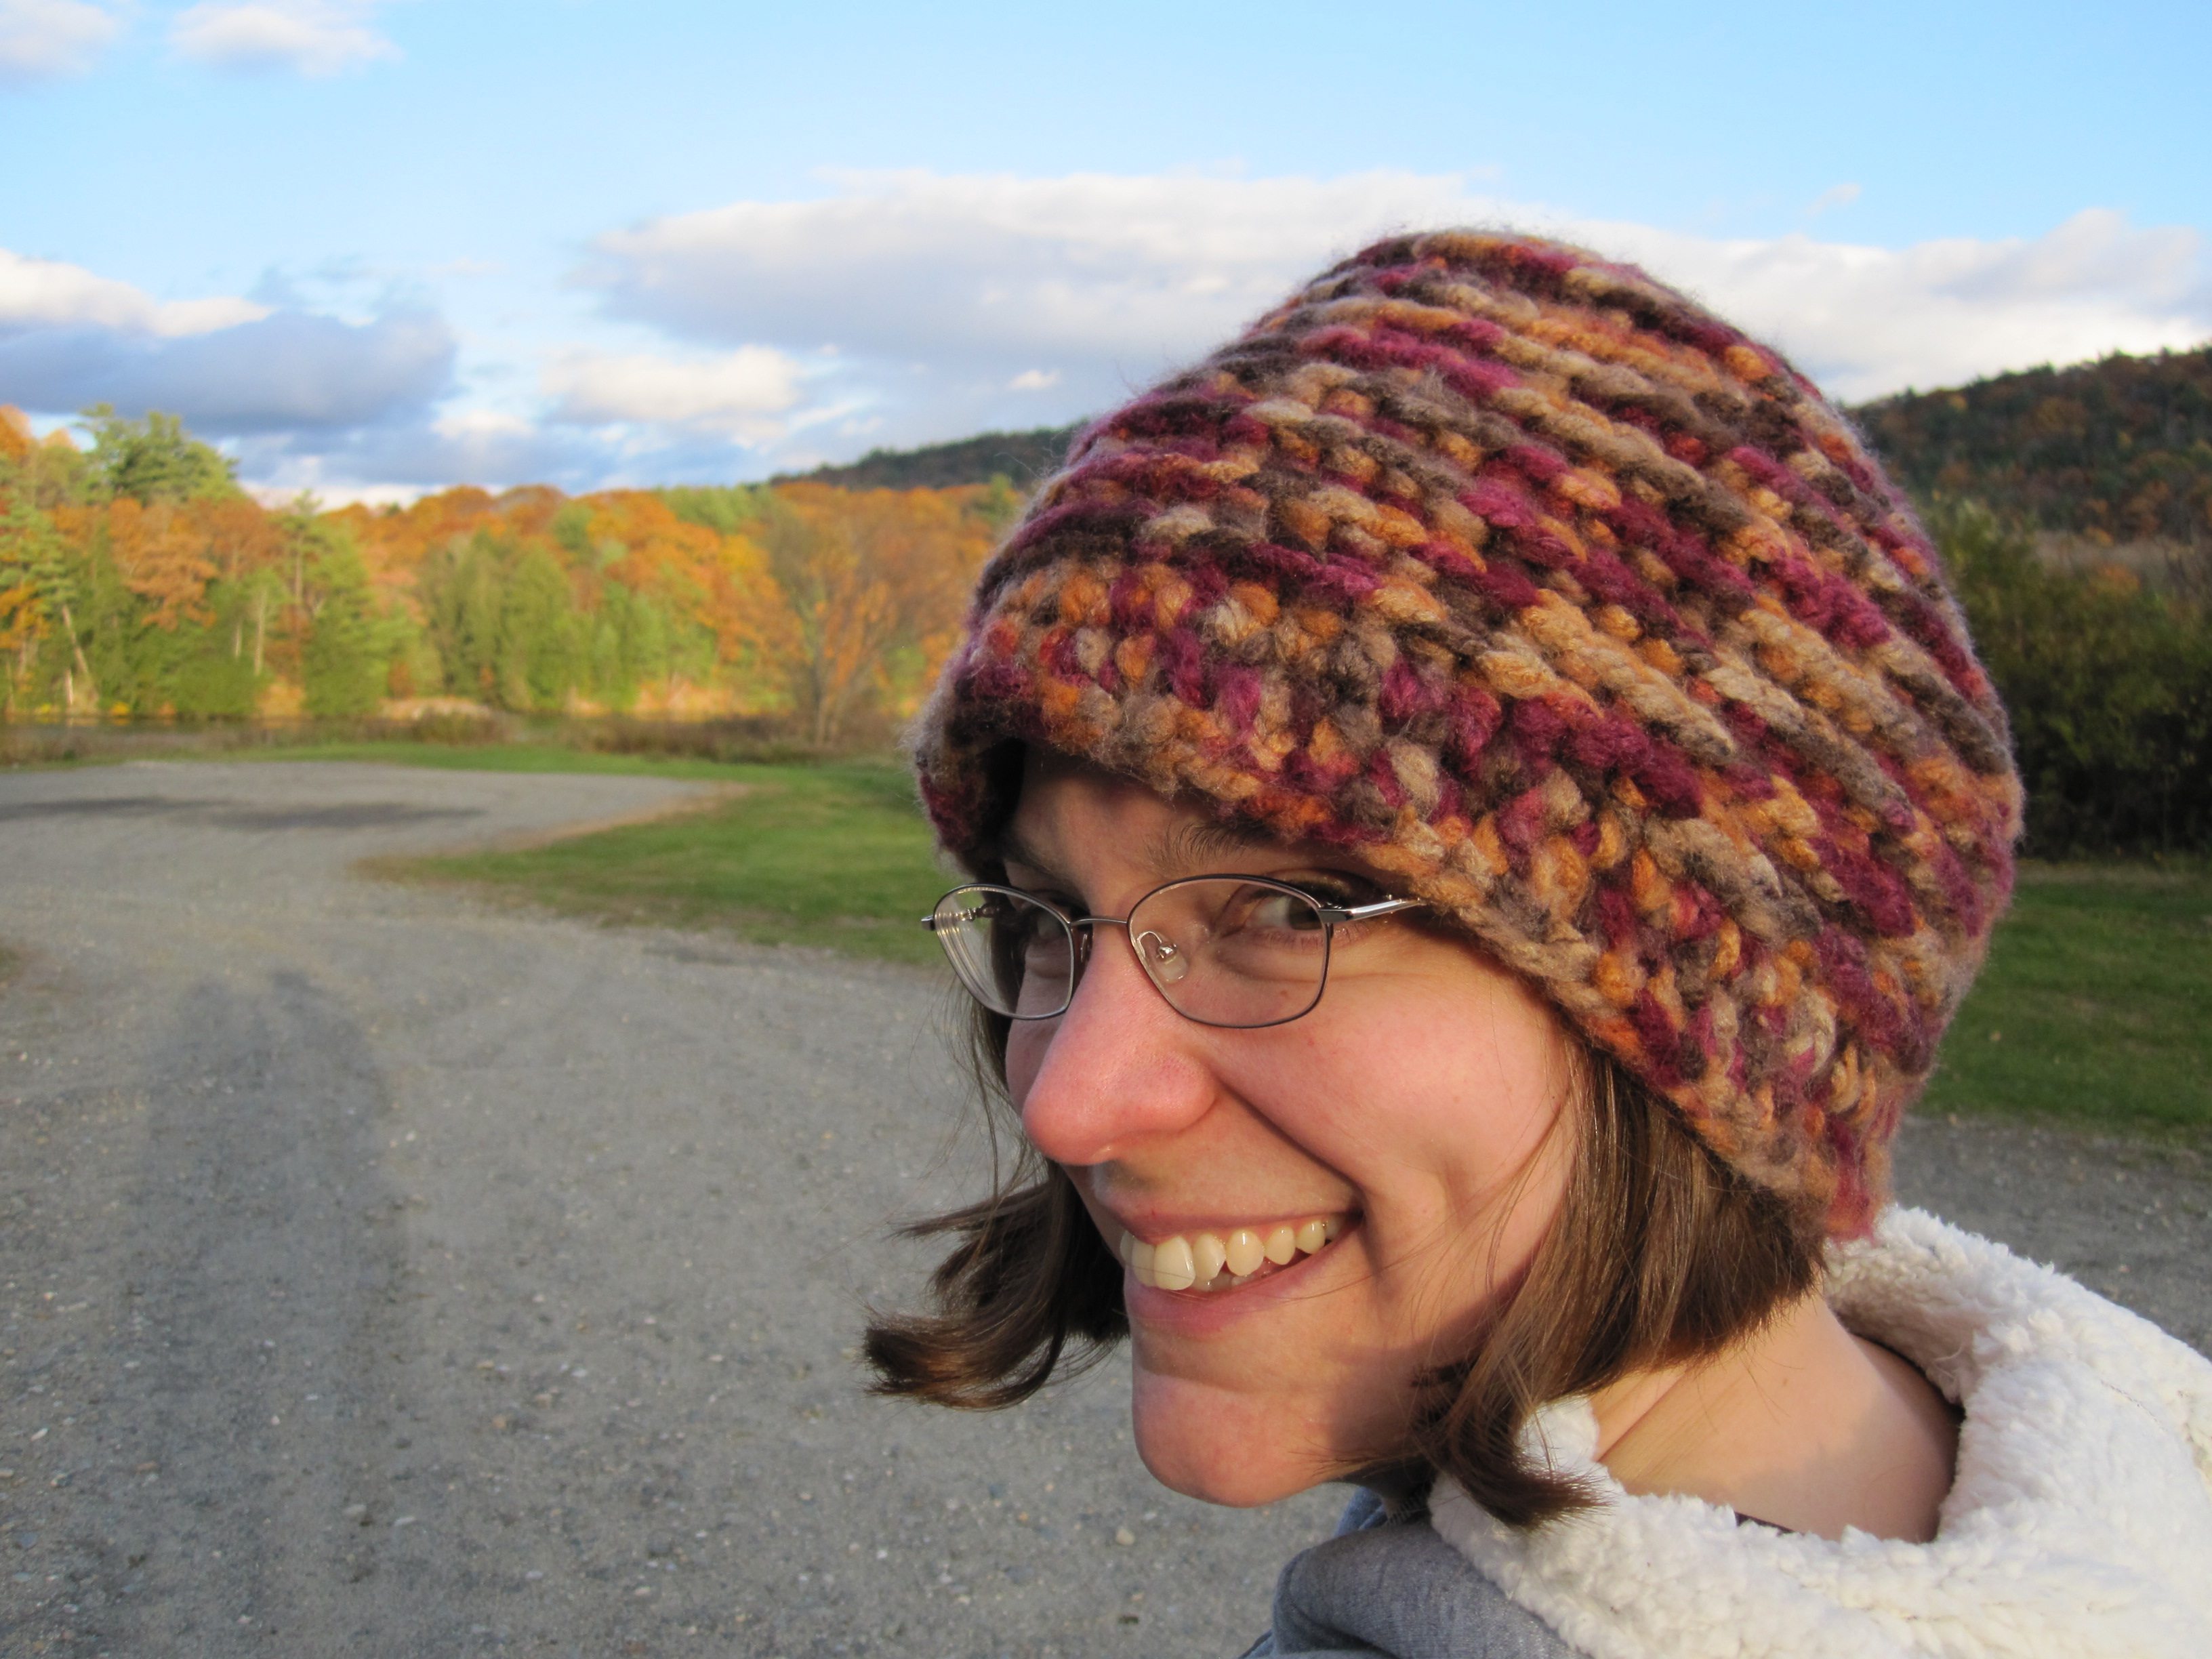
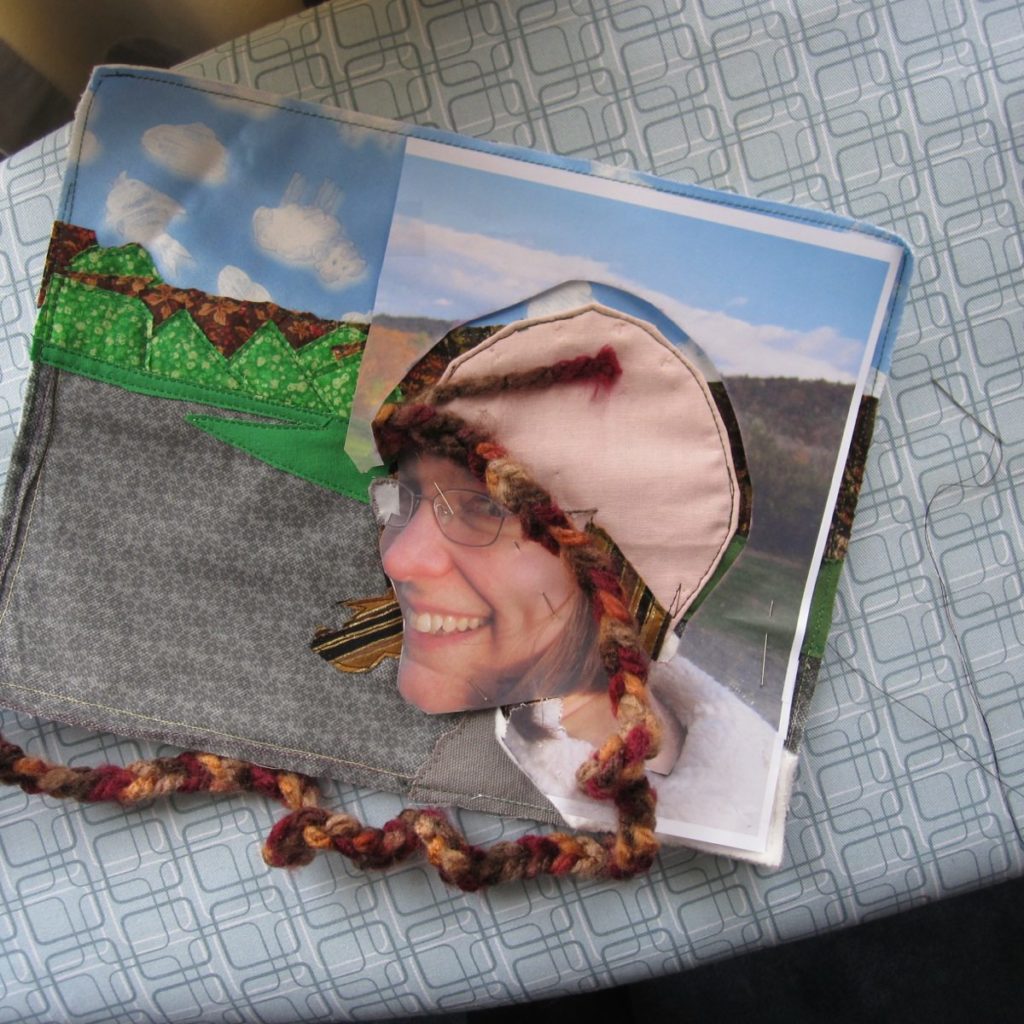
The photo it represents actually came from this blog, from the post discussing the creation of the hat I’m wearing in it. Here it is for direct comparison.

original self-portrait photo

We did not end up using this for the team page as originally intended; the idea sort of fizzled out. I wanted to show it off somewhere, though, and in case you’re curious, I have for you some material lists and process photos.

Visible components:

  • Fabric
    • satin (sky, glasses)
    • fleece (white part of jacket)
    • home dec type (dark green trees, gray part of jacket)
    • netting (overlay for gravel)
    • cotton and/or cotton-poly (everything else)
  • Sewing thread
  • Bulky acrylic yarn (hat)
  • Fabric paint (lips and teeth)
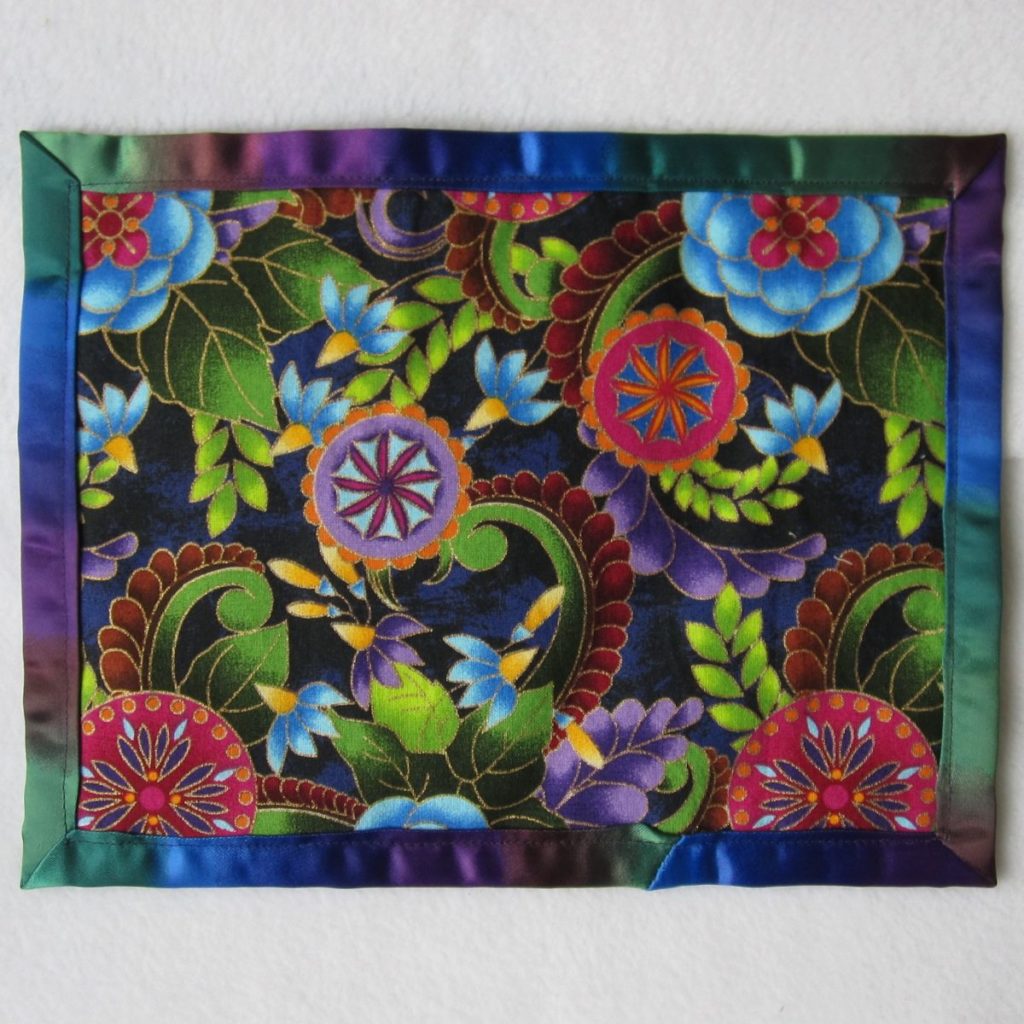
  • Blanket binding (frame)

Invisible components:

  • Flannel (to pad up my nose-cheek-chin region just a tad, though I think it ended up being irrelevant)
  • Heavyweight nonwoven interfacing (face/head, line of trees on left, glasses, two full-size backings)
  • Fusible web (glasses, mouth)
  • Tacky glue (glasses)
  • Fray-Check (glasses)

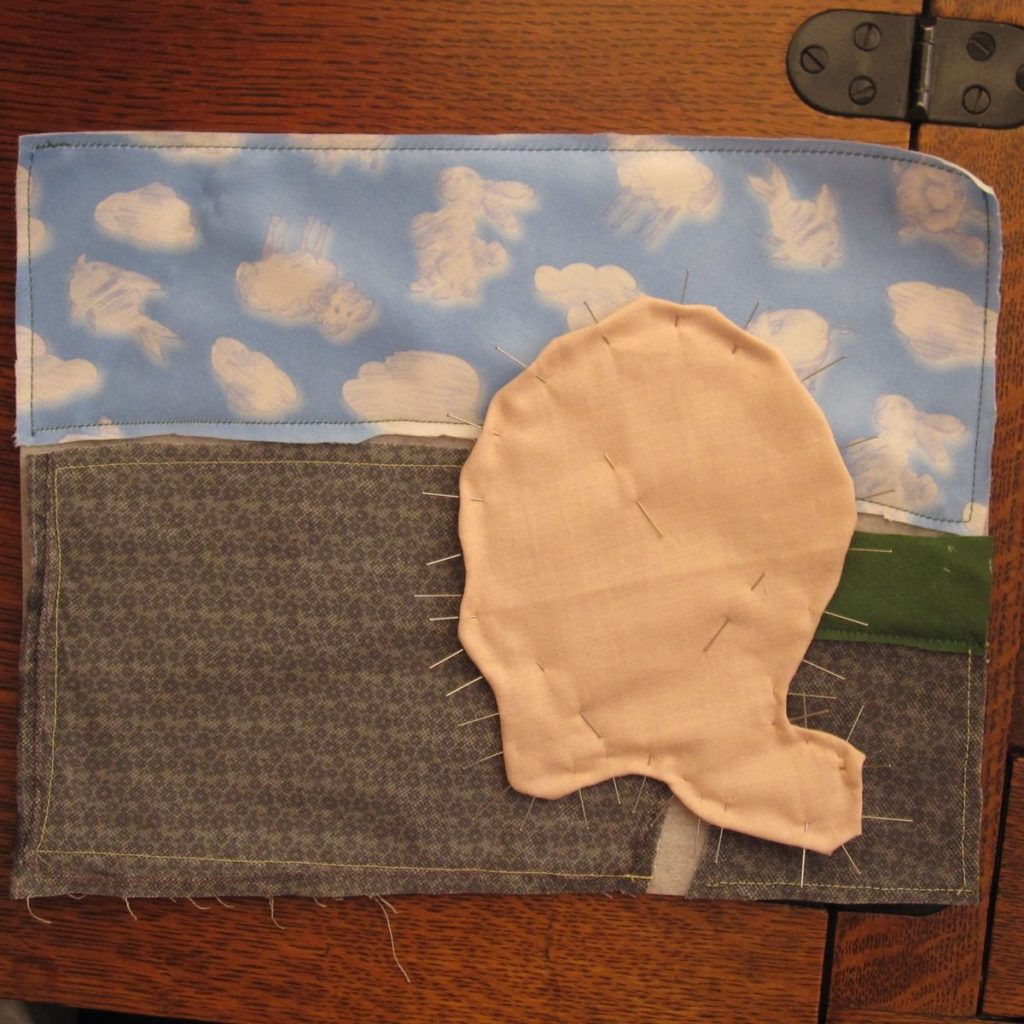
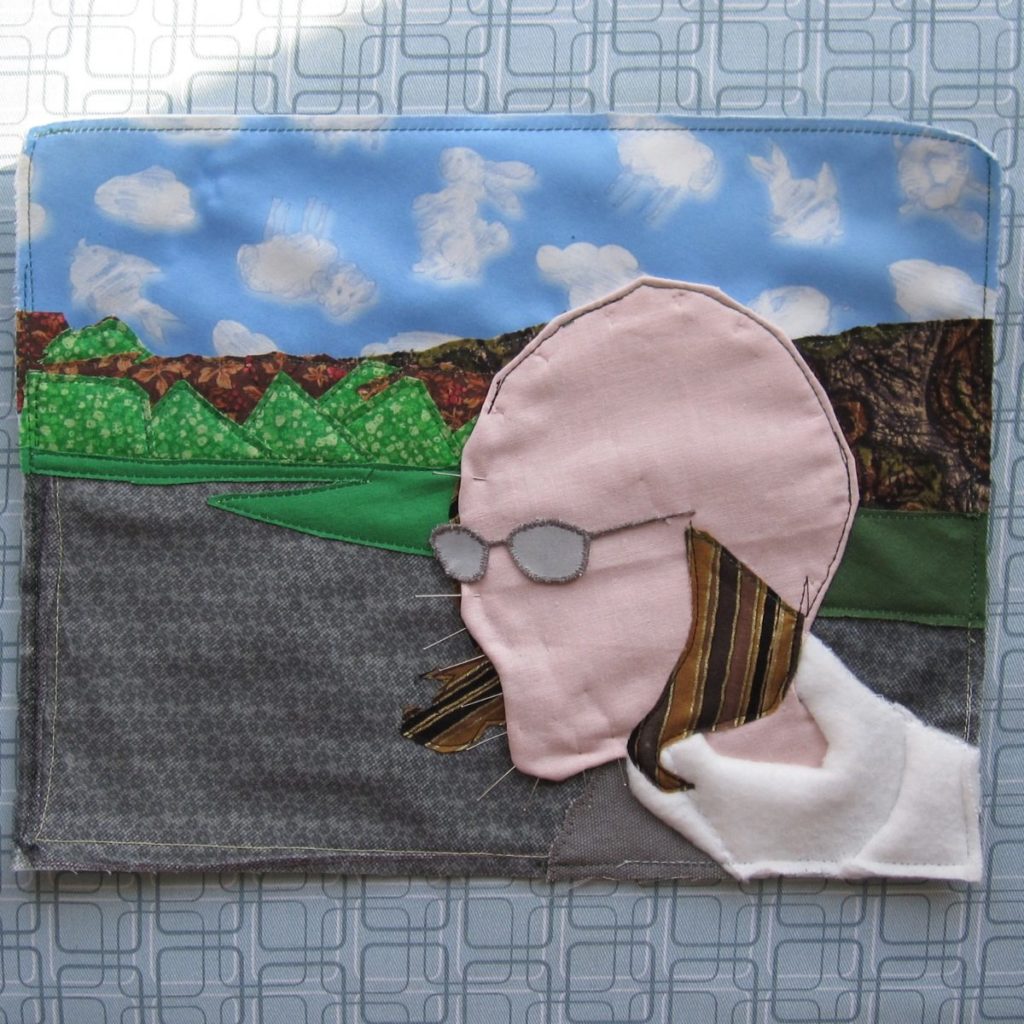
The first two photos are the back view of the piece that formed my head and neck, and a partially laid out background. I used the head piece to help align the background pieces.

photo of back of head/neck piece photo of partially completed background with head/neck piece laid on top

Next, a shot I call The Invisible Bozo, and a taste of the oddness of cutting up three or four copies of your face to do a project.

photo of completed background with head, hair, glasses, and jacket photo of in-process hat

The back, before and after I covered it with a second layer of interfacing and with calico.

photo of finished back without decorative cover photo of fully finished back with decorative fabric layer and binding

Finally, a shot of the finished item lit from the right instead of the left. It really shows how much dimensionality the piece has.

photo of finished piece lit from right instead of left

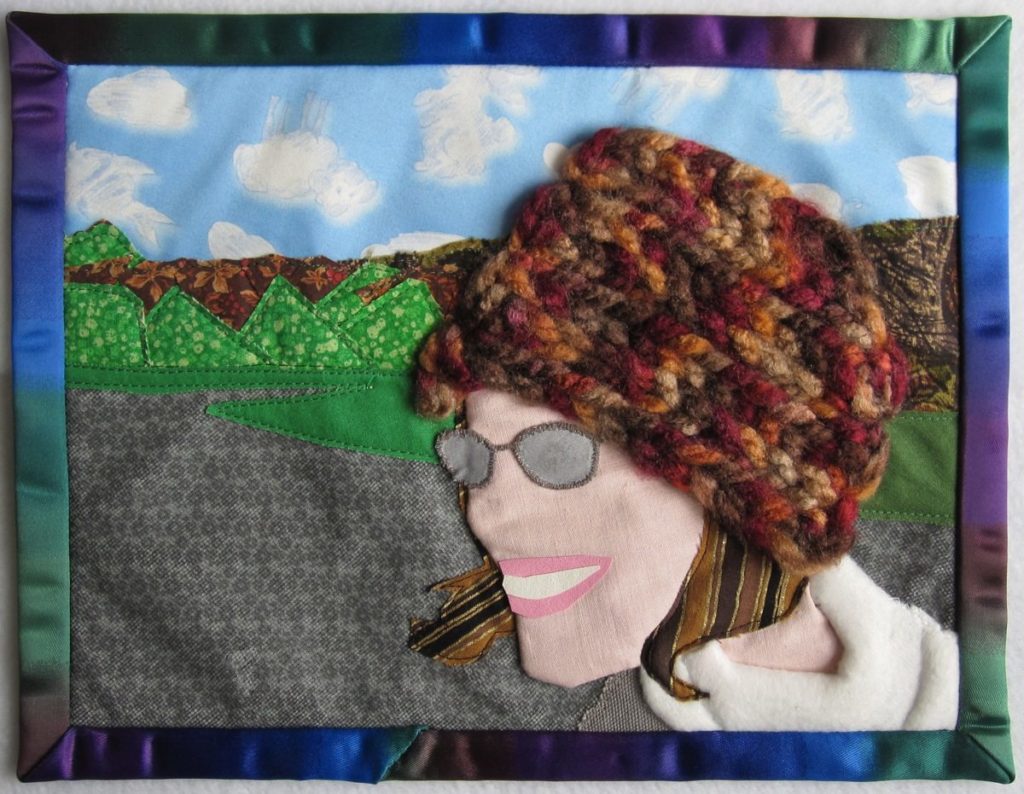
This isn’t a project I would have done without someone telling me “hey, you should to do this,” but it was an interesting challenge. I don’t know what I’ll do with it now, but my rationale for backing and binding it was that if I was going to put as much time into something as I did into this (I didn’t keep track, but 10 hours give or take) then I was going to finish it properly.

Shining (ribbon) stars

Our Christmas tree has no topper. We’d love to get a high-end crystal star for it, but that’s yet in the future. Meanwhile I’ve been improvising – one year we had wide ribbon tied in bows, one year I made an origami star out of construction paper (because it was the only appropriately-colored paper I had that was large enough). This year I decided to crochet a star out of ribbon, and got the chance to this weekend. The result is shown below, blurrily, on the tree, after my loving husband arranged the lights behind it for best effect.

crochet ribbon star on tree

I thought at first that I would chain stitch ribbon around wire, bend it into shape, and connect the ends; nesting two or three of different sizes would fill out the star. That might have worked if my wire had been a bit heavier, but as it was it was too flimsy, and it was also difficult to smooth and flatten the wire without crimping and creasing the ribbon.

Then I went looking for patterns and found one by Kimura Kraft that I liked the look of. Unfortunately it didn’t work in ribbon; the inner part was somehow too large for the outside.

crochet ribbon star

Fortunately I had purchased three “kegs” of ribbon, so after two strikes I could still try for a hit, modifying that pattern. For the star shown I used a J hook (6mm), a 40ft roll of 3/16 inch wide ribbon (12.2m|~5mm), and a generous 2ft (60cm) of 28-gauge jewelry wire. I had a decent bit of ribbon left, but only about half the difference to the next available size down, 32ft (9.75m).

Here are my changes to Markus’s pattern. Unfamiliar abbreviations below (and the rest of them too) are explained on the Crochet Reference page.
Round 1: Replace the starting ring and chains with “ch-4, work into ch next to sl kn.” Make sure to put your sl kn onto the hk loosely – ribbon is inelastic.
Round 2: Ch 3 to start instead of 2; work only 1 dc where it says to work 2 (so don’t make that first dc, in particular).
Round 3: This one’s different enough that it’s simpler to give the instructions in full. Note that “in picot” means to treat the “sl st in 3rd ch from hk” parts of rnd 2 as chain rings, working into the center:
No ch this rnd. Work the following stitches around the wire as well as the rnd-2 sts, leaving a wire tail of several inches: *sc 2 around next ch-2; [sc 2, ch 1, dc, ch 1, sc 2] in picot; sc 2 around next ch-2; sk dc* around. Sl st into 1st sc of rnd to join (40 sc, 10 ch, 5 dc). FO ribbon.
Twist ends of wire together and use to attach star to tree or other hanging/display place. Shape by hand.

Wire crochet experiments

my wire collection - some of it. As promised, I crocheted with wire for the first time last night. The evening began with me teaching my Crochet Via Granny Squares class, so my first idea was a little wire granny square.

It didn’t go so well. I started with green floral wire, probably about 28 gauge, maybe 26, which was stiff with its coating. Second round was 30 gauge gold wire. Both were with a size 1 steel hook (2.75mm). My tension was all over the place – with the gold wire especially, it was impossible to get a grip on it without bending it and risking kinks. Not that I didn’t get kinks regardless. After the fact it occurred to me that finger cots on two or three fingers of my left hand might be a help, but by then I was getting ready for bed.

wire crocheted granny square

I did feel like I was starting to get the hang of it, as uneven as that second round is, but by then I was kind of over the whole granny square idea and decided to make a chained chain. I used the same hook, and red wire that was unlabeled, but probably 28-30 gauge. That went better, especially because the unevenness of my loops is not as apparent as the uneven height of the double crochet stitches.

wire crocheted bracelet wire crocheted bracelet

Speaking of kinks, as we were a while ago, I tried to reel the wire straight off the spool instead of letting it come off the end, coiled, because I read a hint somewhere that I’d get fewer kinks that way. I didn’t have much luck getting the gold wire to unreel like that, but the red wire was better behaved. I think it did result in fewer kinks, but not their complete elimination.

wire wrapped bird's nest I thought about trying beaded wire crochet, but it was getting late and I didn’t have any ideas that appealed to me much. Instead, in honor of how birds-nest-y my wire crochet is (especially the granny), I made a wrapped wire bird’s nest.

Frigid rain all day yesterday. I do like winter, but not that aspect. 🙂