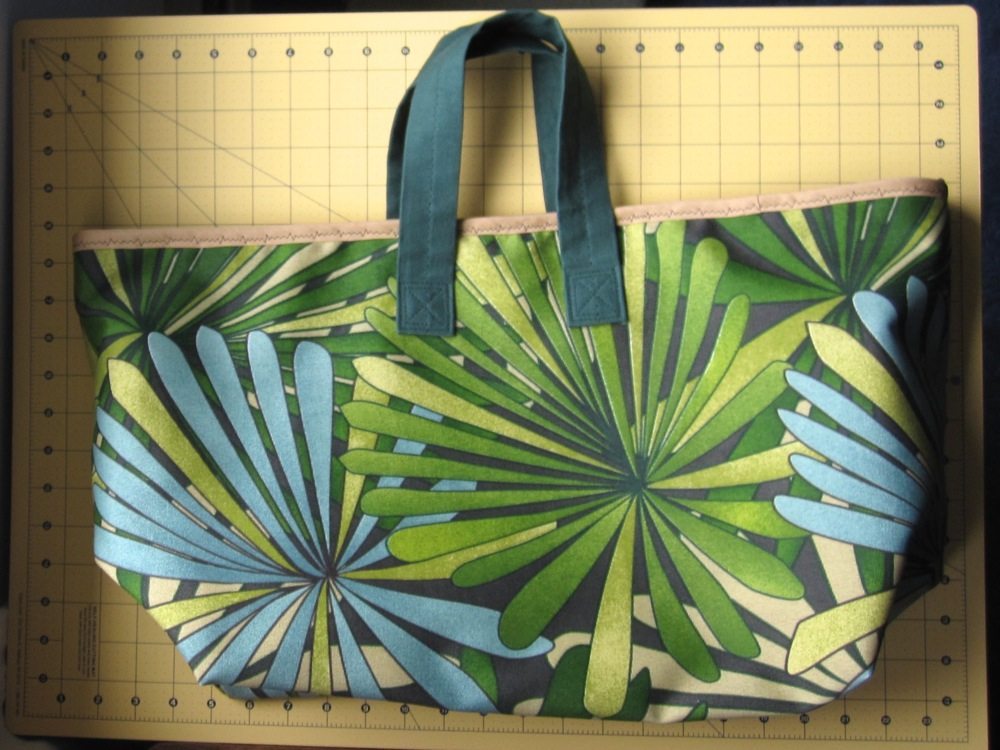
I was all set to create a tutorial (in two parts, even) for the fabric basket I showed you last time, but when it had a few issues I decided that would be overselling it. Let me tell you basically what I did, and where it went well and poorly.
Body of Basket:
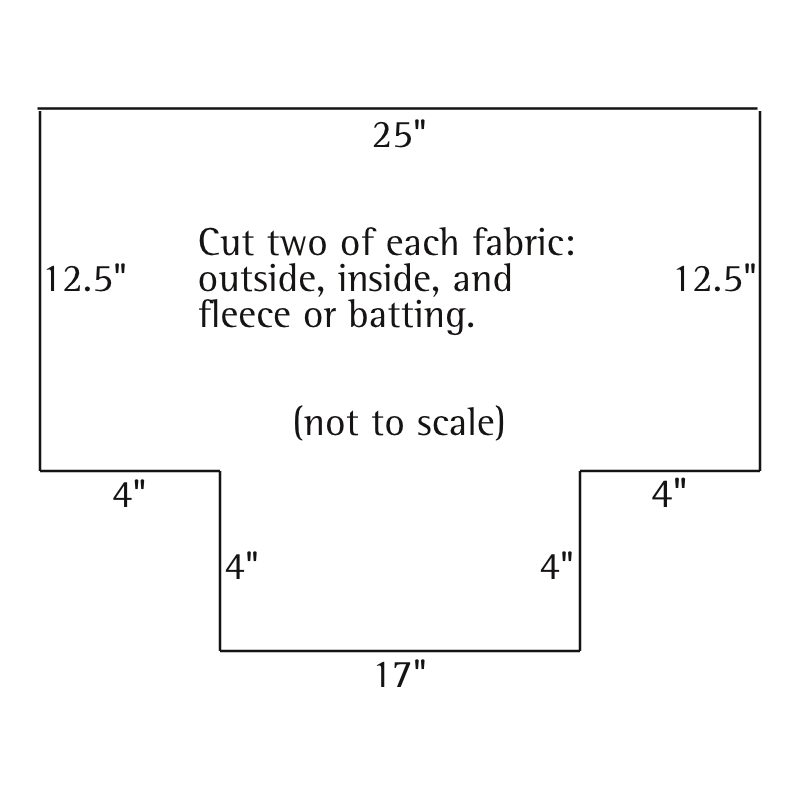
I made a paper pattern for the main basket pieces (diagram below) and cut two of it from each of three fabrics: outer basket fabric (patterned outdoor home dec fabric), basket lining fabric (solid cotton duck), and thin fleece. Later I discovered the pattern was five inches too wide – there was a 17″ measurement, and I thought good, that’s twice as wide as a sheet of paper. Well, you can probably guess what I did, and if not there’s a photo below.
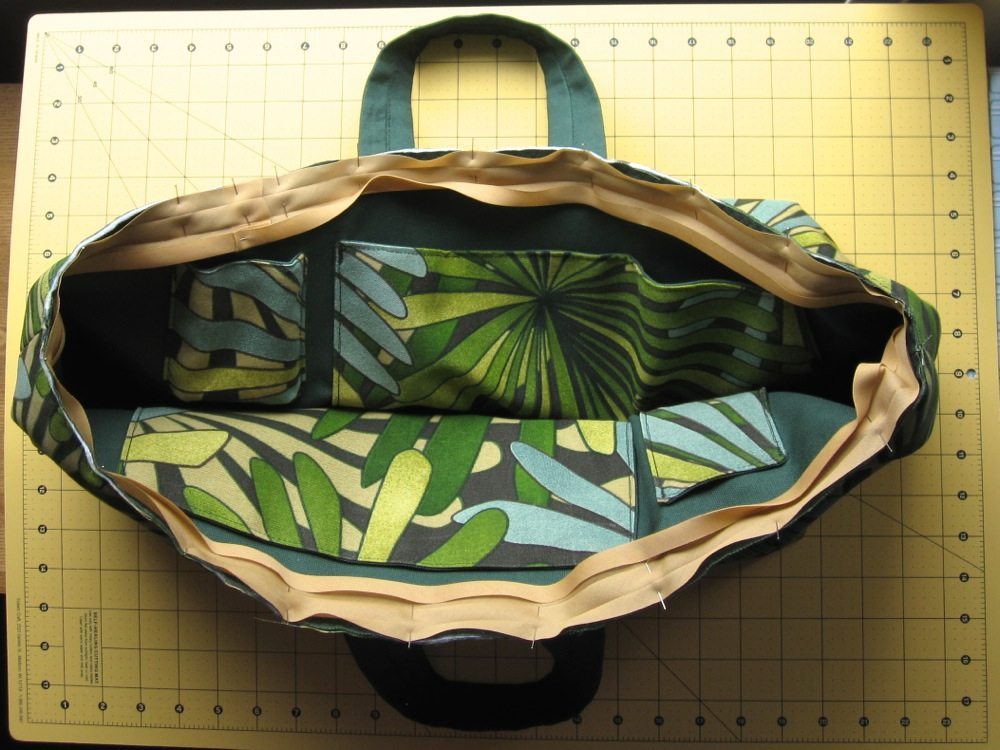
The pattern was good but I have to figure out how to make linings fit well inside thick bags. The bottom interior is a bit scrunched to fit, even though I sewed the outer layer with 1/8″ smaller seam allowance than the inner layer. I also ended up trimming about 1/4″ off the top of the lining when I nested the layers and sewed them together. If I were doing it again I would also pony up for fusible batting and attach it to the outer layer (probably stopping 1/2″ in from the non-top edges) to eliminate the possibility that some of my issues are due to the loose fleece lining being in the wrong place.
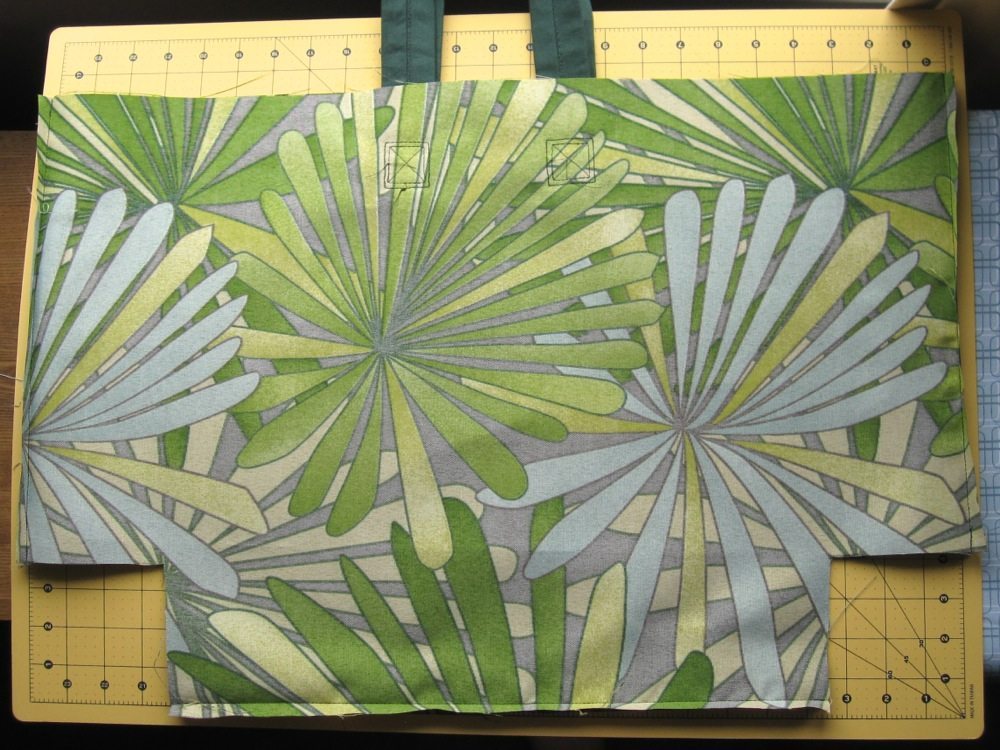
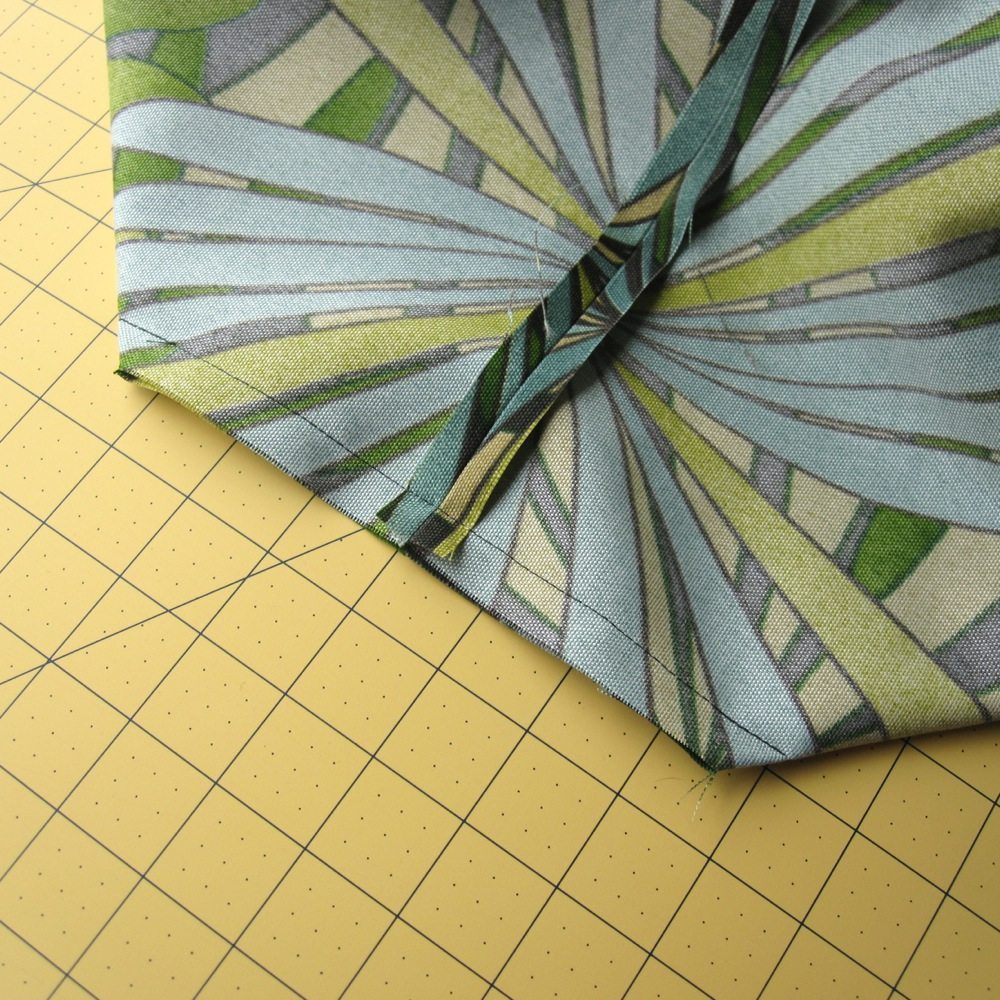
Sewing was fine: after applying pockets and handles to right sides, place each layer right sides together and stitch the sides and base, leaving the cut-out corners open. I did the lining and fleece at 1/2″ and the outer fabric at 3/8″. Press the seams open. Now open out the layers and re-fold so the cut-outs close up: meet the ends of the side and base seam; the raw edge will go from cut-out corner to corner with the seam ends in the middle. Stitch these lines. This one I did all layers at 1/2″, so the seams in the outer layer would still be 8″ long.
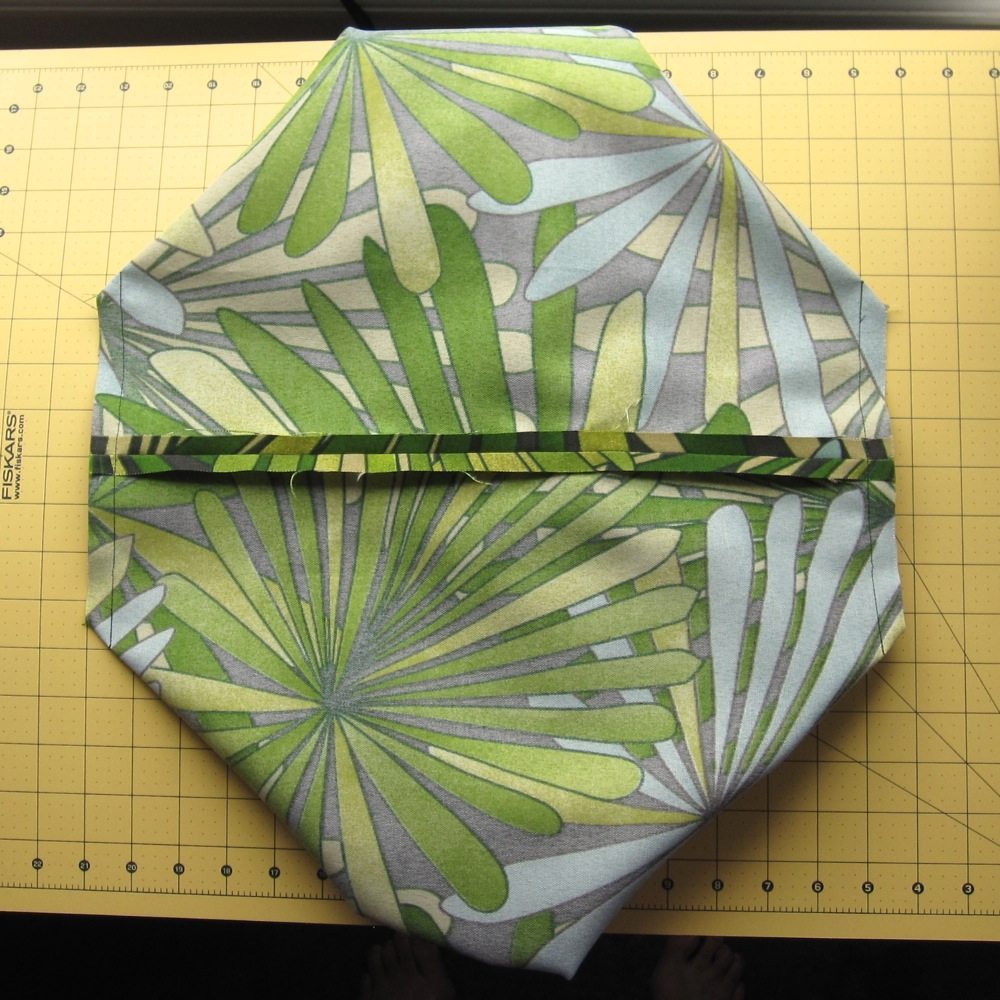
To do the final assembly, I marked the center of each long side on each layer, nested them, and matched their side seams and side centers. Then I pinned regularly all around and did a long, wide zigzag to baste. After that is when I trimmed 1/4″ off the lining, having pinned so it was sticking up. Finally I bound the raw edge with bias tape sewed on from the inside, and tacked down on the outside with a decorative zigzag.
Handles:
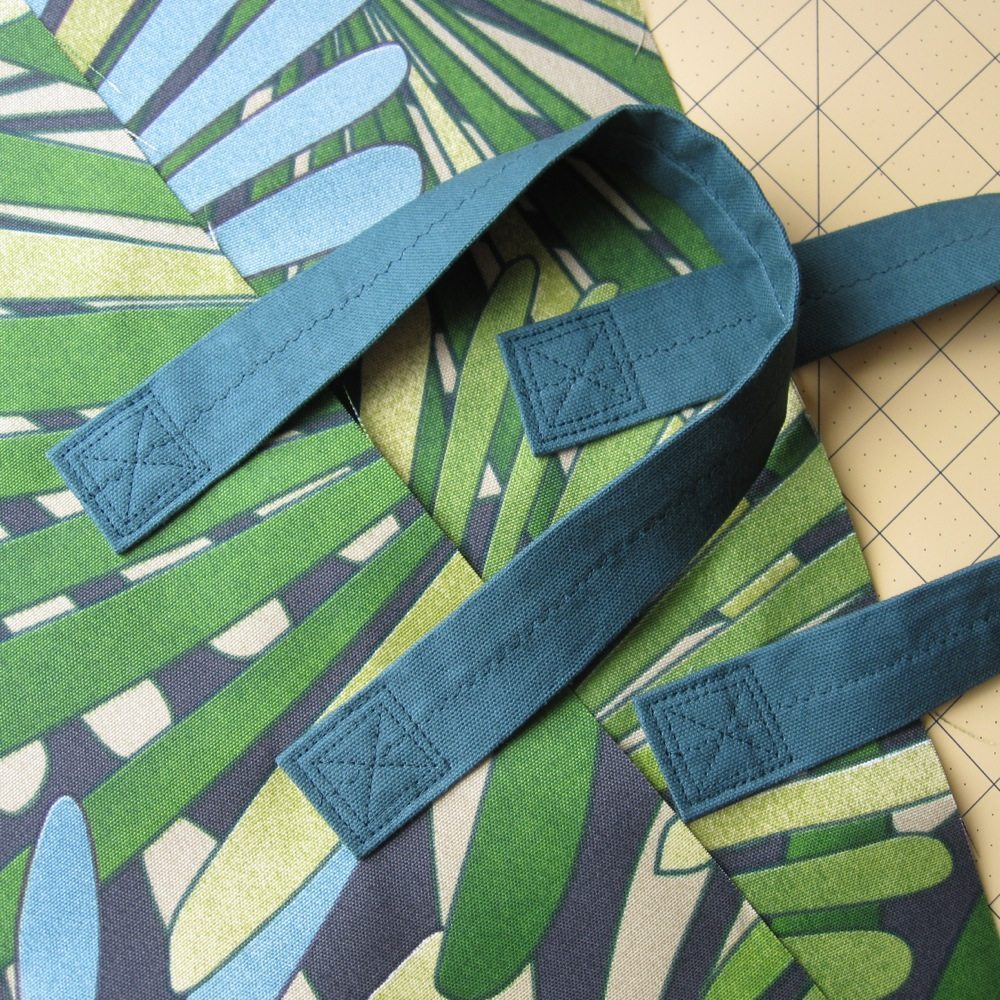
The handles themselves are great. Cut two 4″ by 20″ strips from the lining fabric. Sew each into a tube with a 1/2″ seam and turn right side out. Press so the seam is down the center of one side, fold each end to the interior by 1″, and press again. Stitch down the center of each handle to secure.
I sewed the handles onto the outer fabric with their interior bottom corners 3″ down from the top and 11″ in from the closer side, so they’d be centered and 3″ apart. The sewing itself was contained in a 1.5″ box at the bottom of the handle. I don’t know whether it’s the lowness of the handles or the alignment of the basket layers, but when you pick up the basket the outer layer pulls up, causing the part above the handles to fold over the top of the basket. Not really a problem but not as attractive as I would like. I suspect having batting fused to the outer layer and securing the handles through it as well would help.
Making pockets:
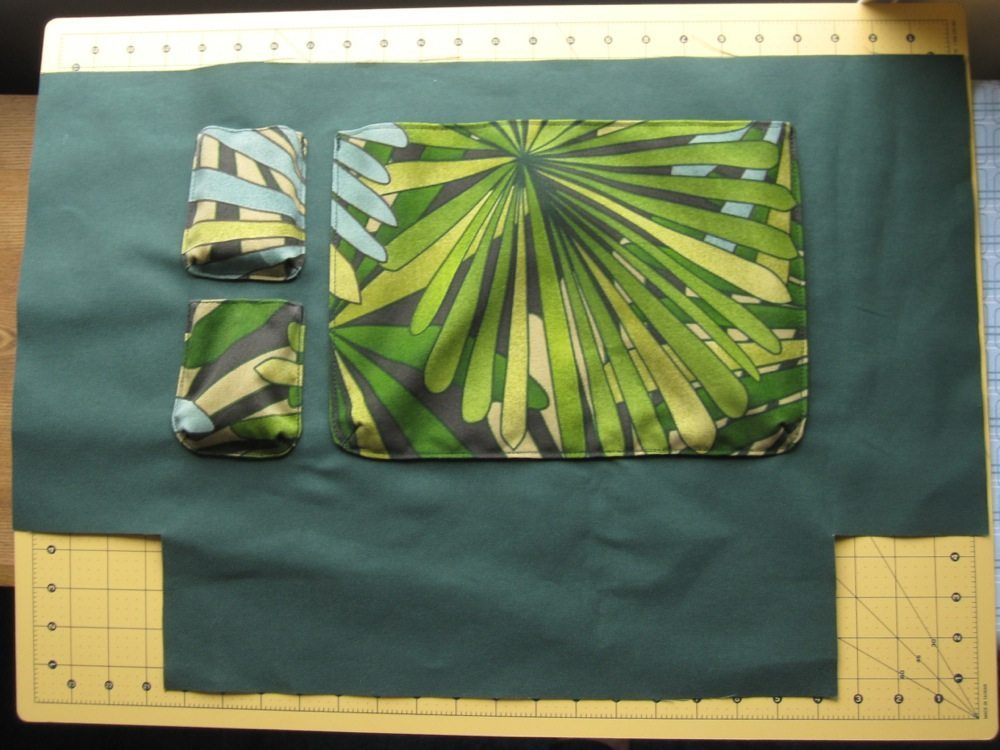
The pockets had their own issues, but unlike the layers I know how to fix them. Here’s what I cut for pockets, one from each (non-fleece) fabric except where noted. They are all written as width by height.
Large flat: 13″ x 9.5″.
Large darted: 14″ x 10″.
Small flat: 4″ x 9.5″.
Small darted (two from each fabric): 5″ x 5.5″.
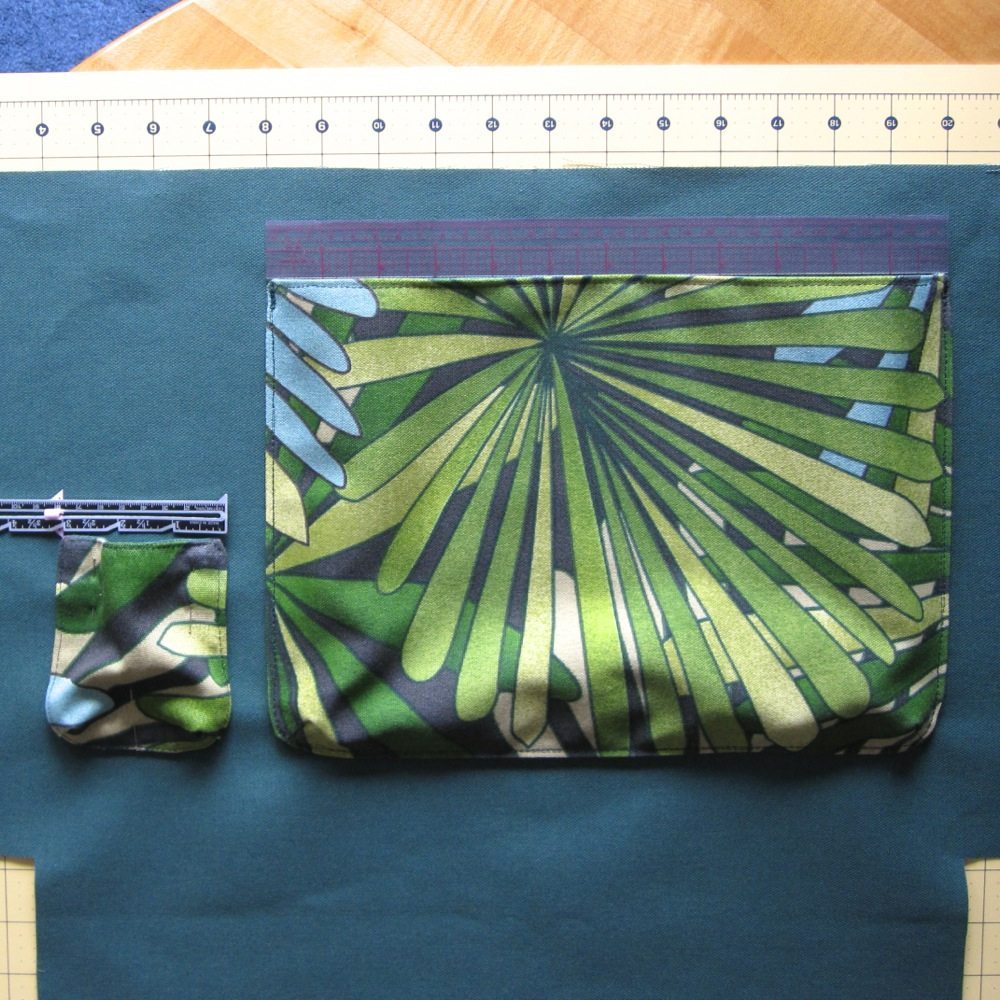
If I were doing it again I would leave the small pockets as is but add a half inch to the long side of the large flat pocket and probably a quarter inch to the long side of the large darted pocket. They both came out large enough for my purposes (paper) but barely. I lost more size in the turning than I expected, presumably due to the heaviness of the fabrics.
All pockets were ultimately sewn right sides together leaving a gap on one edge, clipped, pressed, turned, and topstitched all the way around. Before that, though, the darted pockets had additional steps.
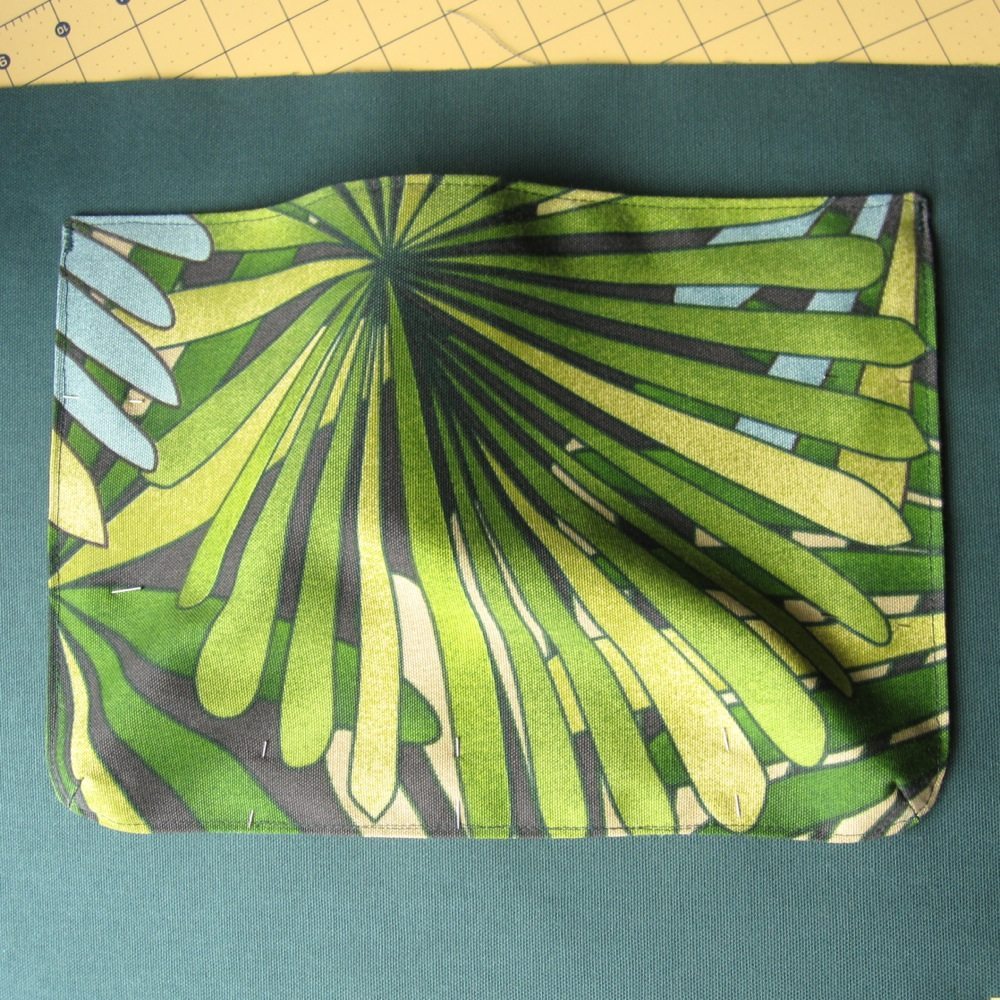
To create the darts I folded the bottom corners right side enclosed with raw edges meeting, marked on the raw edge 1/2″ from the corner, and then on the fabric 1″ from the corner along the raw edge and 1/2″ up from there. I stitched between those two points and then up to the fold: perpendicular to the raw edge on the small pockets and at a gentler angle on the large one, ending about 1.5″ and 2″ along the fold from the corner, respectively.
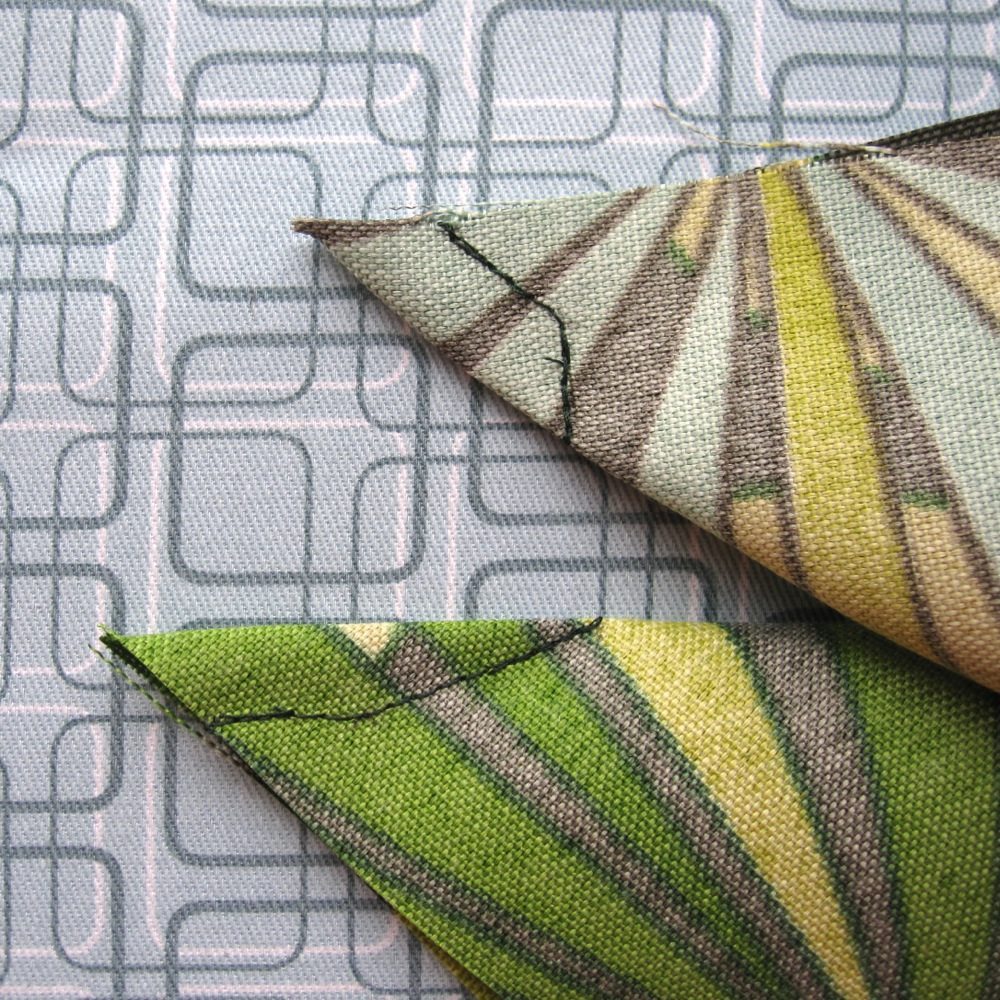
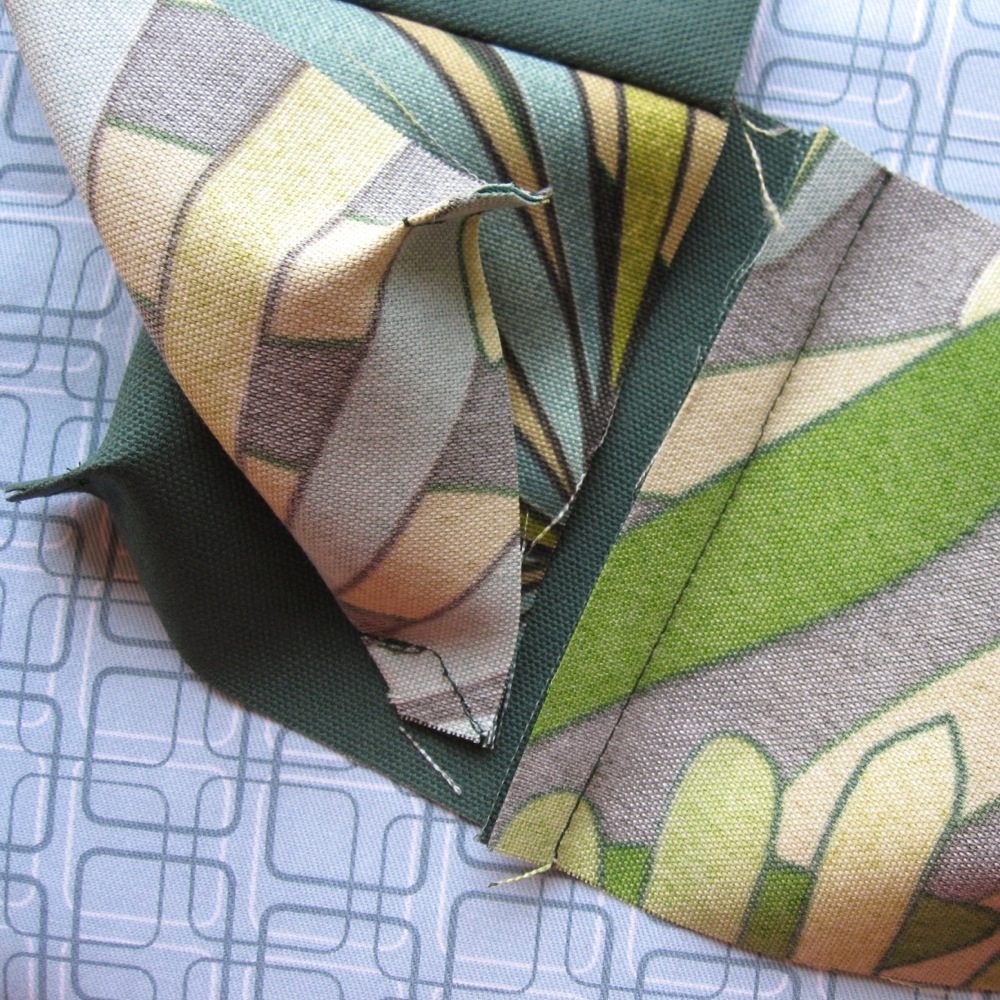
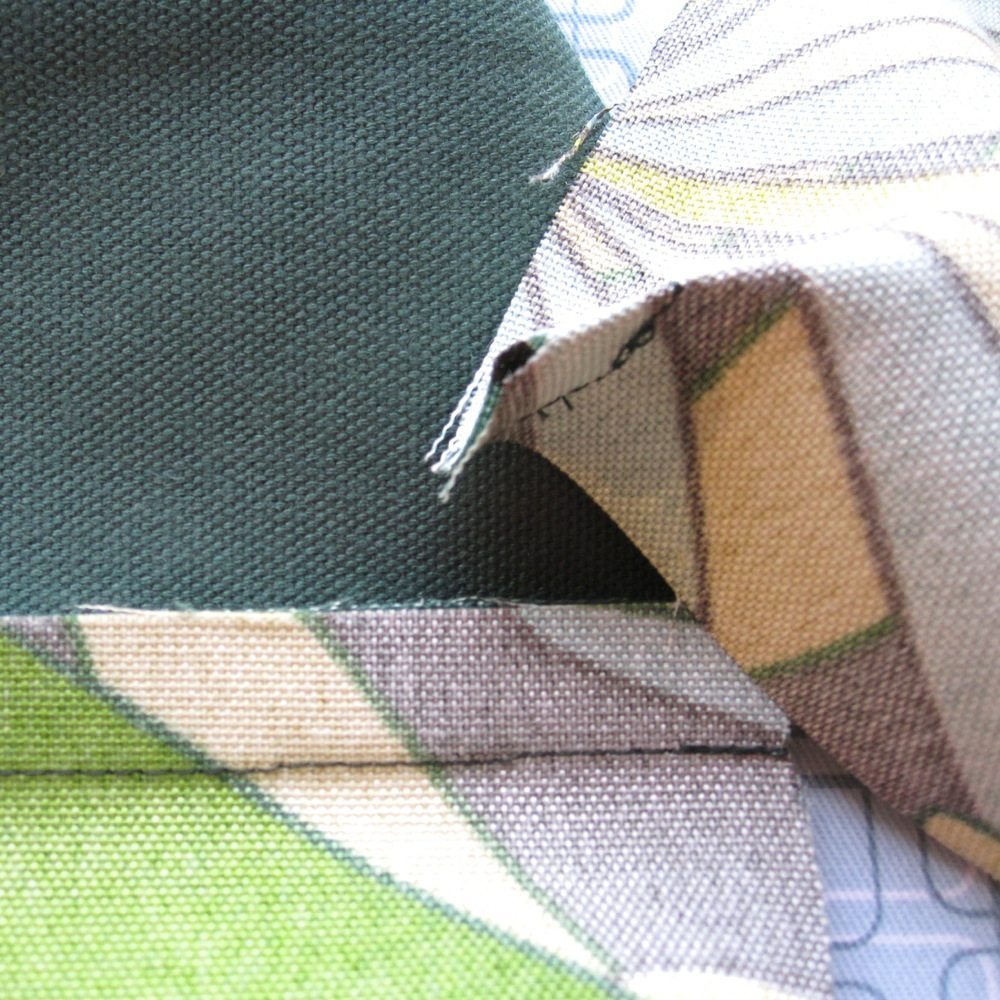
After clipping the point off (left picture above) and snipping up the fold a little (right picture above), I tried to open out the darts on the large pocket. It didn’t necessarily work that well. With the small pockets I just bent the dart one direction or the other.
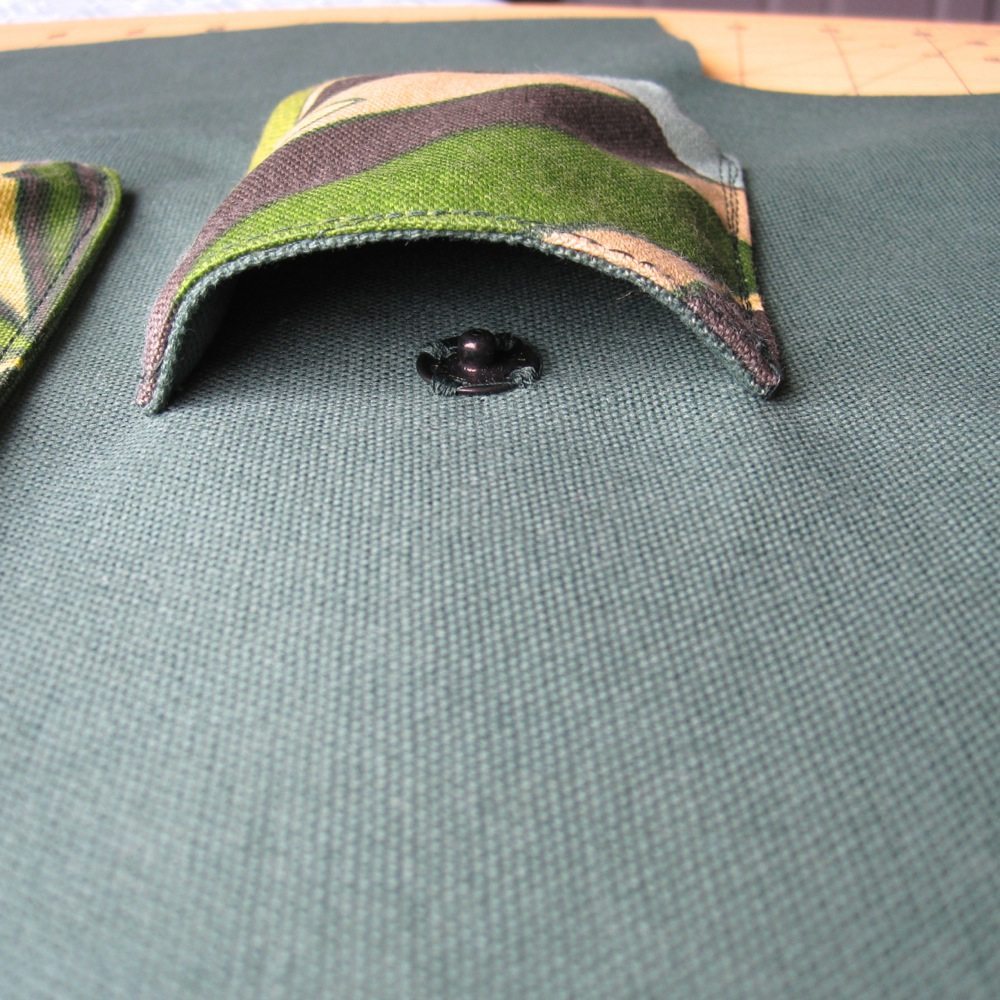
The small darted pockets had yet another step: I wanted them to snap closed, so I sewed their top seam and then secured half a snap to the top center of the lining before doing the rest of the pocket construction.
Attaching pockets:
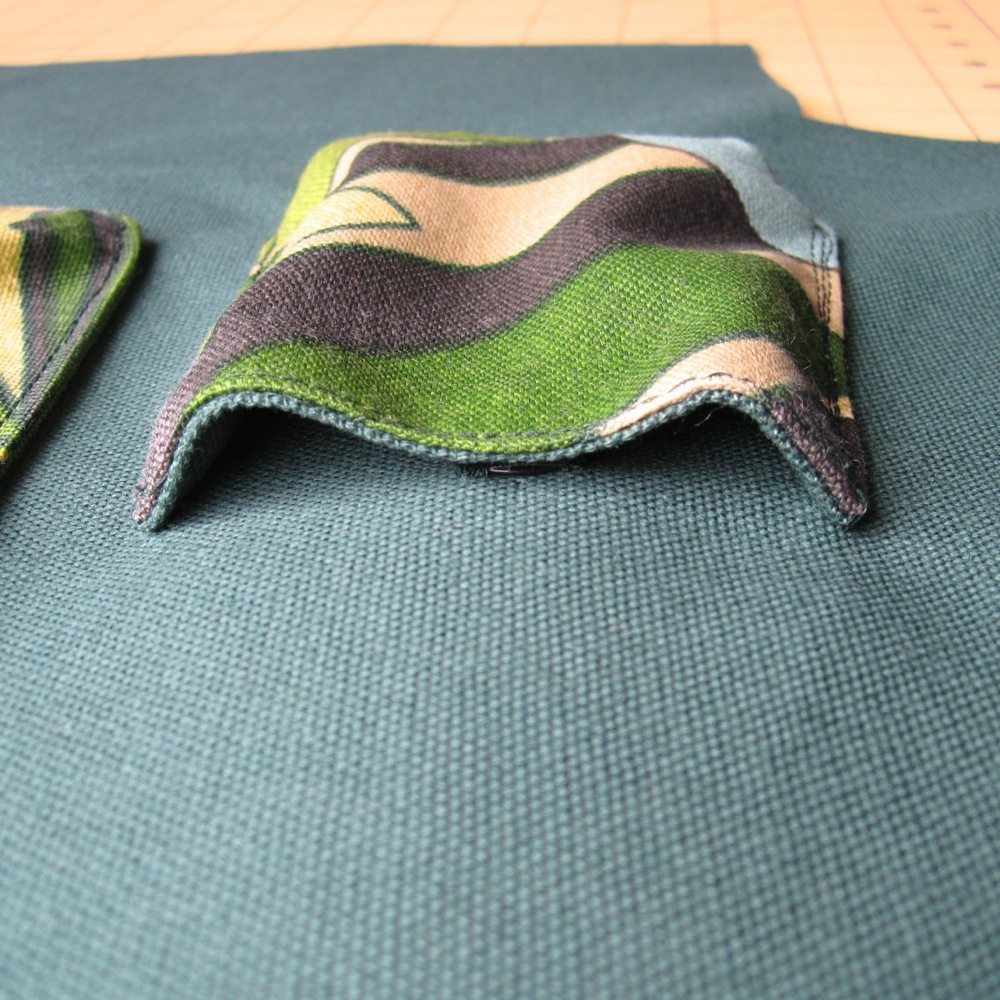
I lined the pockets up on the lining fabric so they would be 4.5″ in from each side and 2″ down from the top. The small darted pockets are stacked vertically so the lower one lines up at the bottom with the large darted pocket. They are all topstitched onto the lining fabric with a bar tack at the top of each side; for the large darted pocket I made the bar tacks first and then got the rest of the pocket pinned and sewn, but when I went to do the small darted pockets that seemed unnecessary.
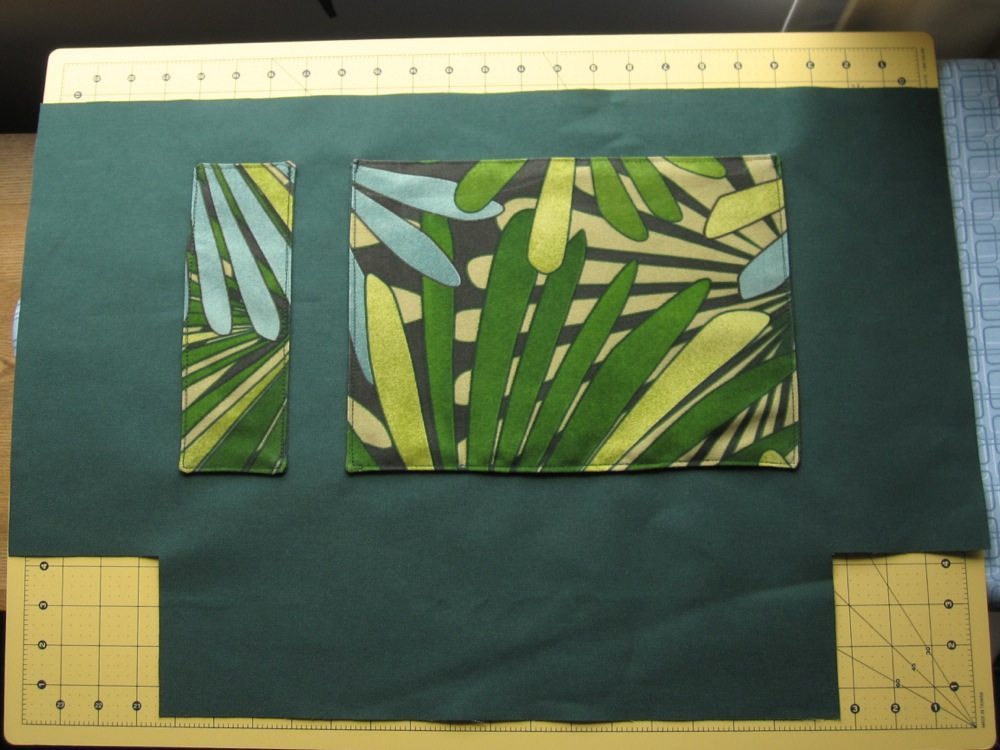
When you place the darted pockets you have to measure to get their tops the correct width: 3″ for the small and 12″ for the large (if I made the larger version I’d make that 12.25″). You can pin them down all the way around; the extra fabric will bunch up into a sort of Y shape (right picture above).
I sewed the lower small darted pocket first so I would have easy access to its top opening to attach the other half of the snap to the lining fabric in the right place (I sewed my snaps by machine). It’s off-center because the snap half on the pocket is off-center.
With both pockets and handles I was unusually careful with finishing the stitching: I took all threads to the back and tied them off, then used Fray-Check around the outsides of the corners (on the wrong side of the basket fabric) and on and around the bar tacks. Those will be the areas with the most strain so this should hopefully help with longevity – I do like the basket enough to want it to last!