Teaching classes in alterations has made me ponder what I would recommend for having in your sewing stash if you plan to do much clothing alteration.
Some items are obvious, such as good scissors, a sewing machine, thread, straight pins, hand-sewing needles, and an iron and ironing board. Beyond that, here’s what I use the most, ordered by how I might use them to alter pants that are too long and too big in the waist. The waist comes first because changing it affects the length, but not vice-versa.
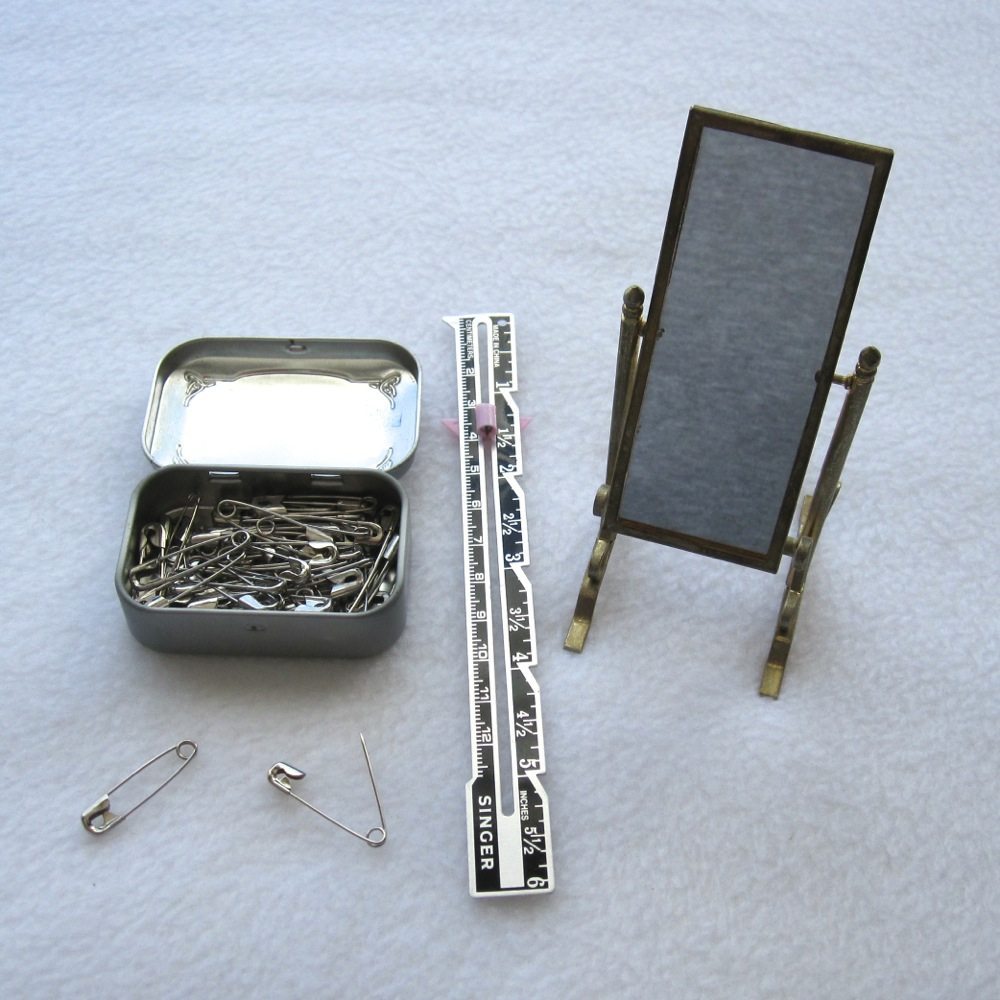
Safety pins – the easiest way to mark when you’re fitting yourself.
Seam gauge – no better tool to transfer the measurements that come up in alterations. Those measurements are usually fairly small and often not round, so the sliding tab of the gauge serves as your calipers and your memory.
Full-length mirror – ideally hung on the wall (or on a stand), but propped up will do.
The first step in taking in the waist of pants is to put them on (the right way out) and, looking in the mirror, pinch the waistband until it is the size you want. One side at a time – you’ll have to re-pinch side two in between – safety pin the pinch where you would sew it. Measure from the fold to the pin with the seam gauge and average out what you get. Mark that amount on the gauge. Time for the next batch of tools!
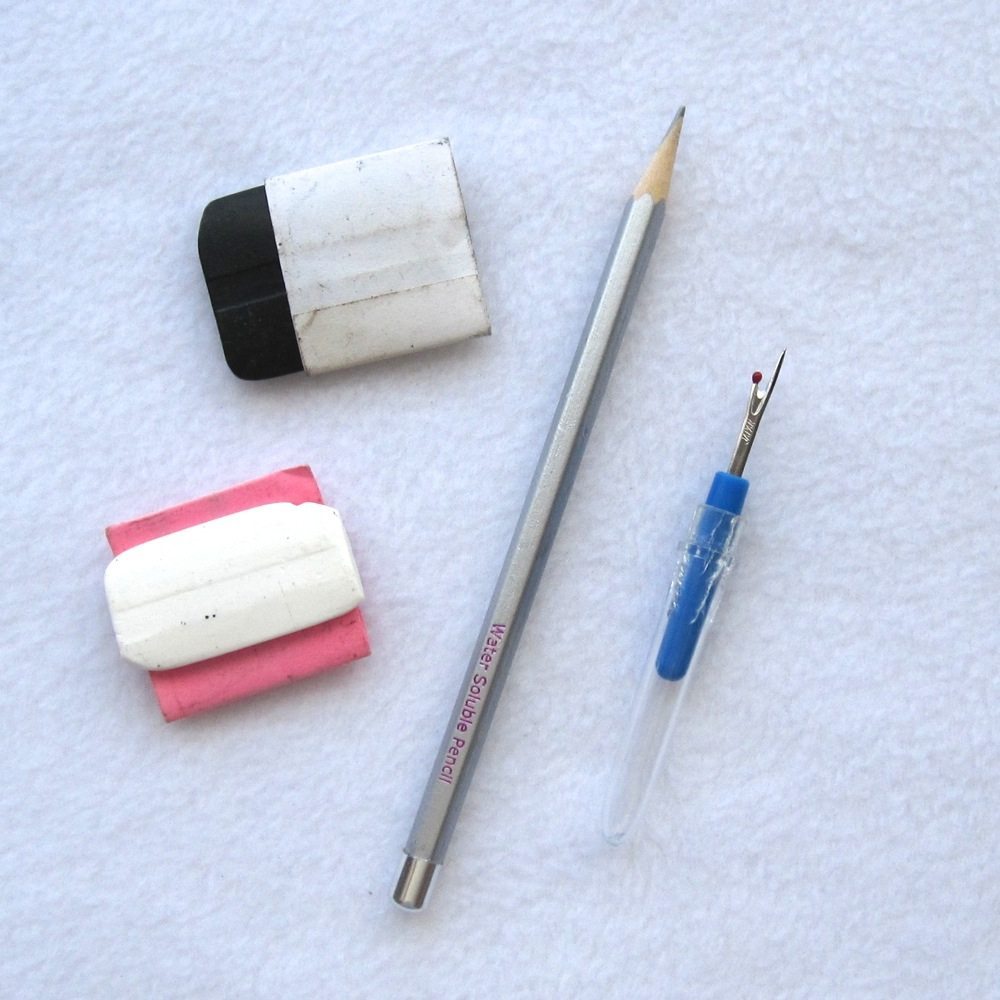
Tailor’s chalk or fabric marking pencil – the silver pencil, by Dritz, is the best pen or pencil I have come across for marking. It brushes or washes off. Tailor’s chalk (which is really more like a crayon) comes in a variety of colors and washes out, but if you use the white chalk it will also disappear upon ironing, turning clear. I have mine in sleeves made from post-it notes.
Seam ripper – naturally! Make sure it is sharp.
The waistband of pants is altered separately from the legs and so must be detached in the vicinity of the side seams. If the waistband doesn’t have side seams, the proper way to shorten it is by removing it nearly all the way around and shortening from one end (if there is a button, leave the buttonhole end attached to the pants and shorten at the button end). If there is a side seam or you don’t mind making one, just give yourself about two inches’ clearance on each side of where you’ll be stitching. If there are side belt loops take them off entirely. Turn the pants inside out and fold them at the original side seam. Mark the new seam at the waist using your seam gauge’s memory and tailor’s chalk or pencil and gradually slope it out to meet the original seam. If there is topstitching (stitching down the seam allowance, visible from the outside), take it out wherever your seam line is on top of the seam allowance and for a distance below and above that. Pin (away from the seam is fine because you are just keeping the fabric underneath from shifting) and stitch, avoiding stitching through the original seam allowance. I usually semi-freehand the first seam and then mark the second to match, in terms of slope and rejoining the original seam. Take the waistband in by the amount marked on the seam gauge.
The next step is to press, which can be aided by the following tools.
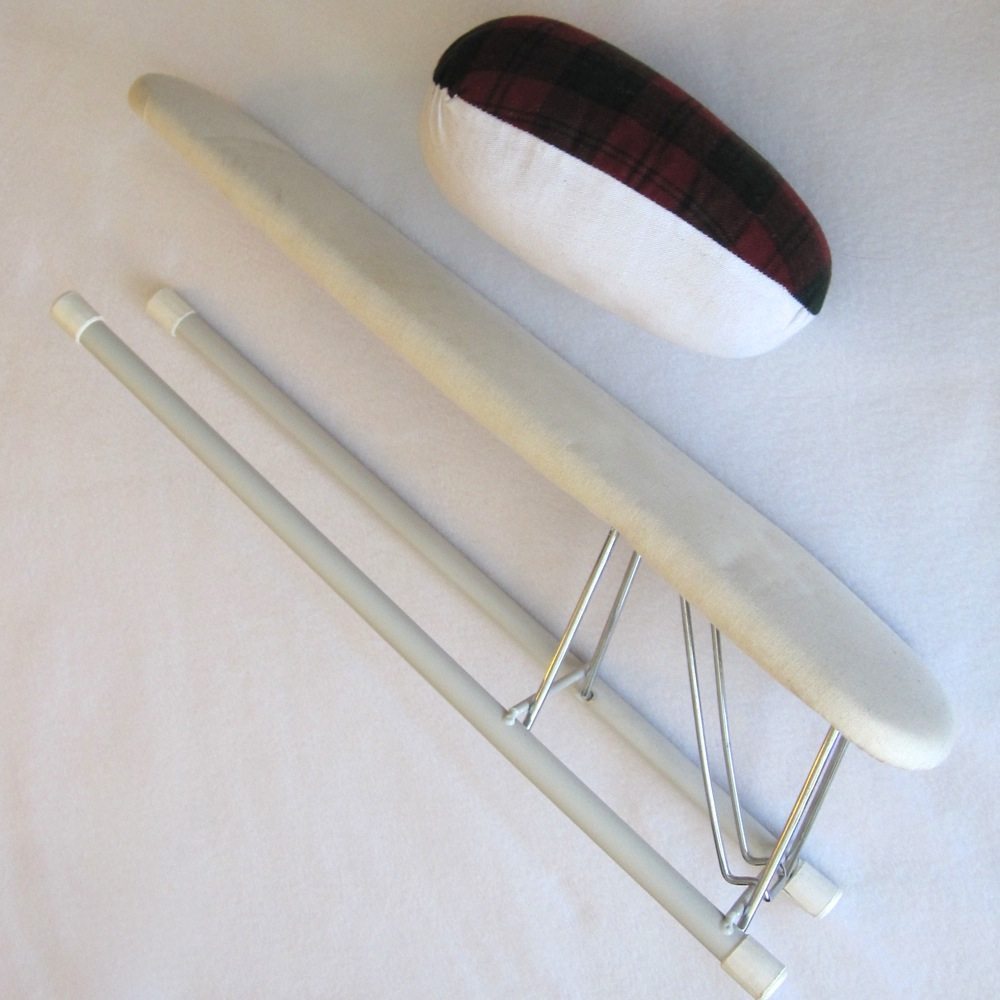
Sleeve board – looks like a mini ironing board, inserted into sleeves and other tubes too small to go over the end of the full ironing board, this tool helps you press one side without adding creases to the other accidentally. I use mine quite a bit.
Tailor’s ham – By shifting the angle and direction of this densely-stuffed beast, you can iron curved seams smoothly. Learn how to make your own at No Big Dill or Chance of Rain. Commercial hams have a cotton side (heavy, like canvas or duck) and a wool side. I use mine infrequently, but there’s no substitute when you really need it.
Press the side seams open or to one side, according to how they were originally. Press the waistband seams open if the side seams are, and either open or to the opposite side if the side seams are pressed to the side. Trim excesses of seam allowance and zigzag to overcast if desired; replace topstitching if there was any, removing any original topstitching that turns out not to be in the right place. Pin belt loops on if you removed them and sew the outer layer of the waistband to the pants. Fold the waistband to the inside and stitch in the ditch to secure the inner layer. Sew the tops of the belt loops on.
We’re on to the hem! You’ll need your safety pins and full-length mirror again, and you may want one of these guys:
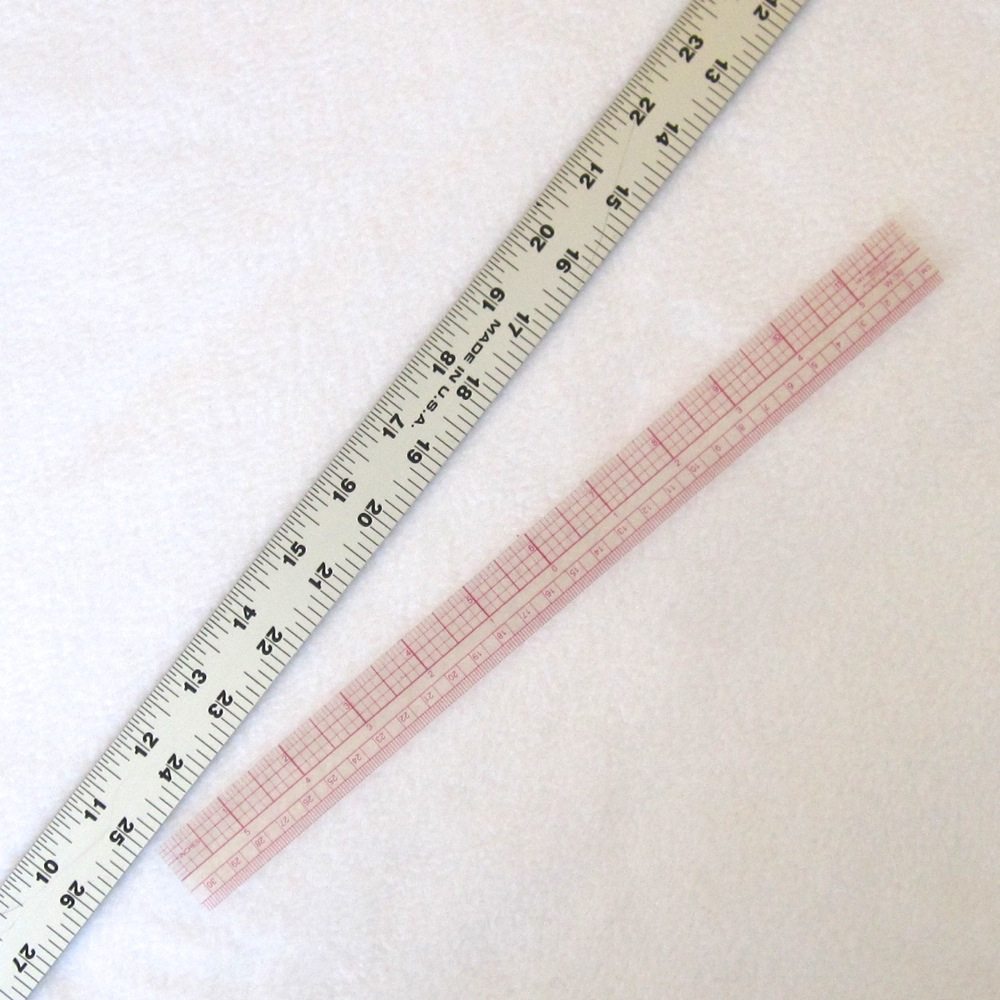
Yardstick – Wood or metal. I am surprised to realize I’ve never seen a plastic yardstick.
and/or
12″ ruler – I <3 <3 <3 my transparent one. To mark the length, put the pants on again. Estimate how much to turn up and do so, pinning the turned-up part of the pants in place. Go by what happens at the back of the foot. If you have carpet, wear shoes and base your length on position relative to the top of the sole (I like my pants to hit the top of the sole in the back; you may want them higher, or lower if you're going to wear the pants with high heels). Make sure to drop them, settle the pants at their natural position on your waist, and twist as little from the waist down as you can manage - if you stand barely facing away from the mirror you can usually see yourself with twists that are in the shoulders and neck only. If the hem line is straight to the ground, determination of which is sometimes helped by standing on tiptoes, you can mark up the appropriate amount on the front and back and then use the yardstick or ruler to mark a straight line across. If it isn't (some pants are higher in front, which may not be desirable), pin so the back is the right height and mark perpendicular to the inseam. If you are making pants to a particular inseam measurement, the yardstick will allow you to measure that easily. That's it! Alter in good health.