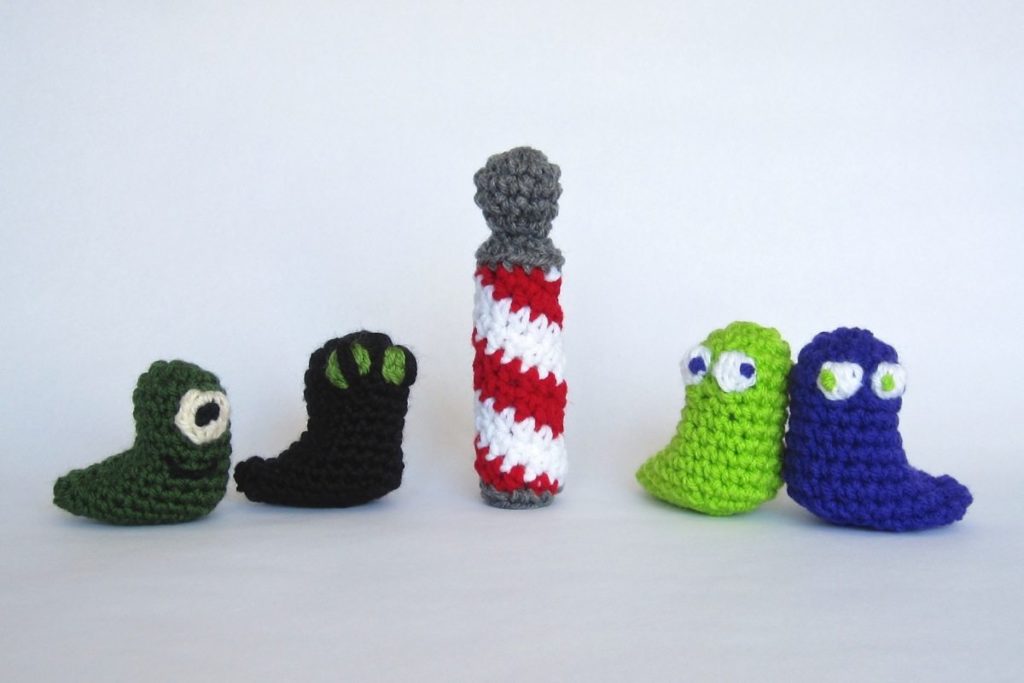
This post is dedicated to the Champaign-Urbana Sweet Adelines chorus, Toast of Champaign.
Tomorrow is Barbershop Quartet Day, the 76th anniversary of a Tulsa songfest considered the beginning of the Barbershop Harmony Society. I’ve never celebrated, but it is nevertheless close to my heart because I grew up with barbershop music. My mother has been in a Sweet Adelines chorus (and sometimes quartets) throughout my life, and through her I heard many choruses and quartets, male and female. The latest Sweet Adeline Queens of Harmony are a young quartet called LoveNotes, but the big name when I was listening a lot was Ambiance. I believe I’ve seen them live; I know I saw Joker’s Wild and The Gas House Gang — I have the cassettes to prove it.
The latest music to hit my ears was from this gang:
Be sure it’s true when you say “I love you;” it’s a sin to tell a lie…
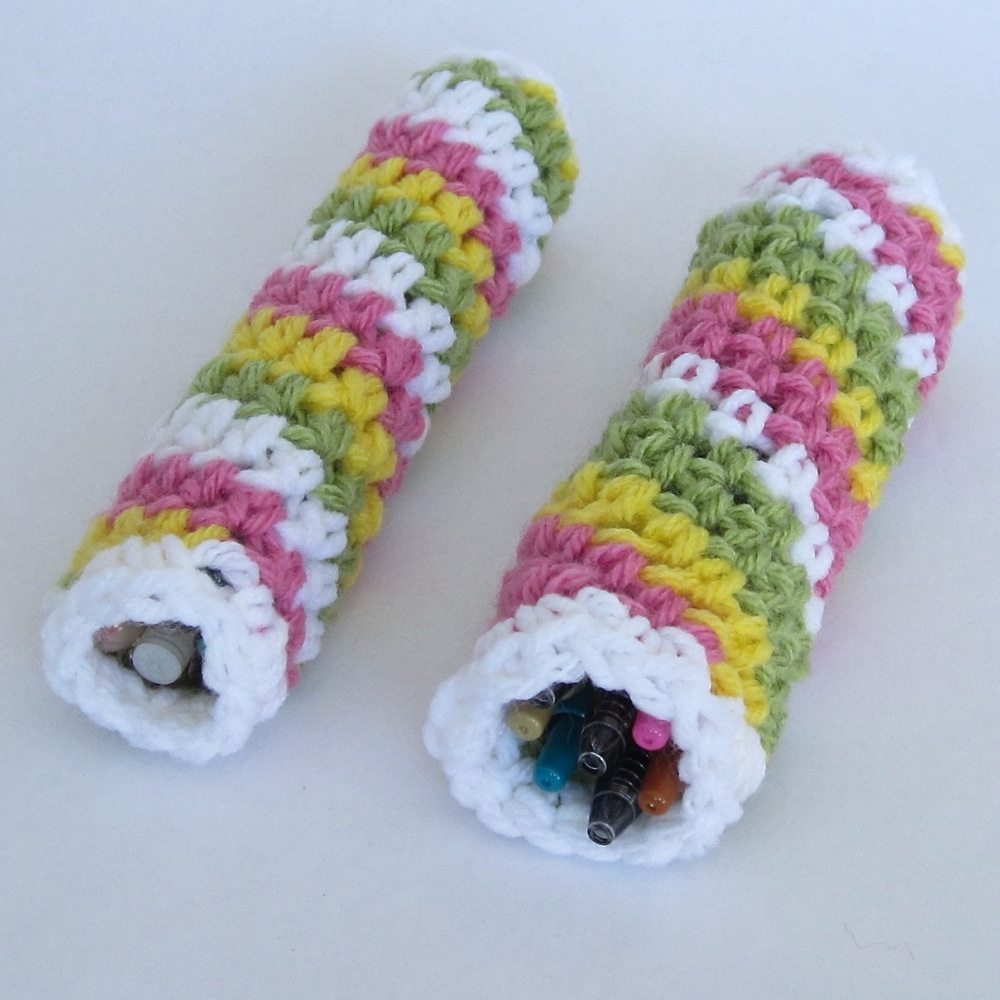
If you have your own quartet, only lacking a barber pole, a pattern is below, in time to make for any of your Barbershop Quartet Day celebrations. It may be made with stripes in up to four colors. The one above is two white and two red stripes, but it would also be traditional to have two white, one red, and one blue stripe, with the white stripes separating the red and blue. The store has a name your price pdf of this pattern that not only prints more nicely, but also includes a 6-stranded version so you can make cheerful candy sticks, and instructions to use either the 4 or 6 stranded version for a lip balm cozy, pen case, or reading glasses sleeve.
General spiral instructions:
- My crochet abbreviations and conventions may be useful, though the only ones that might be ambiguous are: 2sc for sc increase, sc 5 for “sc once in each of the next 5 sts” (and similarly), dec for sc dec, and NJ for needle join.
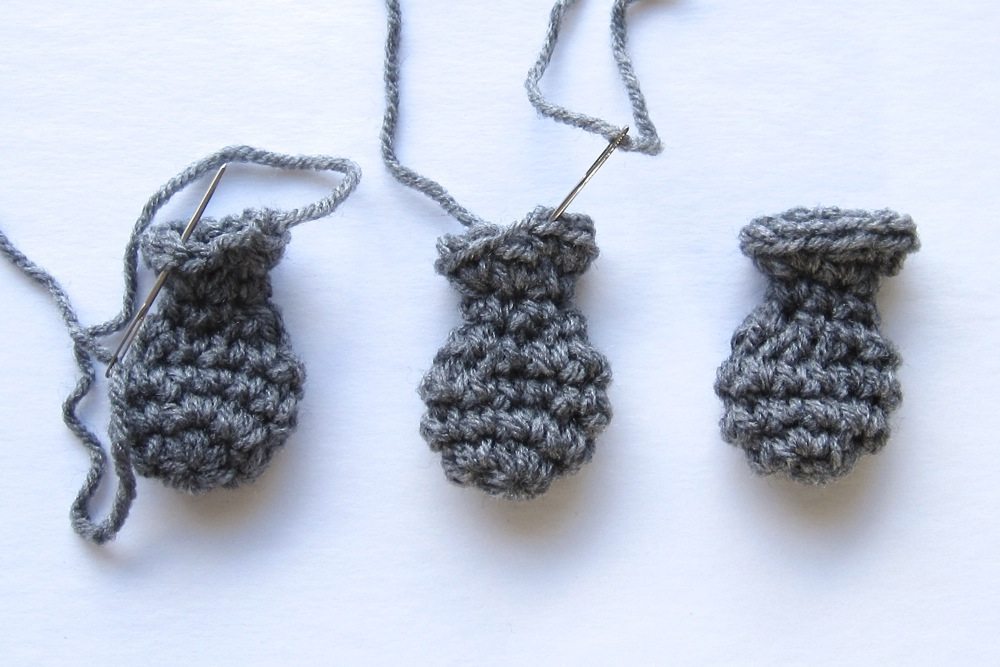
I used worsted weight yarn, an F/5 hook (3.75mm), and a small amount of fiberfill to make each barber pole.
- Active versus on hold: The barber pole is made with four spirals of stitching that combine to form a solid tube. There are no color changes, but you cannot make each spiral in its entirety before starting the next because you will run out of places to stitch. Therefore, I will refer to strands that are not finished/cut, but also not currently in use, as “on hold.” To place a strand on hold, loosen its last loop or place a stitch marker in it to keep the stitches from coming undone. To “activate” a strand, remove the stitch marker if necessary and snug the loop back down on your hook.
- If you place loops on hold by loosening the loops, you’ll have a lot of strands to deal with. If you use stitch markers, though, make sure they are secure and won’t snag the other strands (such as tight split rings or the kind that look like safety pins).
- Because of frequently stopping and starting a line of stitches, your tension may be a little whackadoodle. Pay attention to snugging the loop down appropriately when you come back to a strand and it shouldn’t be noticeable. Also make sure the side of the loop leading to the working end of the strand is in front of the hook.
- Upstream: The spiral strands are worked in counter-clockwise order for a right hander, clockwise for a lefty. That is, after placing one strand on hold, the next one to be activated will be the one you come to when you back up along the stitches you just made. I will refer to this as “upstream.”
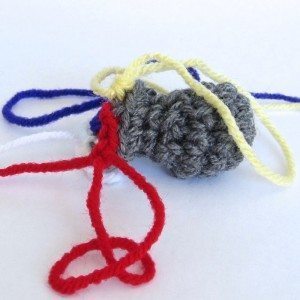
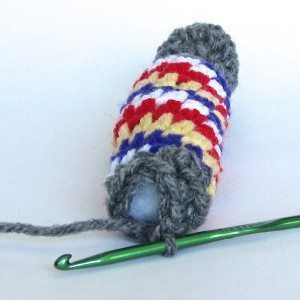
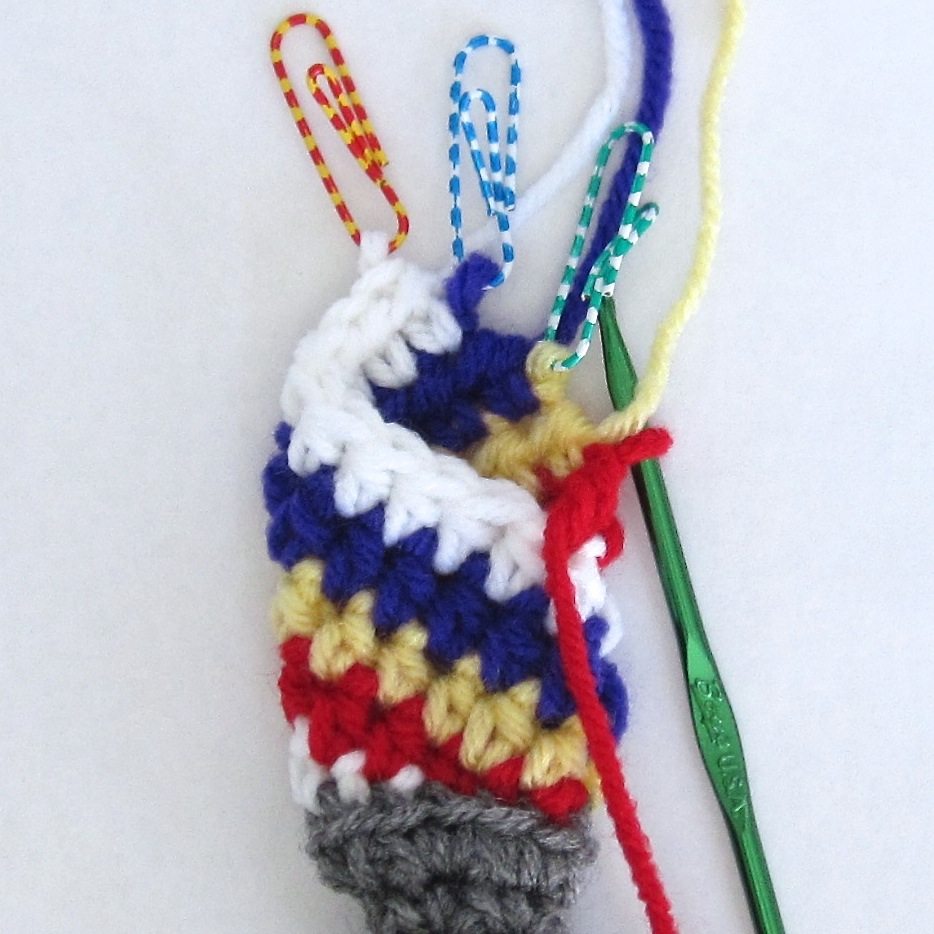
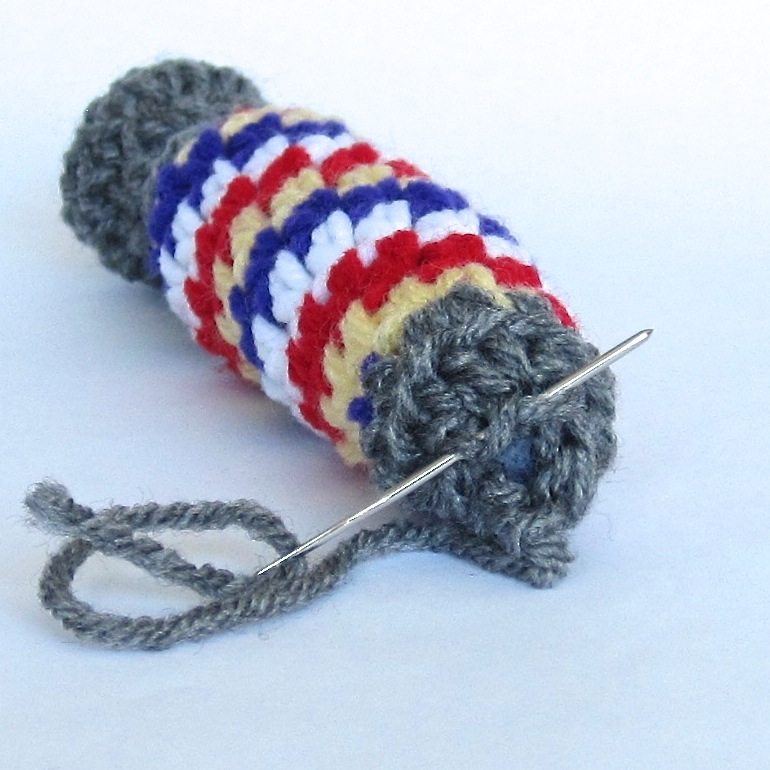
The instructions are in six sections. For the barber poles shown, make the bulb and clean-up/base sections in silver or gray. The rest are in the red and white or red, white and blue. I’ve given progress photos of one made with four different colors for ease of interpretation — you will have just as many loose ends with two colors, since you must have four strands regardless.
- Barber pole bulb:
1. Form magic ring, ch 1, and sc 6.
2. 2sc around (12).
3-4. Sc around (2 rnds; 12 sc). Stuff.
5. Dec around (6).
6. Sc around (6).
7. 2sc around (12).
Sc in next st and cut yarn. NJ in 2nd st from last (shown below and in its own blog post) and FO (may stuff end of yarn into neck of barber pole).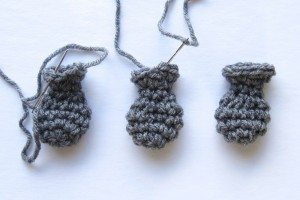
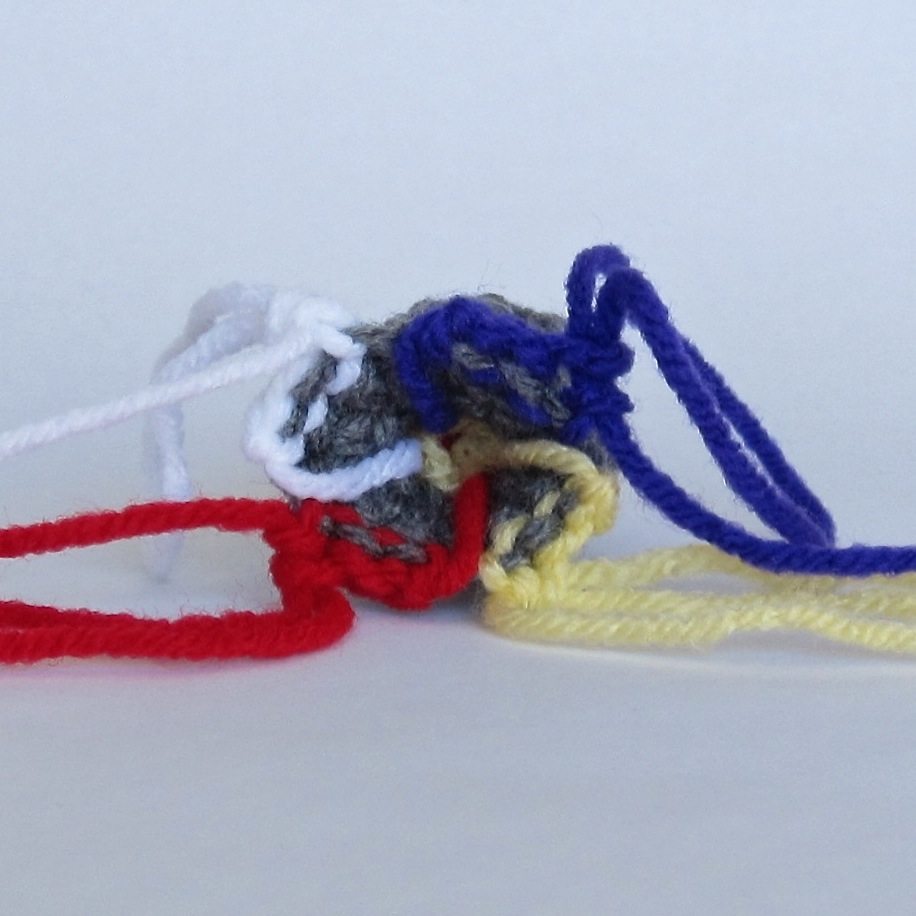
- Spiral set-up: Each strand of the spiral will get a block of three stitches in a row.
For each: tie sl kn in strand, place on hk, attach to BL of first stitch with sl st.
Also in BL only, sl st in 2nd st, sc in 3rd st. Place each strand but one on hold. Two views of the progress so far are below.
- Spiral block A: The currently active strand is, now and forever, the “lead strand.” You may wish to mark one of its early hdcs with a stitch marker if it is the same color as another strand. You are now working in both loops.
Skip joining sl st of next strand; hdc into 2nd sl st and sc. Place on hold.
*Activate upstream strand. Sk joining sl st of next strand; hdc into 2nd sl st, sc, and each hdc. Place on hold.*
Repeat *…* for remaining strands; each will have 2 more hdc than the previous, so the final strand has 8. The result at this point is shown below.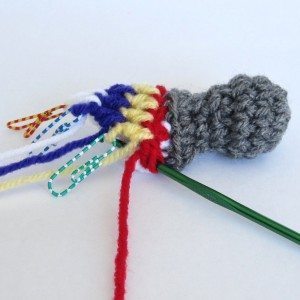
- Spiral block B: Activate lead strand; hdc into each hdc of next strand (8 hdc). Place on hold.
*Activate upstream strand. Hdc in each hdc of next strand (8); place on hold.*
Repeat *…* for remaining strands. The first picture below shows the result of one B block.
Repeat block B, and then activate the lead strand, hdc into each hdc of the next strand, place on hold and continue to block C. The second picture below shows the status at this point.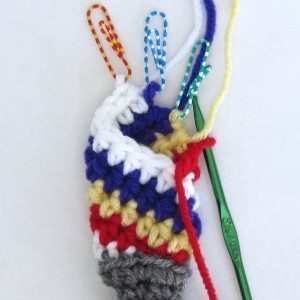
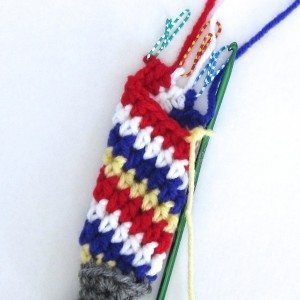
- Spiral block C: Beginning with the strand upstream from the lead strand, *hdc in each hdc of next strand except final 2. Sc, sl st, cut yarn.*
Repeat *…* for each upstream strand in turn, finishing with lead strand (which should have only sc and sl st left).
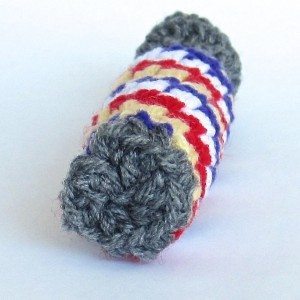
FO all ends and stuff. The result of this block is shown below.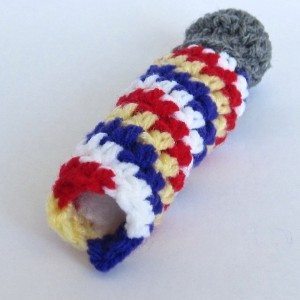
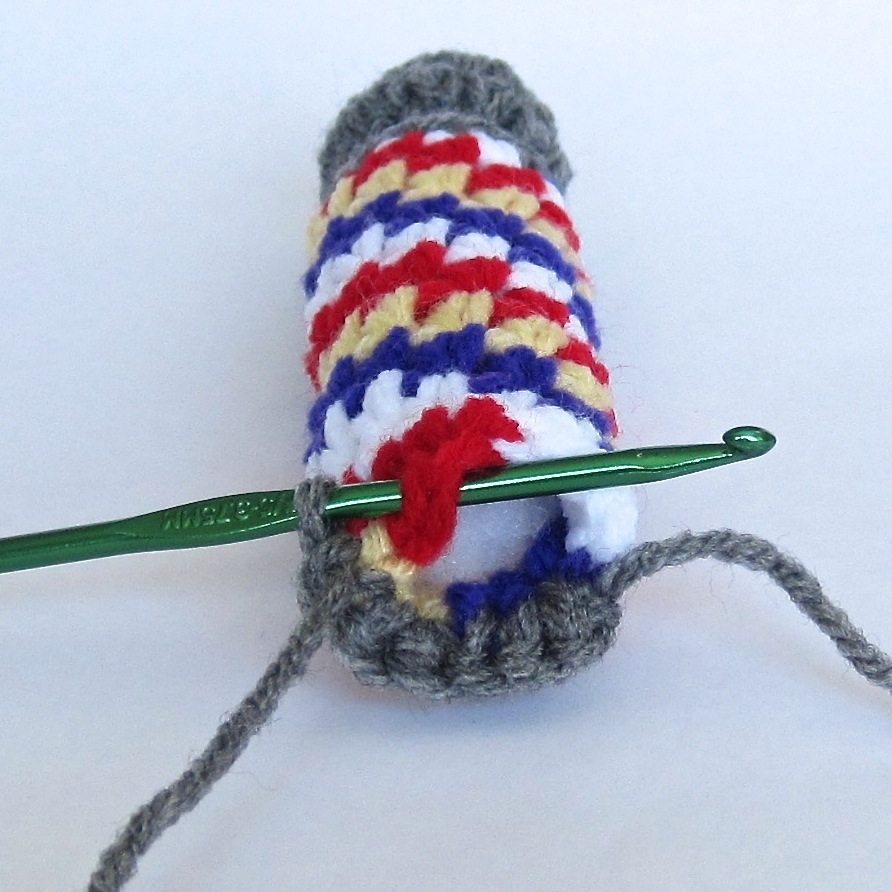
- Clean-up and pole base: Tie sl kn in new strand of yarn and place on hk.
Sl st to join in any sc of block C. Ch 1, sc in same sc.
Sc in next sl st; sk hdc into which sl st was made.
*2sc in next sc, sc in next sl st* three times. You’ll be back where you started.
Sc in same st as joining sl st.
Top off stuffing and dec around in BL only. I like to alternate (bulky) standard decrease with (short) slip stitch decrease. FO.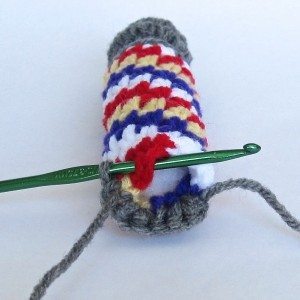
Above: Photos taken halfway through the round of sc and halfway through the round of decreases.
Below: Halfway through the running stitch closure for the final hole, and the finished base.


If you want to change the length of your barber pole, change the number of repetitions of block B. Whenever the lead strand reaches your desired length, skip to block C. If your lead strand reaches the desired length before a full 8-hdc “round,” that is fine. Just undo stitches until every strand except the lead strand has at most 2 hdc that have not been stitched into.
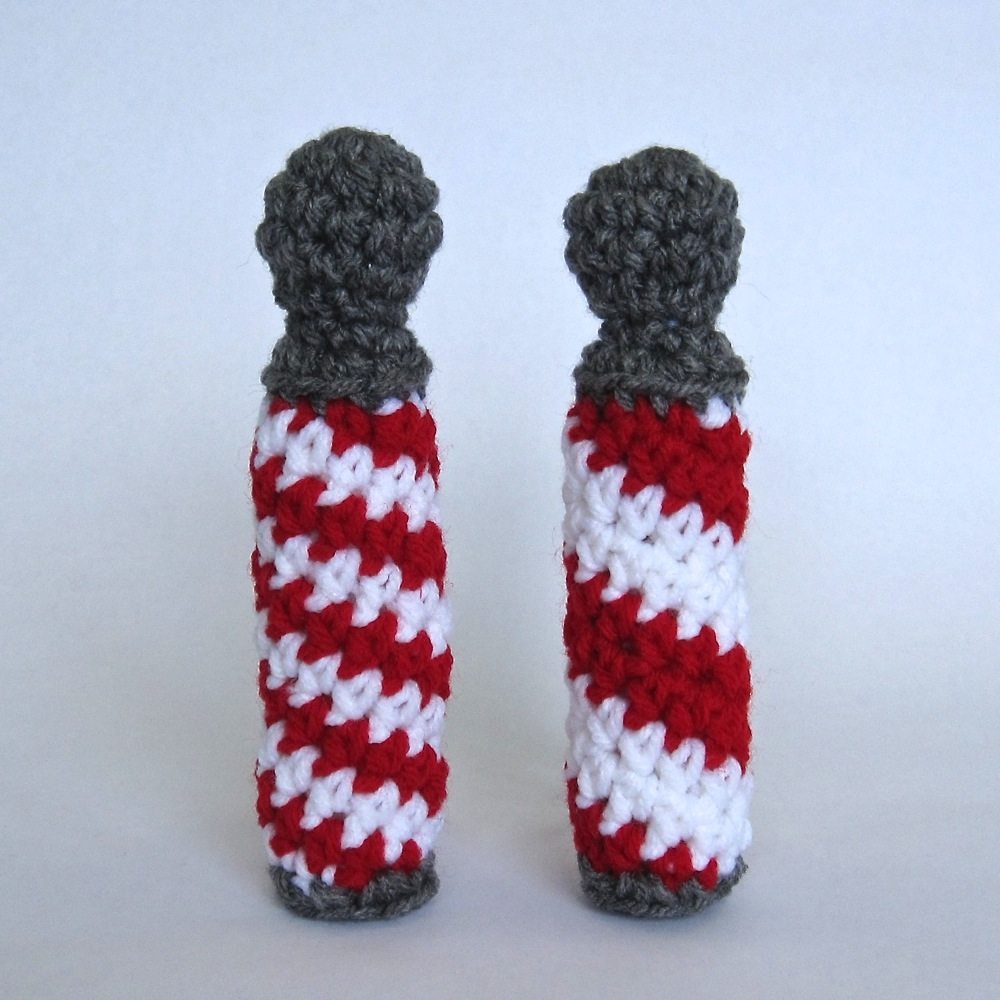
Barber Poles & Candy Sticks Pattern
I hope you enjoy it!
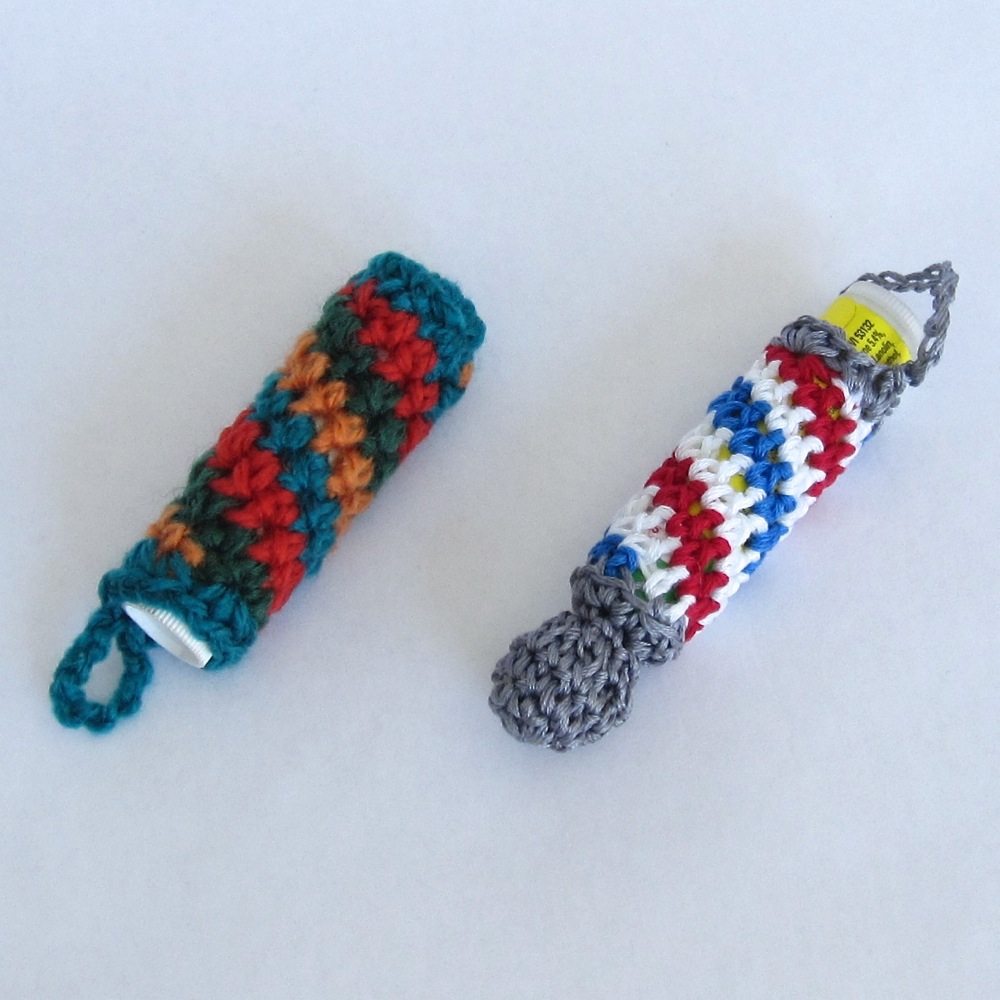
I am a barber and this is absolutely adorable. I am very new to crochet and wondering if you have any videos or advice on how to make the red, white, blue, barber pole keychain. Thanks so much!
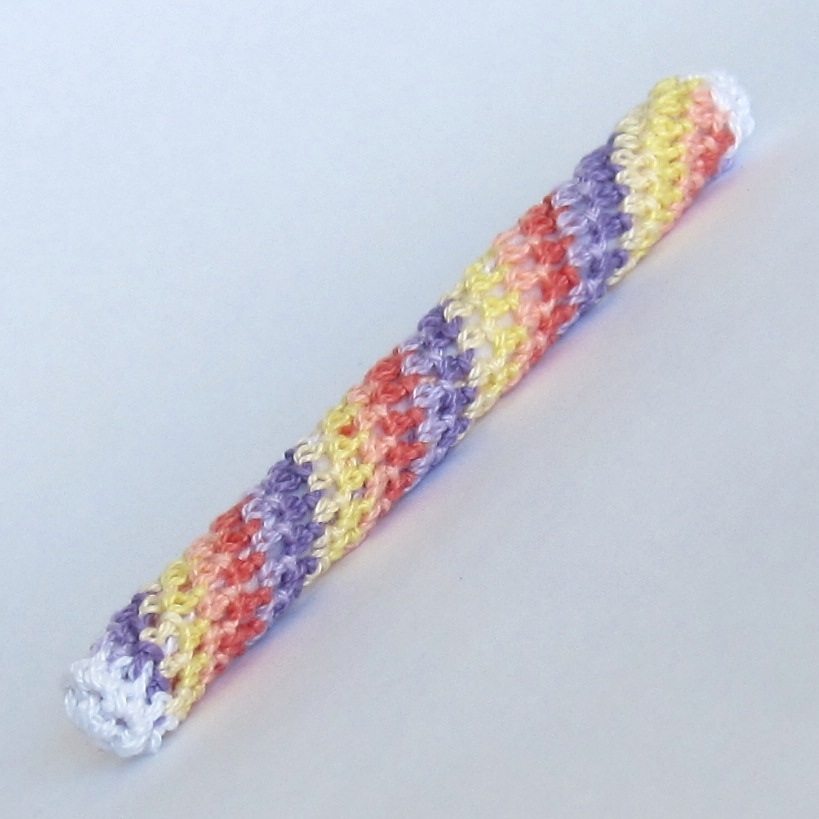
Oh my goodness, I’m sorry to have left your comment for so long! The red, white and blue keychain is a four-strand spiral like the pictured barber pole, but 2 strands are in white (the yellow in the pictures would be replaced with white).
To leave the end open, do the “clean-up and pole base” section but stop before the decrease round. If you’re working snug to make a cozy, you might replace “*2sc in next sc, sc in next sl st* three times” by “*3sc in next sc, sc in next sl st* three times” to give the end more stretch.
For the loop, after the joining slip stitch of the clean-up round, leave your yarn attached and chain until it’s as long as you like, joining on the opposite side (or right next to where you started, depending on what you’d like).
My red, white and blue keychain was made with embroidery floss and a size 1 steel hook (2.75mm), and the other keychain was fine yarn (weight class 2) and a D hook (3.25mm). They had one of each spiral block: A, B, C. The red, white and blue one used the stretchier clean-up round and had a chain-14 for the loop. The other keychain used the clean-up as written and had a chain-8 for the loop.
Advice would be… embroidery floss is more difficult to work with because it has no stretch, so if you can get fine yarn in the appropriate colors that would probably be more fun. Good lighting helps a lot. Make sure you get your loops all the way up to the full diameter part of the hook, especially on a steel hook, and turn the mouth of the hook downward when you pull it out (or toward the previous chain, if you’re chaining).