We continue to learn how to embroider crocheted fabric with “formal” embroidery stitches, which we’ll explore for the rest of the series. This episode covers isolated stitches that may be used separately or together, to draw features or other images. Remember that I would love to hear your comments and answer your questions!
As before, the photos link to larger versions, and the full post is behind the cut.
| Inside this post: | |
|---|---|
| Lazy Daisy Fly stitch |
French and bullion knot |
Lazy Daisy
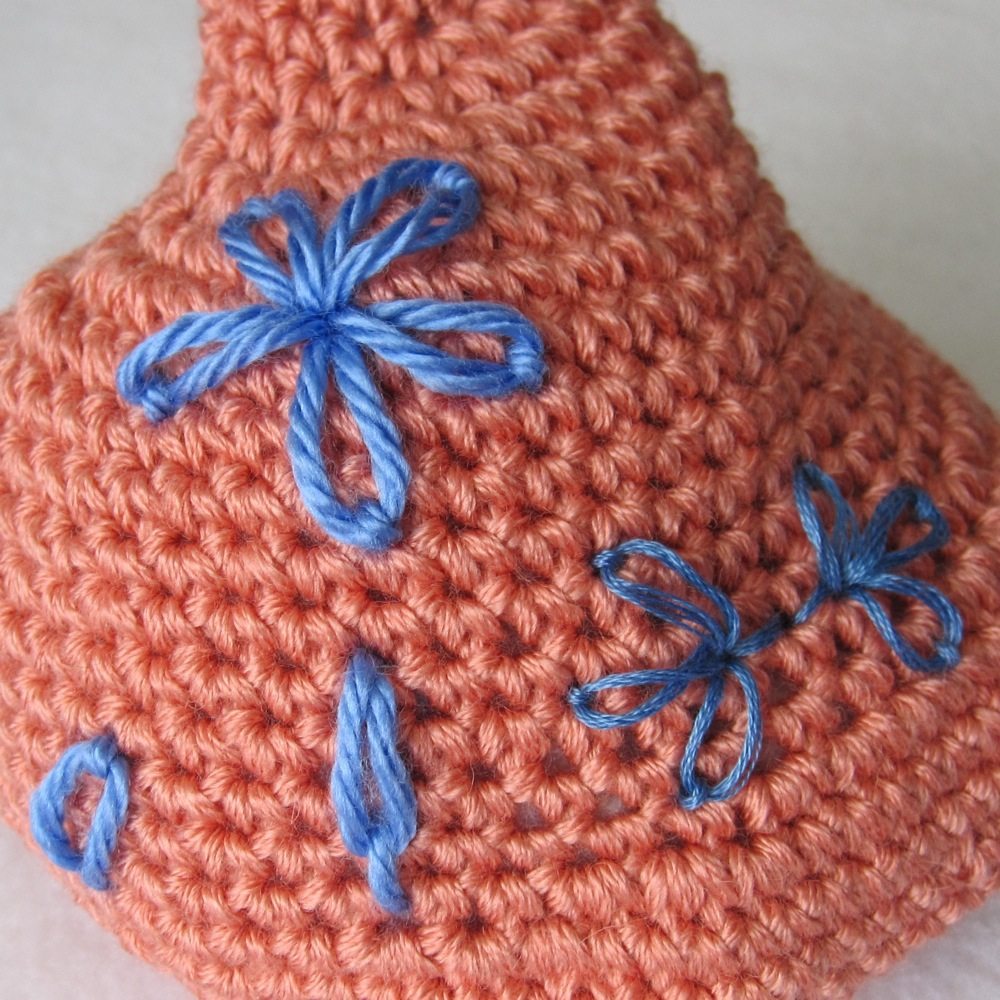
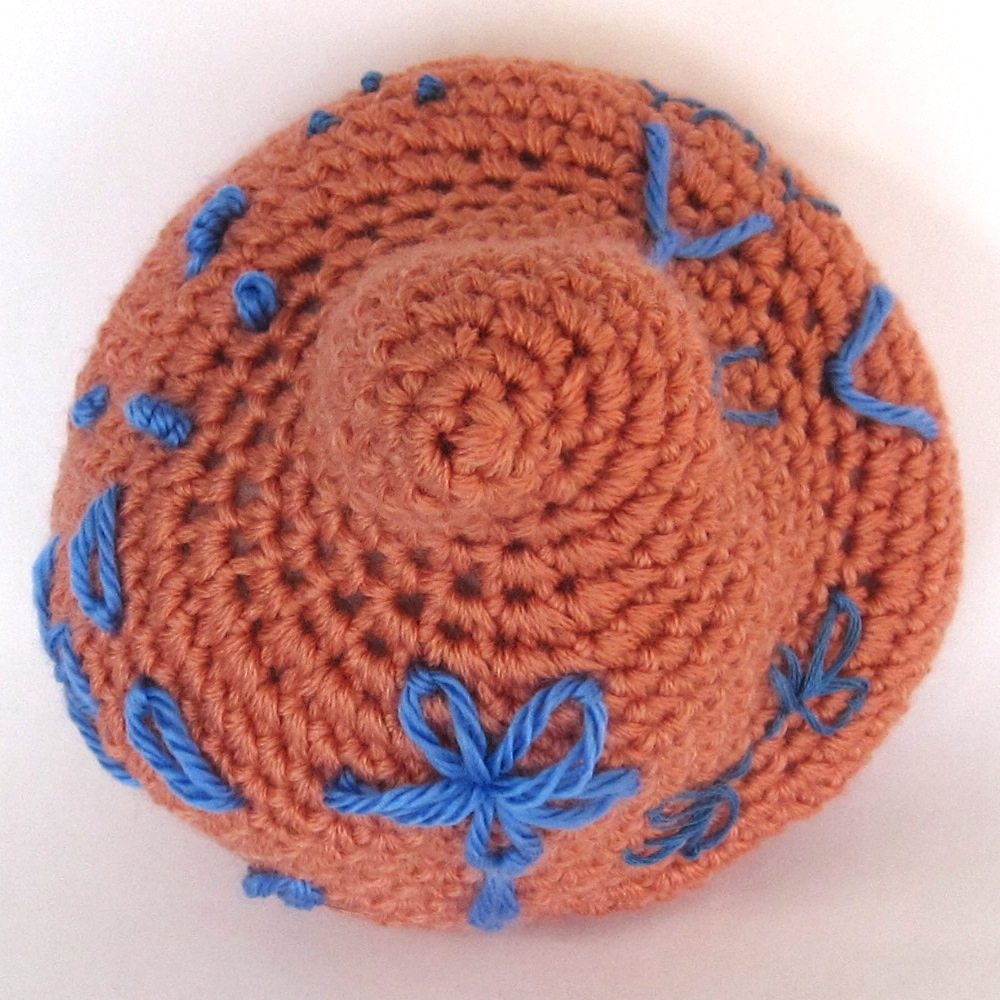
The lazy daisy, or detached chain stitch, is a teardrop-shaped stitch formed from a loop of yarn that’s caught by a small stitch.
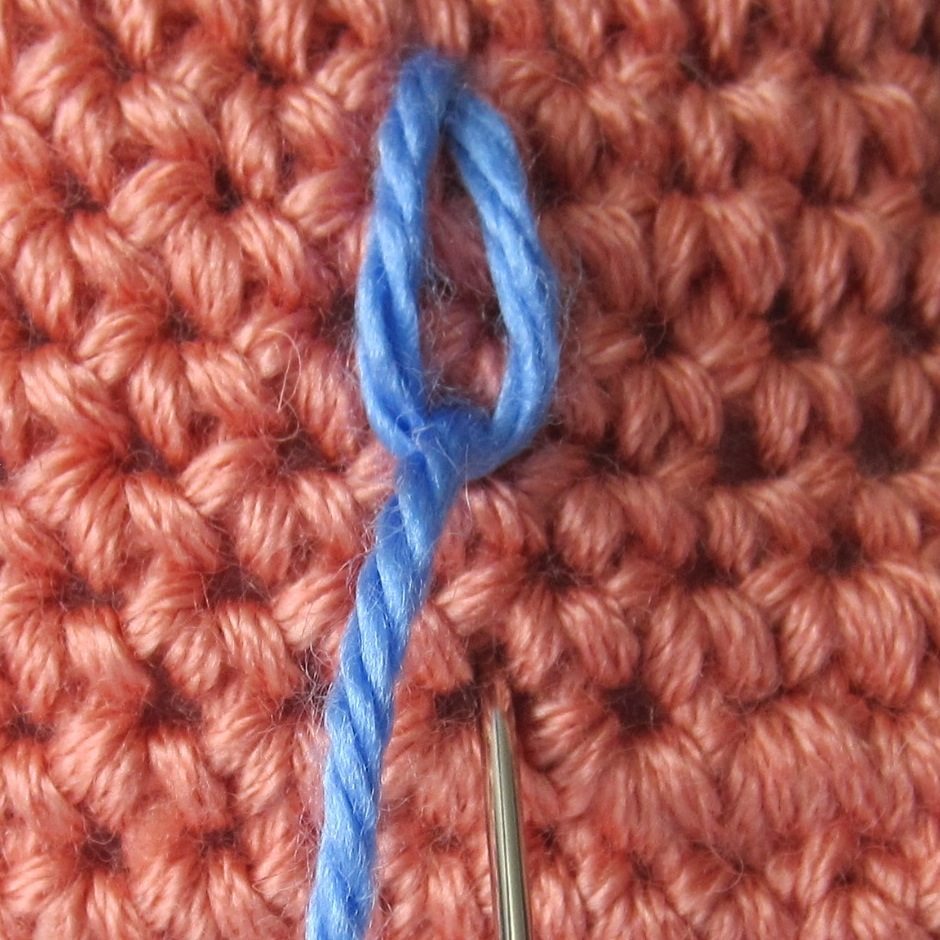
Bring your needle up where you want the point of the teardrop to be. You will stitch down into the same point, and before tightening the yarn, stitch back up at the opposite end of the teardrop. Catch the yarn on the needle (1st picture above) and pull it until it is not floppy, but is still rounded. Stitch back down in the same spot, but on the opposite side of the caught strand (2nd picture above). Be careful not to pull too tightly here as well, as it is easy to acciedntally pull this little tacking stitch down inside the piece. You may also stitch a distance away to make a long-tailed lazy daisy (3rd picture above).
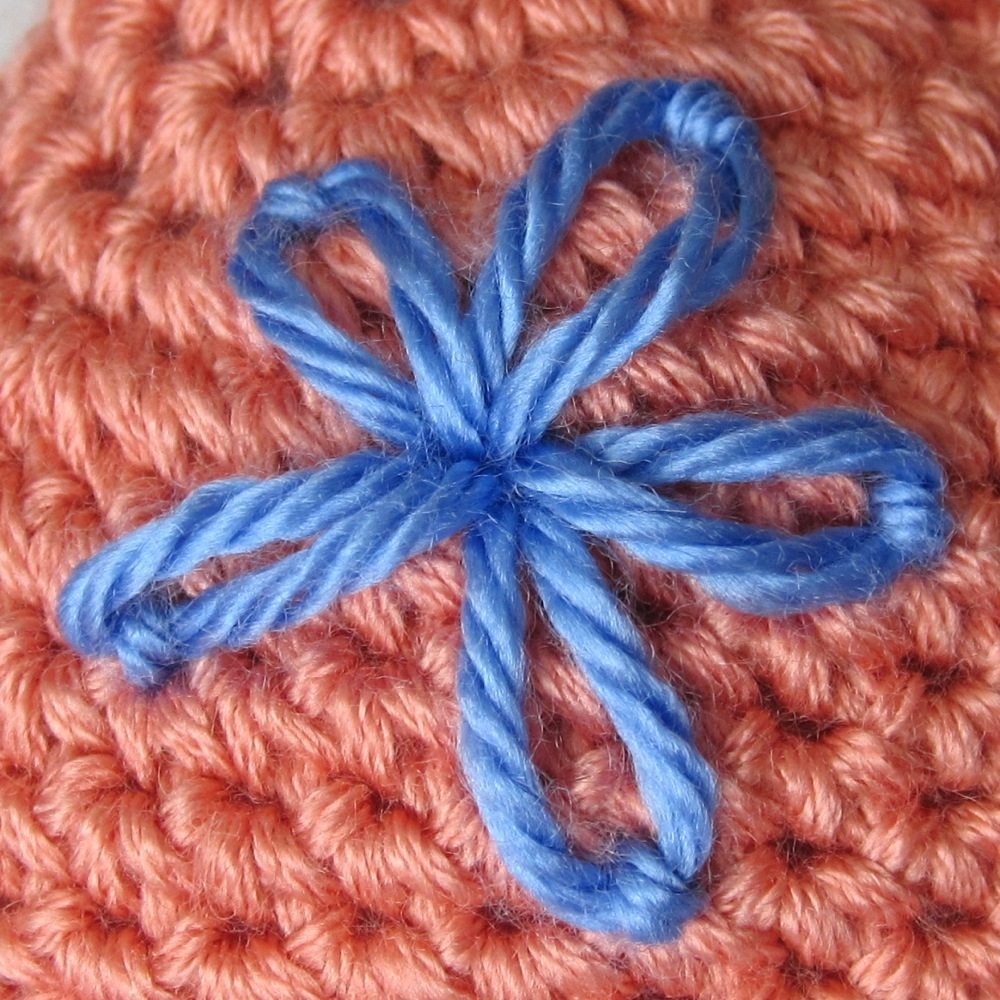
When lazy daisies are grouped together, usually the points of the teardrops are closest. If you make a group of them in a circle, sharing the same teardrop point, it looks like a flower, which gives this stitch its name. In the Medieval Fantasy: King pattern by Kati Galusz, the king’s coat is adorned with frog-closure-like clusters of lazy daisies similar to the second picture above.
Fly Stitch

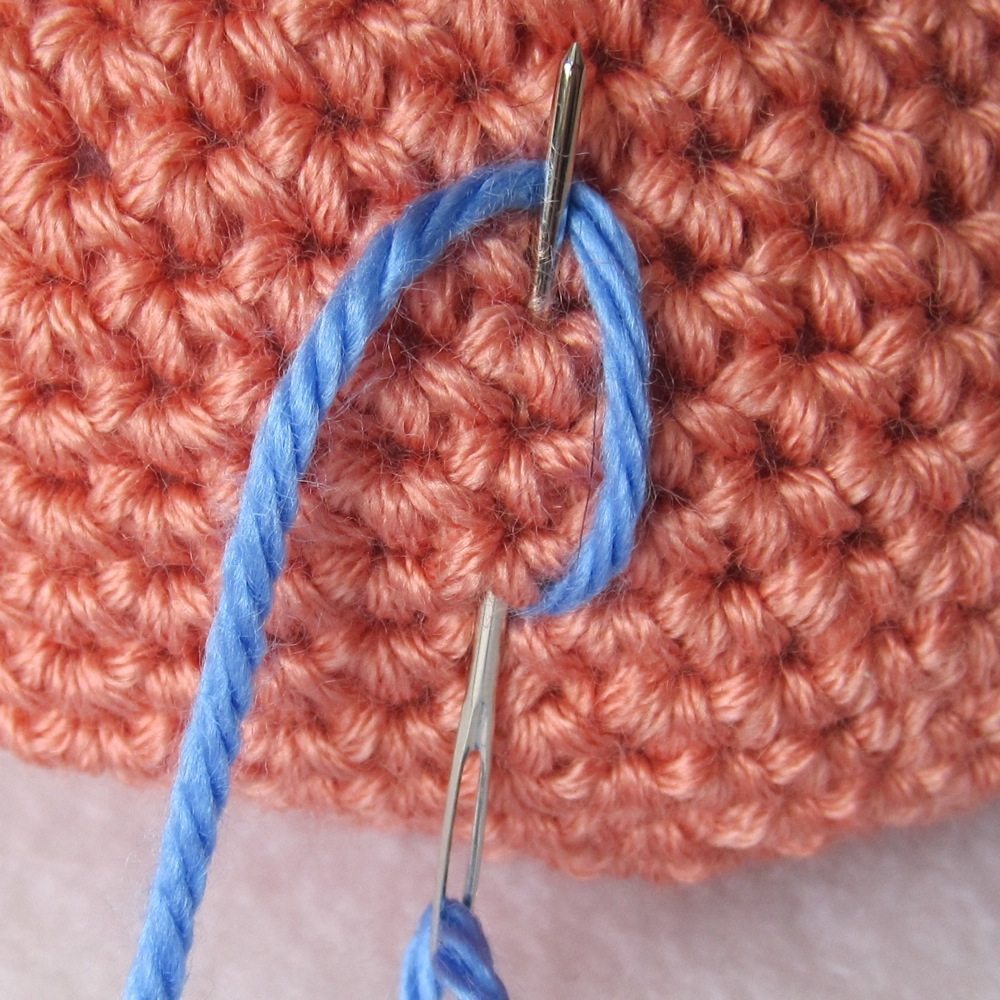
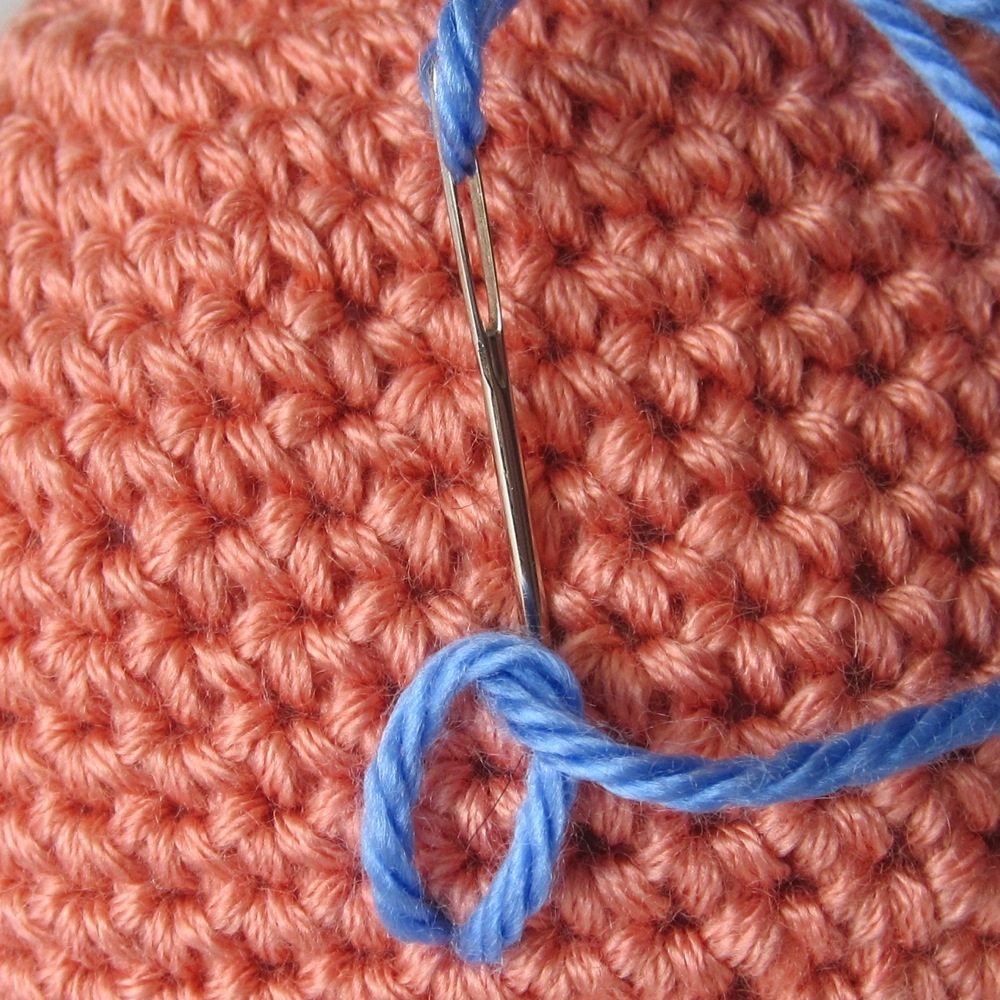
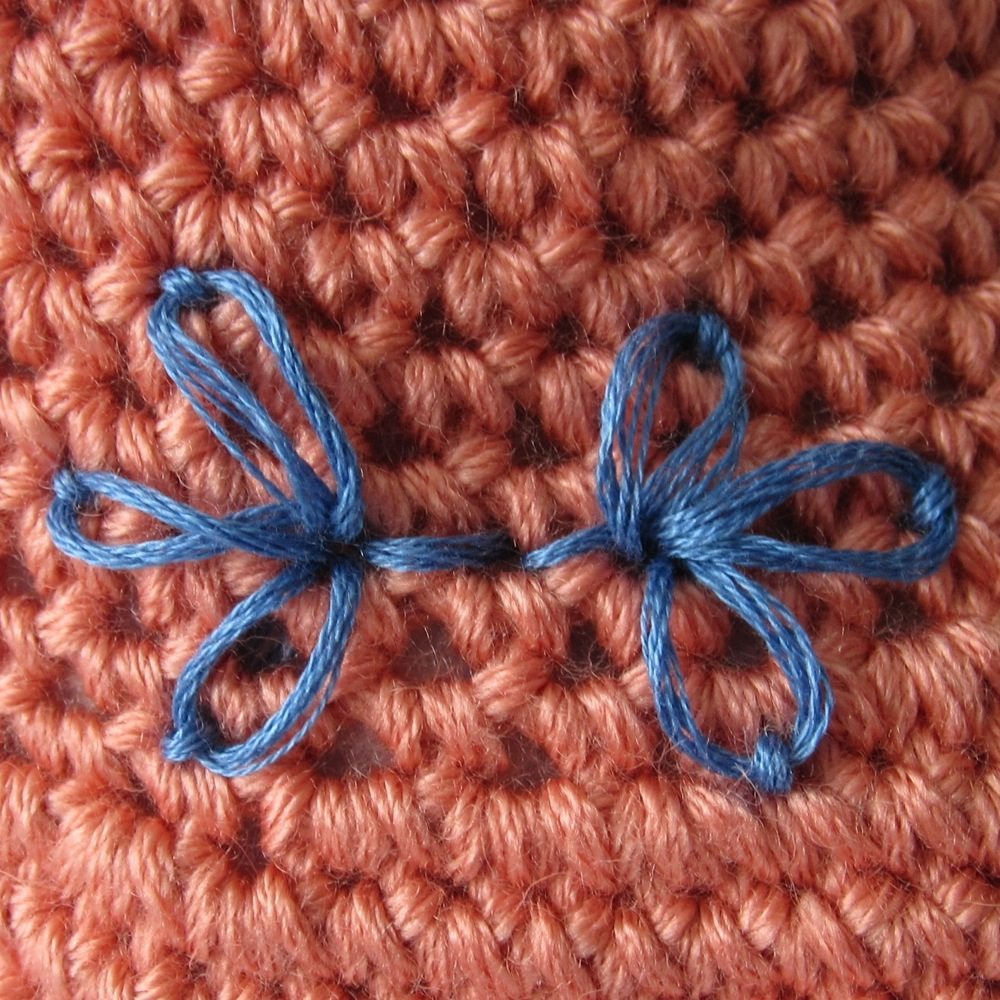
Fly stitch is quite similar to lazy daisy; you make it essentially the same way, except the first downward stitch of fly is a distance away from the first upward stitch, instead of in the same spot. Fly stitches are also typically pulled more tightly than lazy daisies, so the caught thread becomes a V instead of a loop.
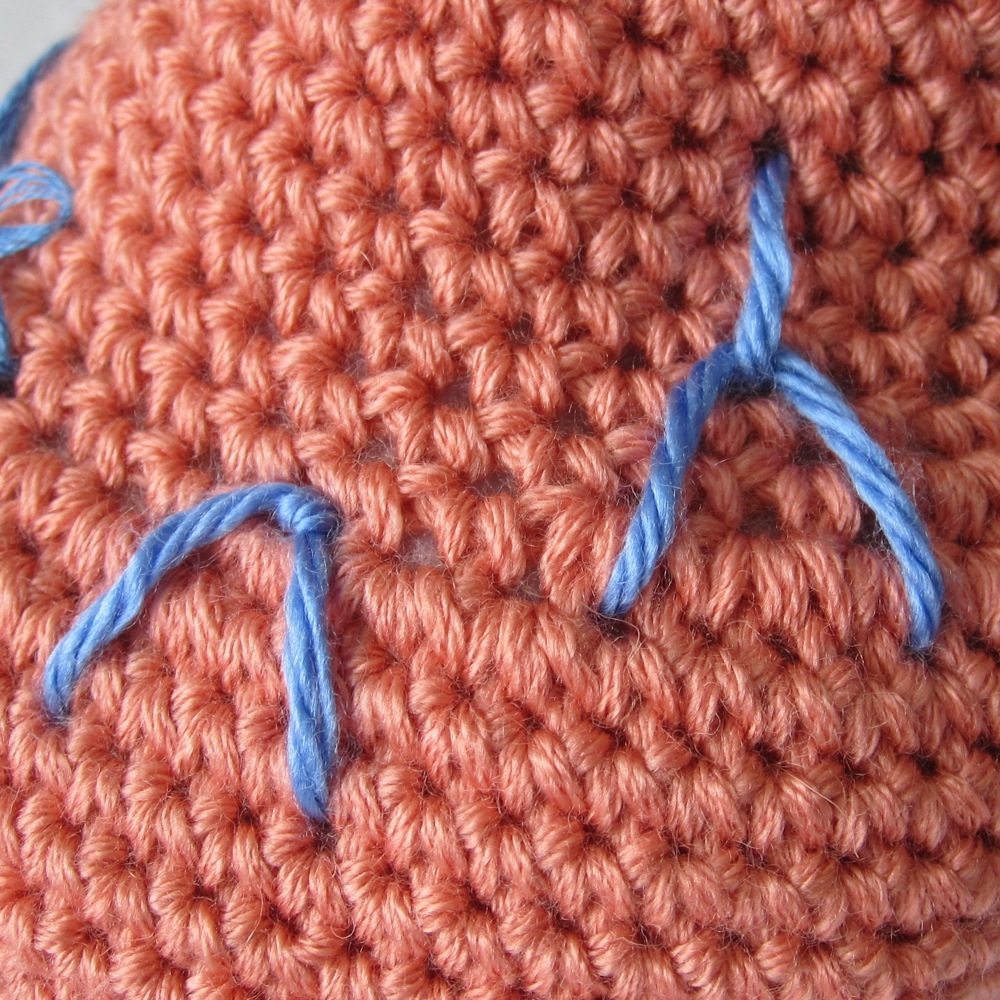
Your fly will be a V (short-tailed) or a Y (long-tailed), and in either case you start by stitching up at one top point. Stitch down at the other and back up again at the base of the V or junction of the Y, catching your yarn under the needle (1st picture above). If you are making a V, stitch back down in the same spot, on the opposite side of the caught strand (2nd picture above); if you are making a Y, stitch down a ways away (3rd picture above). Again, be sure not to tack so tightly that the point of the V disappears into your fabric. You can, of course, make a tacking stitch off at an angle; the adaptability of embroidery stitches is bottomless.
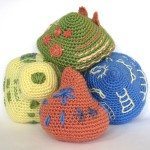
Kool Kat above was made with a long-tailed fly stitch, three straight stitches, and two short-tailed lazy daisies.
Knots

Knots are a common element in crochet embroidery. French knots give little bead-like dots on the surface of your fabric. Less-used bullion knots make thick rope-like lines or loops.
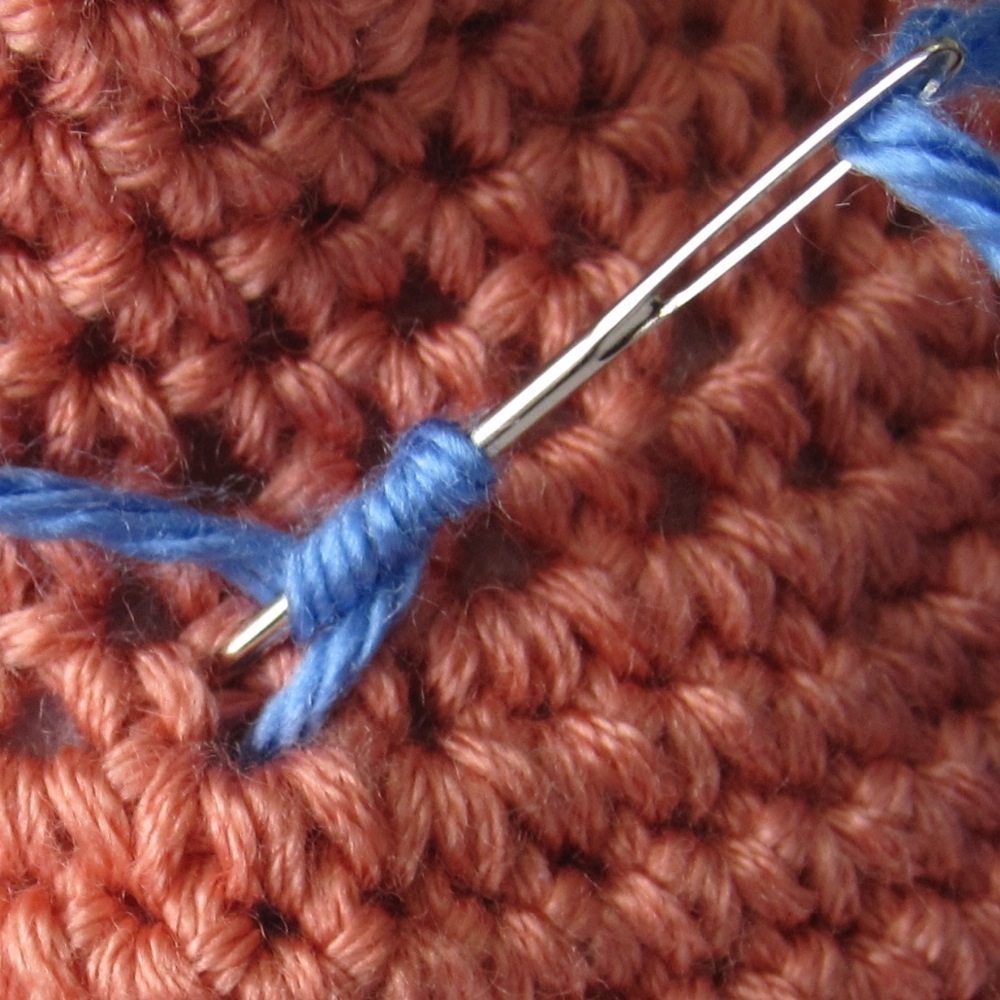
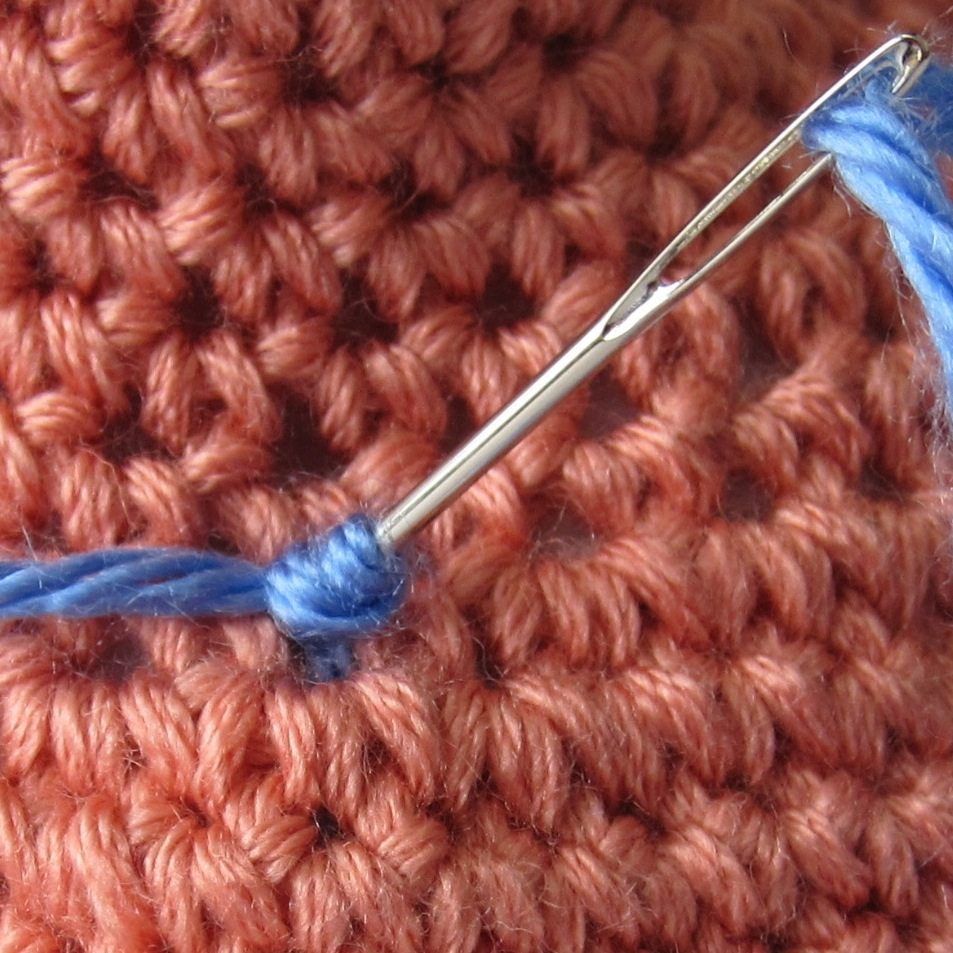
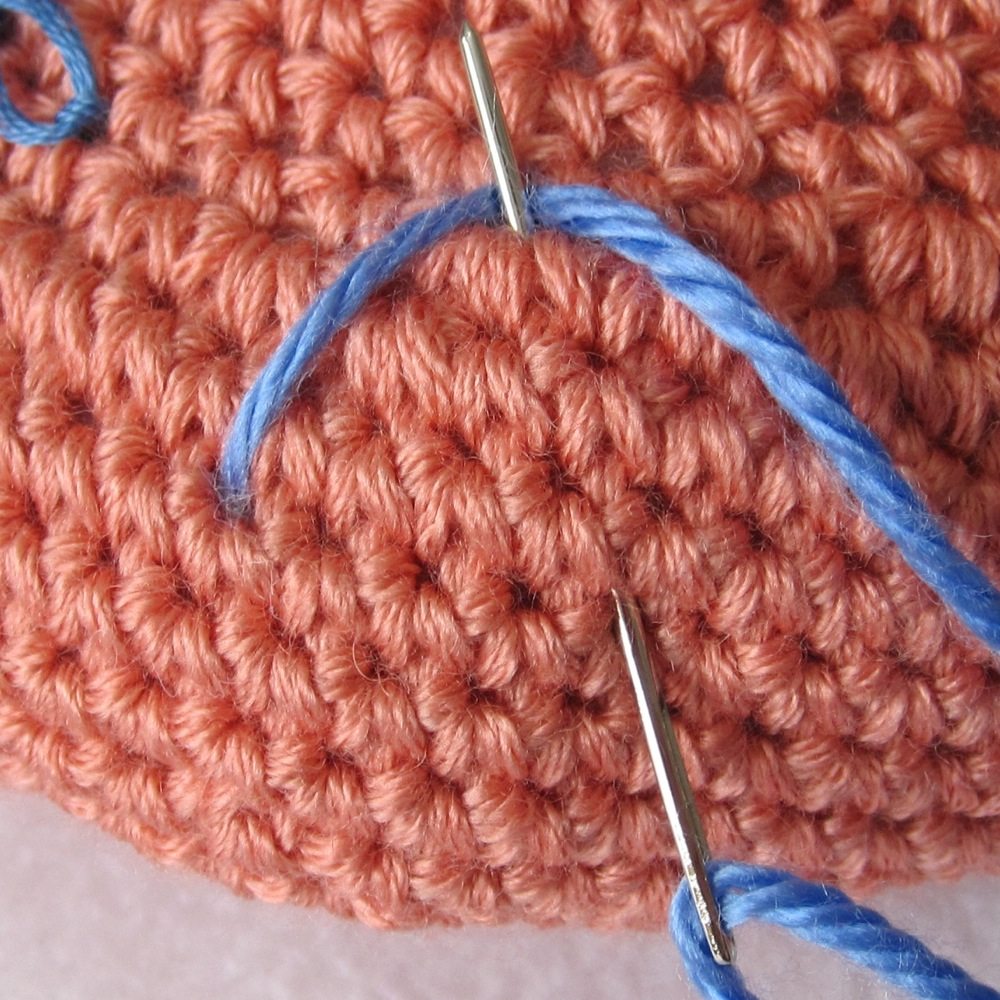
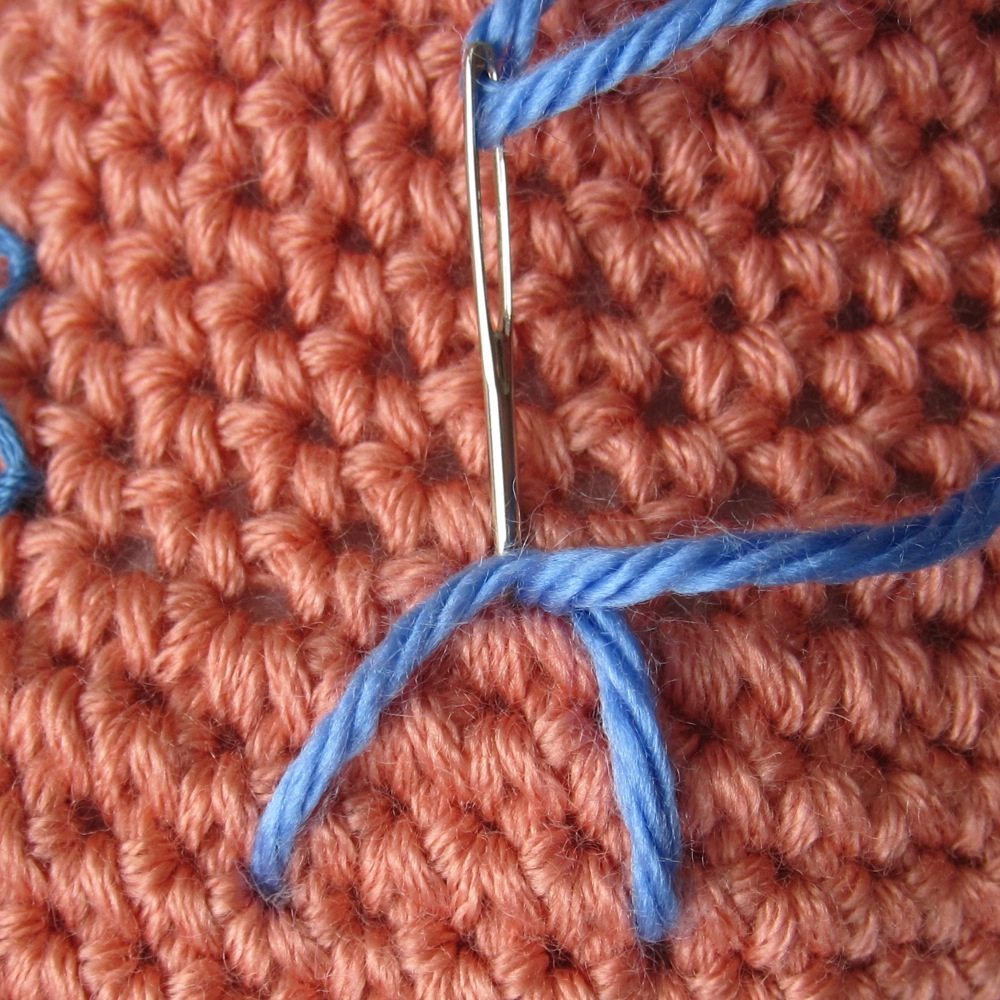
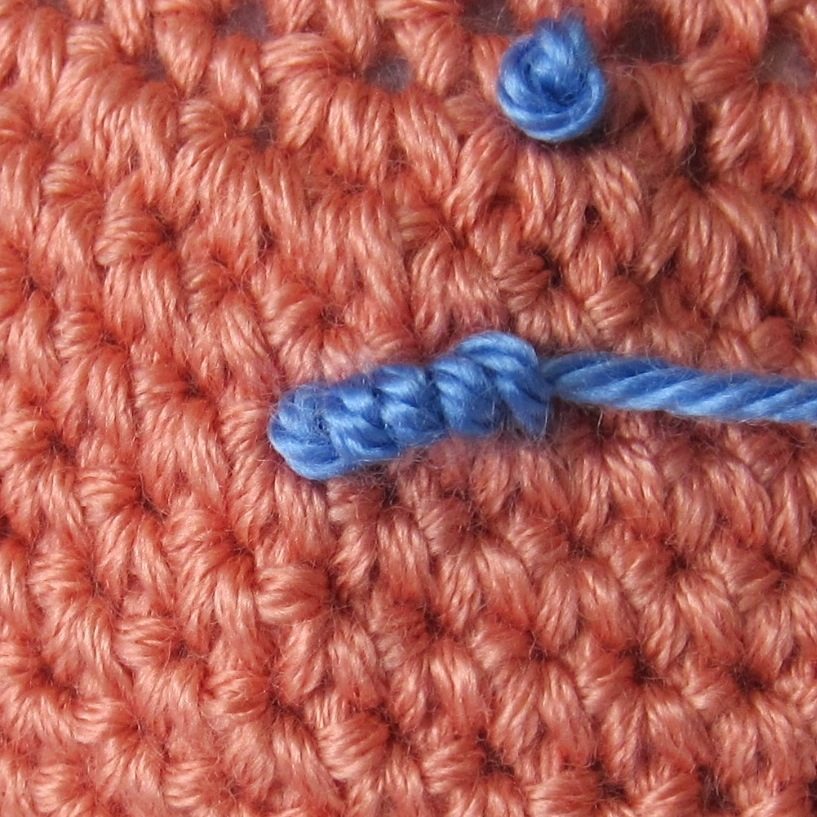
The failsafe way to make a French knot is this: bring your needle up at the point at which you want the knot. Pinch your yarn several inches above the fabric and then, holding the needle by its eye as usual, lay the side of your needle against the yarn between your pinch and the fabric. By moving the hand that is pinching the yarn, wrap the yarn around the needle 2-4 times (1st picture above). Insert the needle back into the fabric not in the exact location where it came up, but around or through an adjacent strand of yarn (2nd picture above). Otherwise, even if the knot does not disappear into the fabric when you tighten it, it could be pushed inside the piece at a later time. Pull the yarn lightly to snug the wraps down around the needle, right at the fabric (3rd picture above), and then bring the needle out in some other location and tighten the yarn. For more pictures of this technique, see Sublime Stitching.
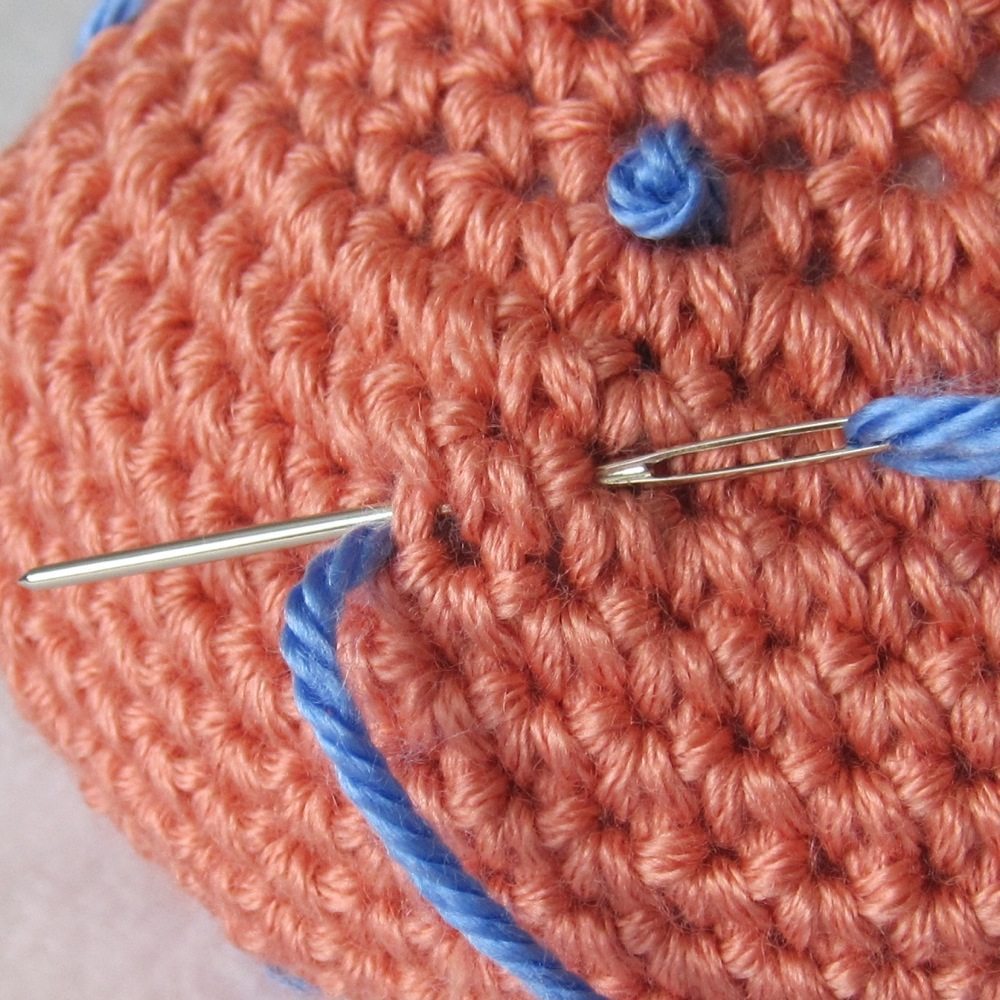
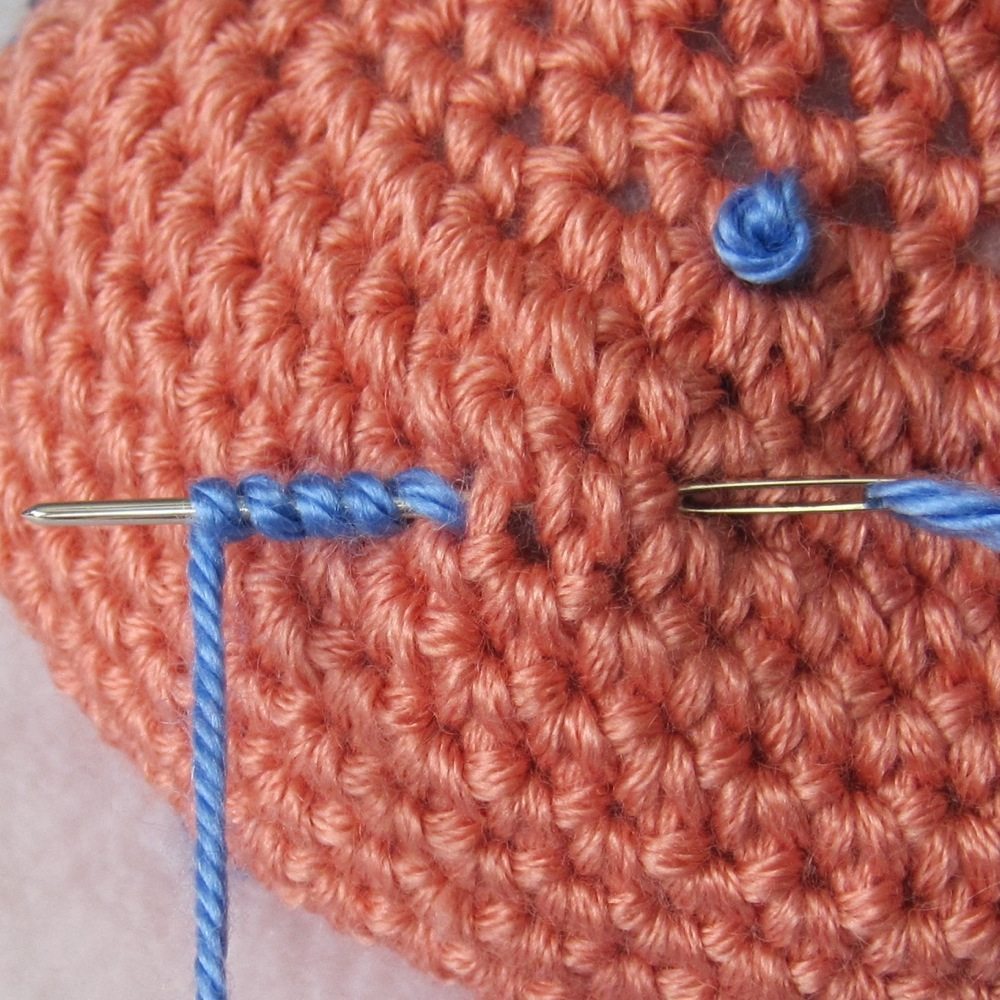
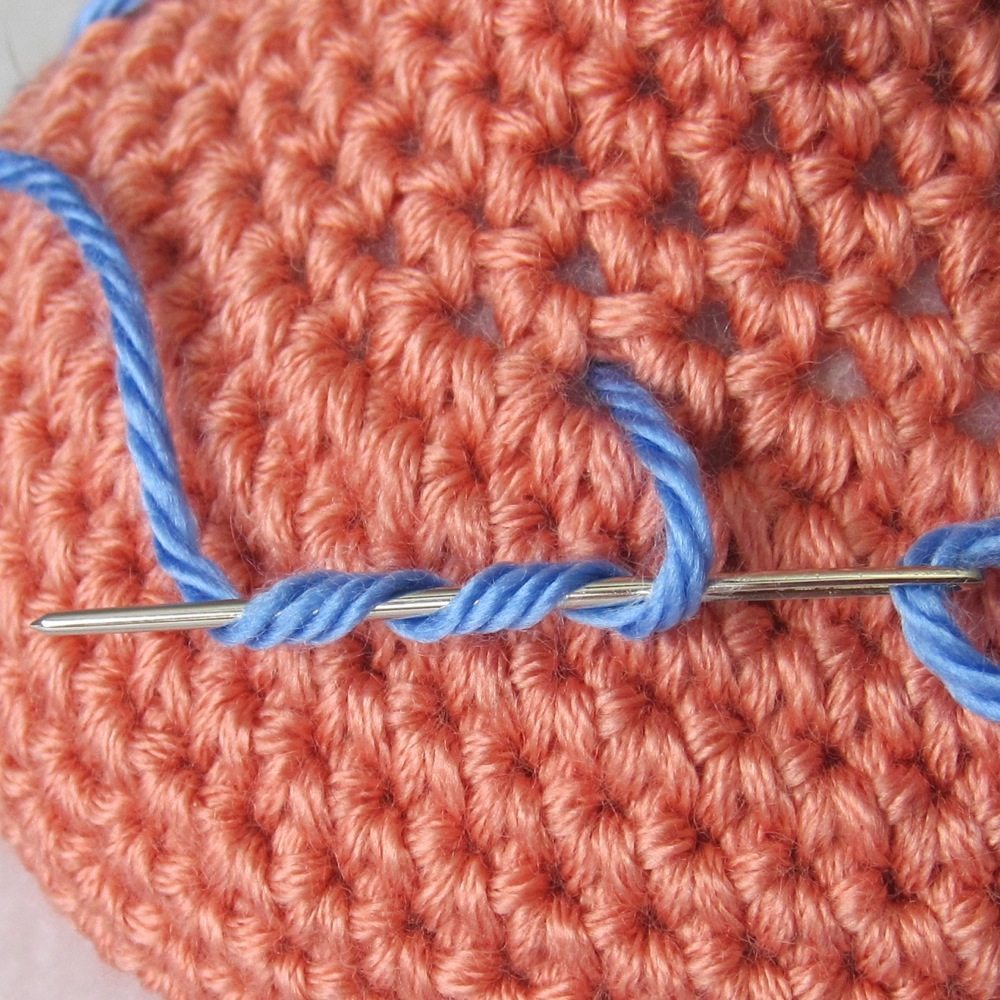
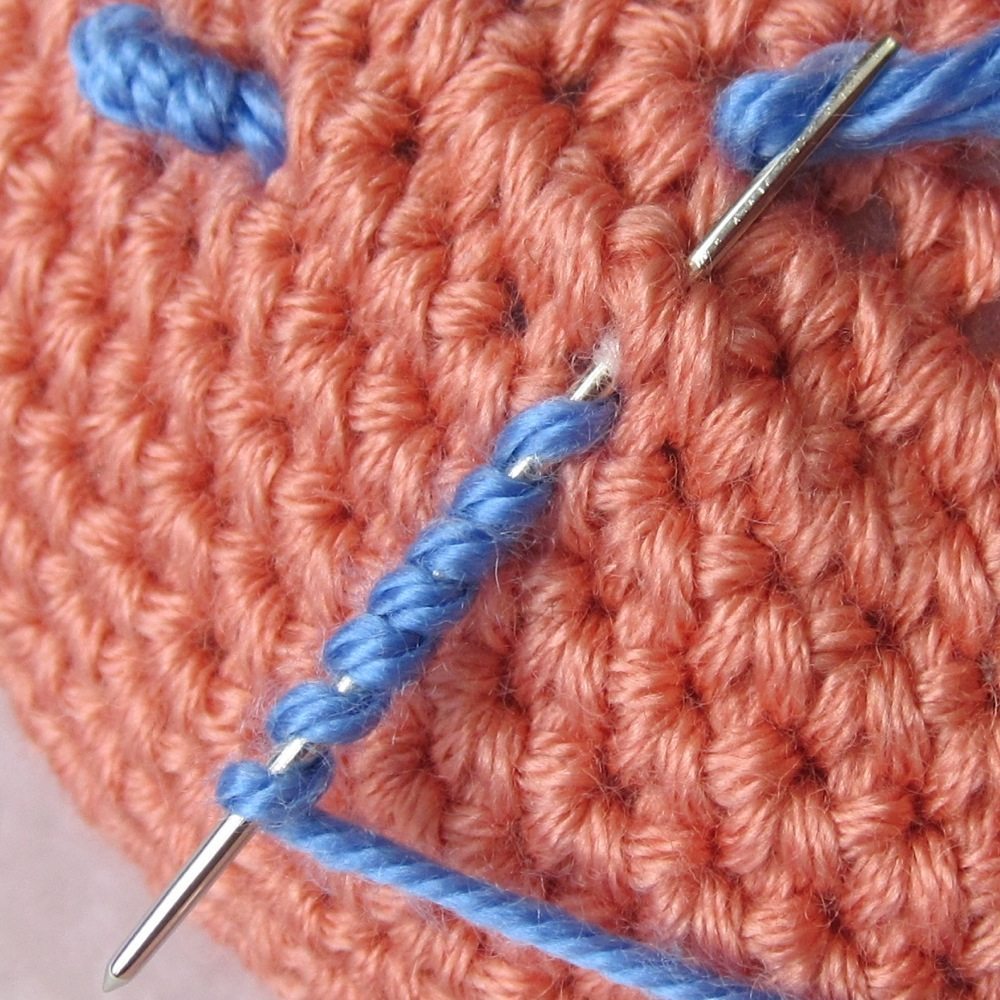
The bullion knot is also made by wrapping yarn around the needle, but it has a slightly more complicated setup. If you want your bullion to be attached to the fabric at points A and B, bring the needle up at A and then insert it through the fabric like a safety pin from B to A (1st picture above). Wrap the yarn around the needle enough times to cover the distance from A to B (2nd picture above). Tug the yarn to tighten the wraps down around the needle toward the fabric, but err on the side of slightly loose, because it can be hard to pull the yarn through the wraps when they are tight. Pinch the wraps lightly with two fingers while you pull the needle first up away from the fabric, and then toward (or really past) the opposite end of the knot. Tighten until the wraps lie flat against the fabric (3rd picture above), and then insert your needle back down at B to finish.
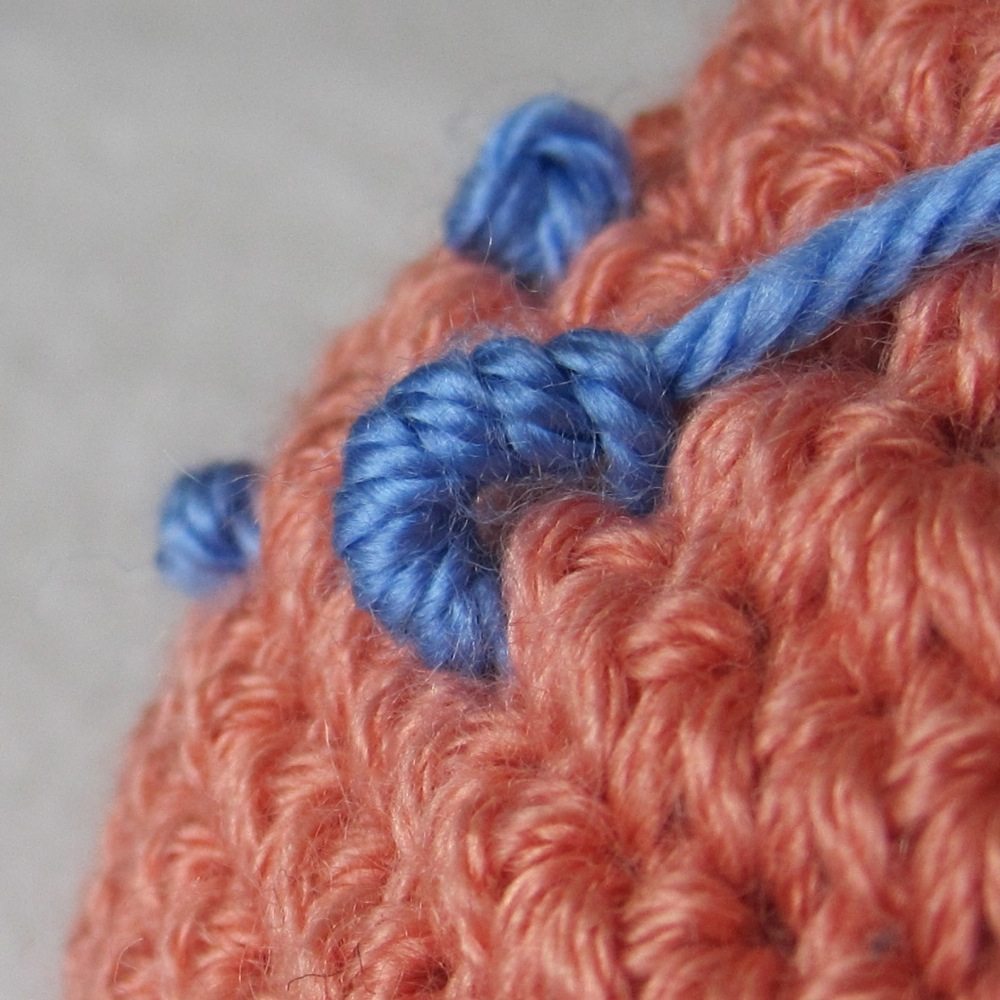
If you wrap more times than necessary to span the distance between A and B, the bullion will stand away from the fabric in a little arch.
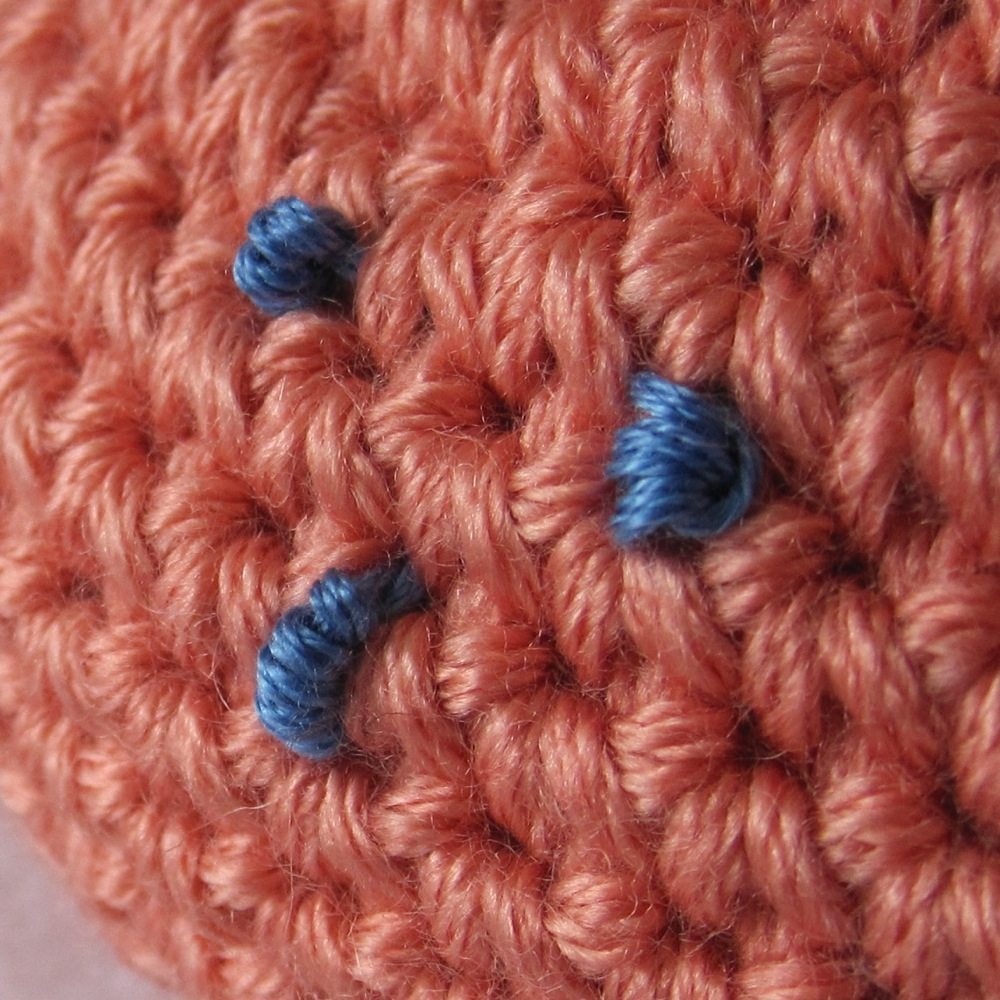
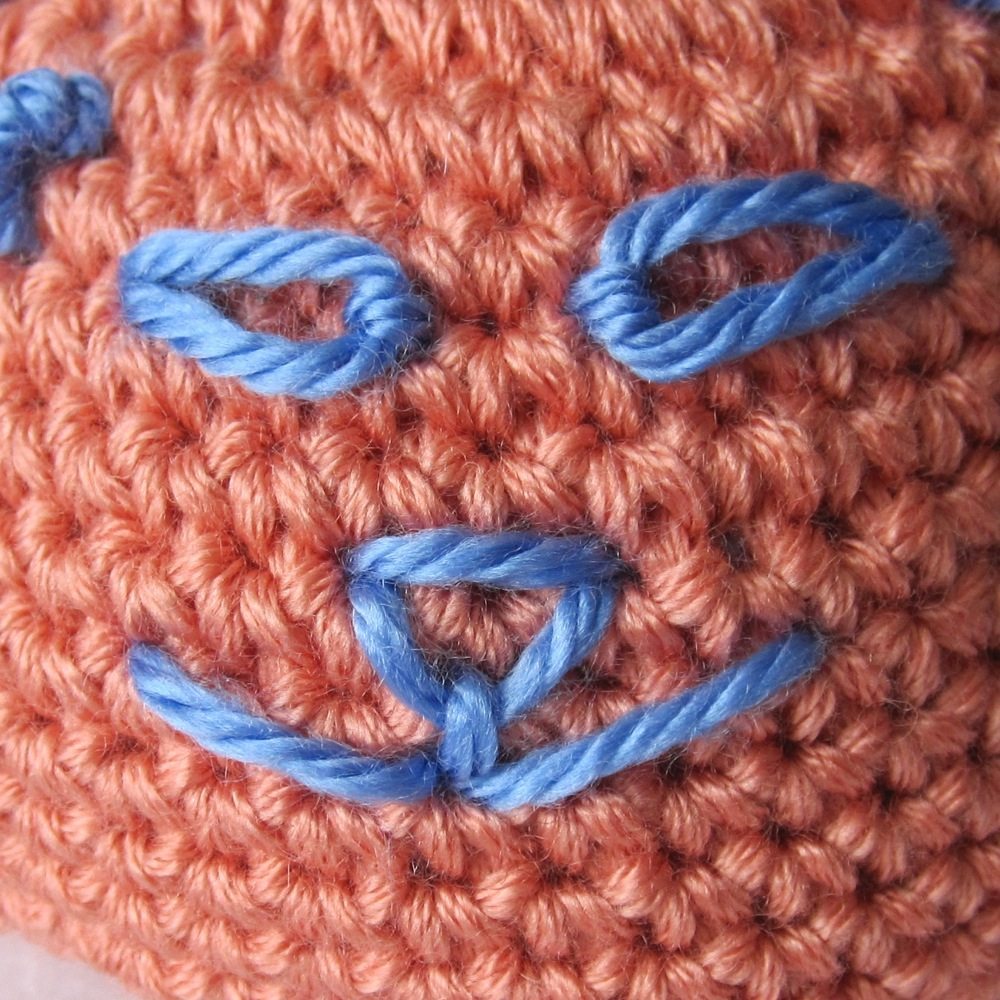
We finish this episode with a simple face of two French knots and one bullion knot.
 Visit the table of contents post for this series or all posts labeled “embroidery on crochet.”
Great! Thanks for posting this.