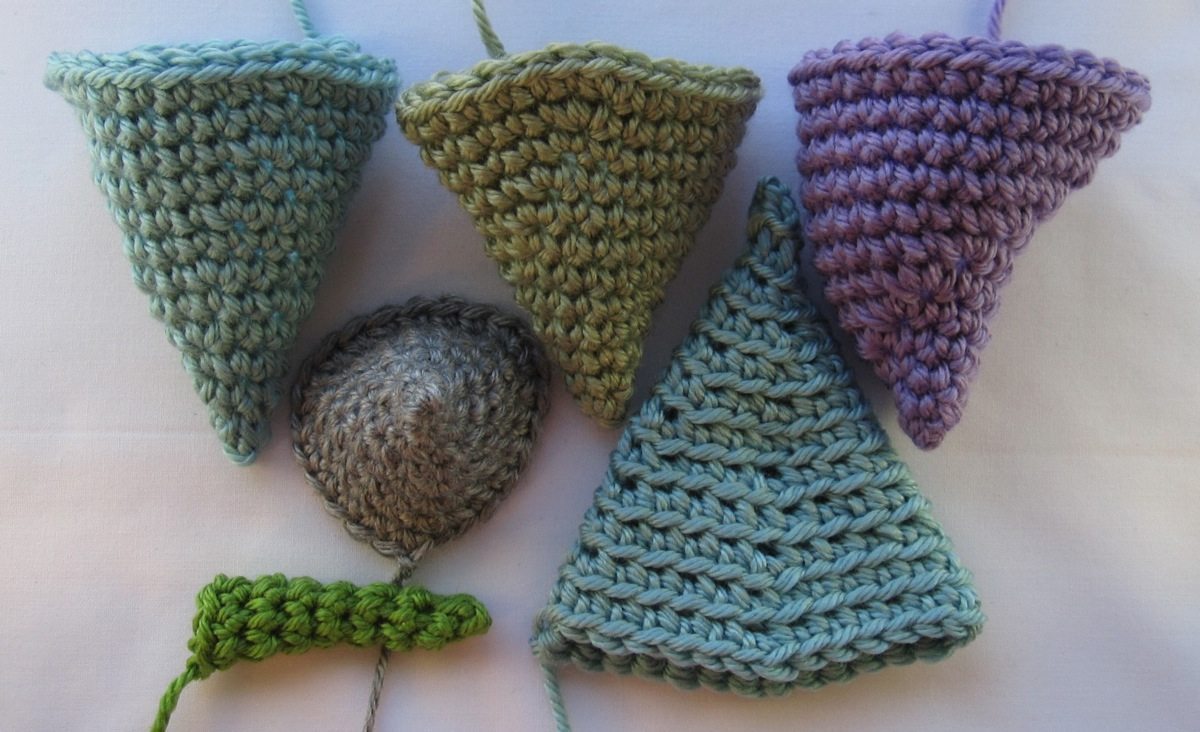
I quite enjoy these explorations of crochet geometry, and I hope you do too – at least the photos. This episode is about crocheting cones, with a teaser photo for my next post at the bottom.
A cone is a basic shape and simple to crochet. The math of it is that the circumference and height of a cone have a linear relationship: for every cone there is a value x so that wherever you are on the cone, the circumference at that point is x times the height at that point. You can use trigonometry to work out stitch counts for cones of specific proportions (here’s a post sort of about that), but more simply it means you add the same number of stitches to each round. That is, at least, on average. You would get a cone by alternating adding 2 and 3 stitches to each round (effectively adding 2.5 per round), or adding 2 stitches to most rounds but only a single stitch to every fourth round (effectively adding 1.75 per round). The fact that increases and decreases in crochet don’t fully take effect until the round after they are made allows this to work smoothly.
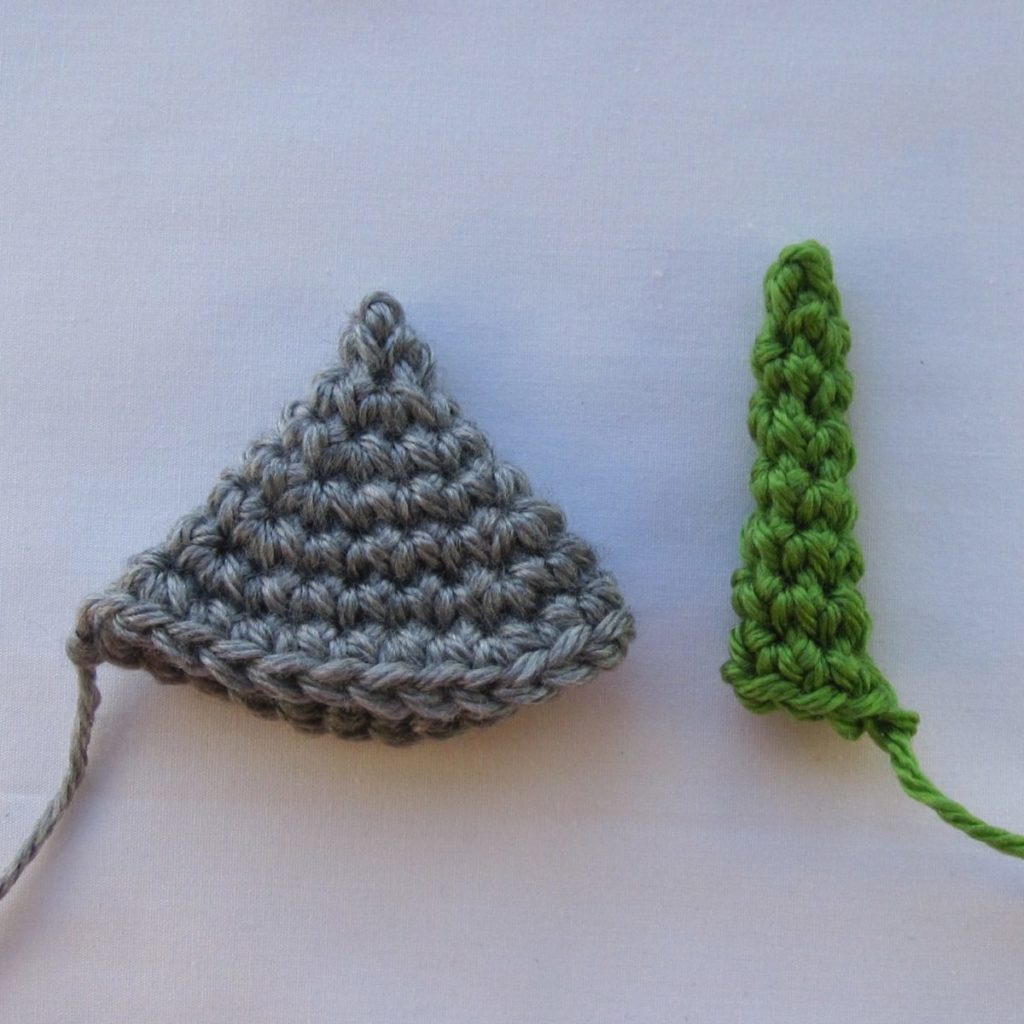
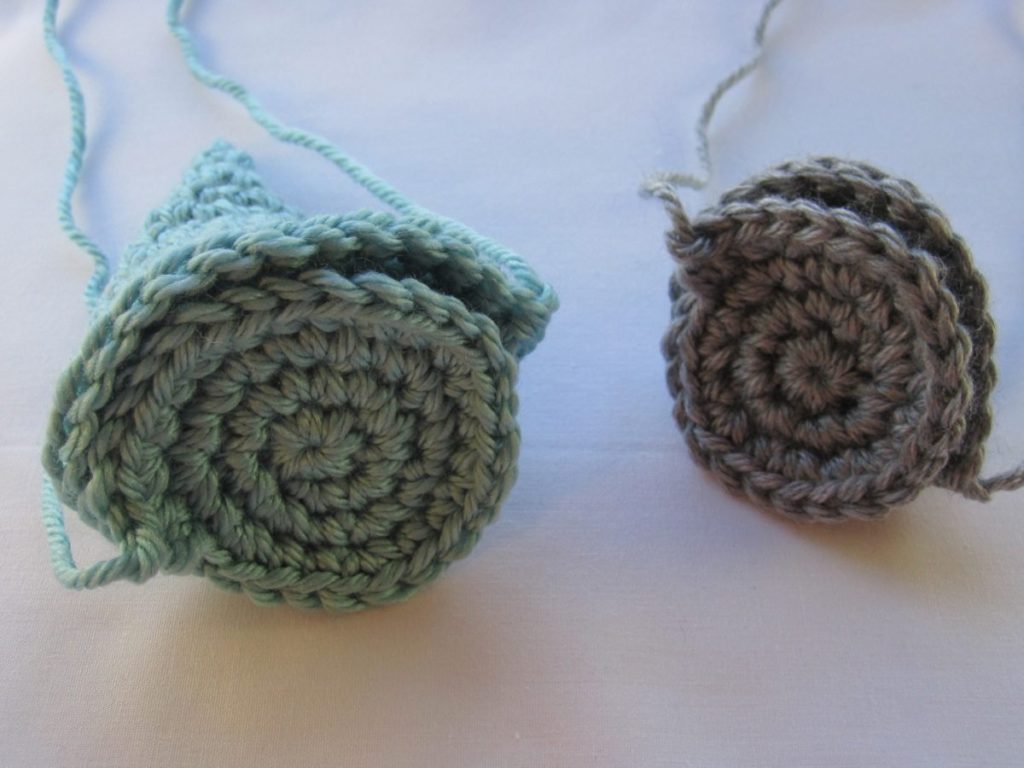
By the time you get to seven stitches per round you’re pancake flat, and six is flat enough that it tends to come out as rounded instead of conical. You can get a good wide cone starting with five stitches in a magic ring and adding four stitches per round – even three will come out as fairly wide. For a very narrow cone, adding just one – or even less – is called for. The following cones were made by starting with 3 stitches in a magic ring and adding 3 more each round (gray cone, left side), and by starting with 3 stitches in a magic ring and alternating between adding one stitch and adding no stitches (starting with 1; green cone, right side). They each proceed for 8 rounds, so the gray cone ends with 24 stitches around and the green one with 7.
After the jump: placing increases, making a base, and stitching in back loops only.
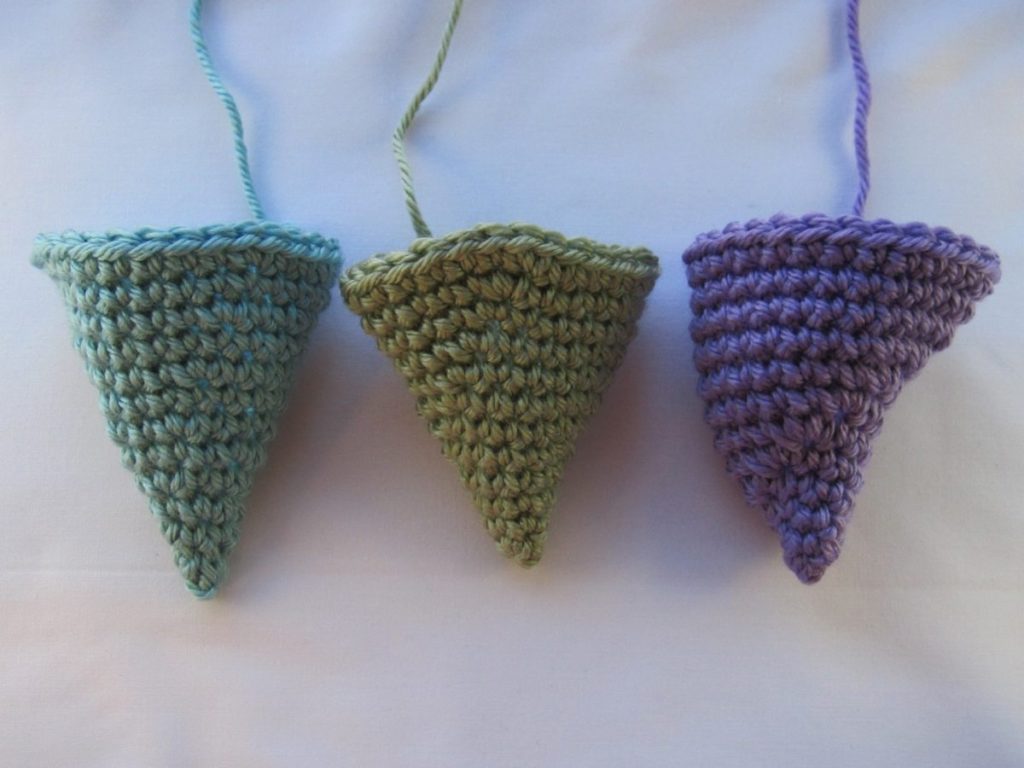
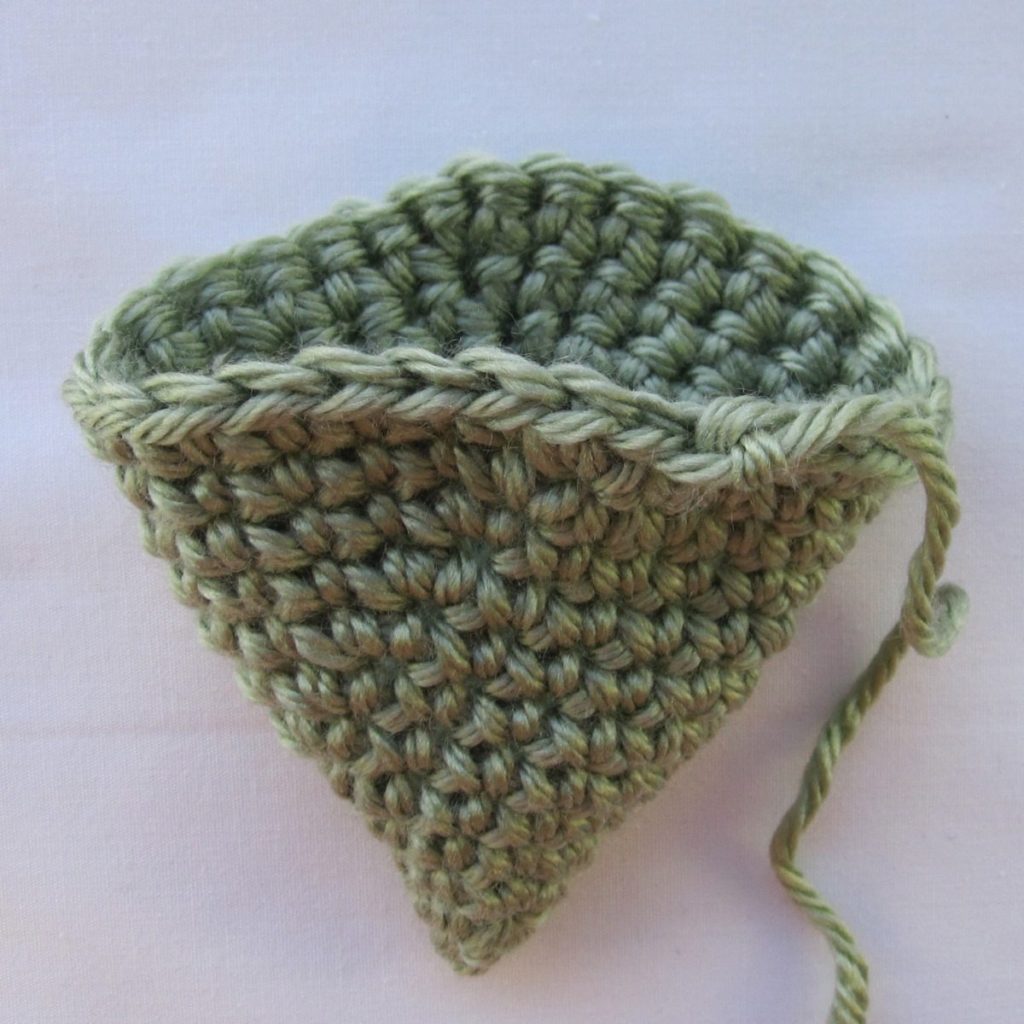
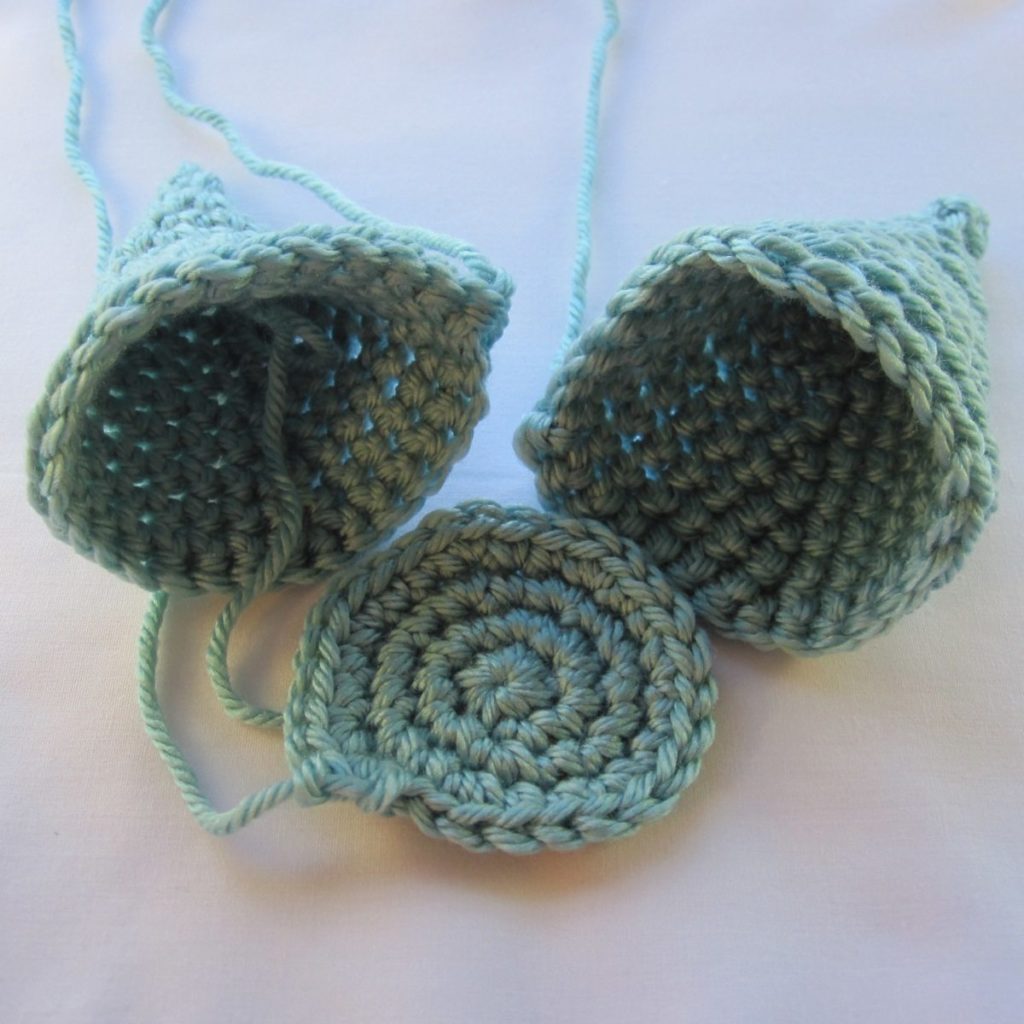
The location of your increases makes a difference. The gray cone above wants to have a triangular lip (you can see that in the top picture of this entry) because every round was of the form “*2sc, sc X* three times” – the increases were all made into previous increases. The three cones below were each made by starting with 4 stitches and adding 2 per round. From left to right: blue is most spread out, alternating between rounds that increased in the first stitch and halfway around (patterns of the form “*2sc, sc X* twice”) and rounds that increased 1/4 and 3/4 of the way around (patterns of the form “*sc Y, 2sc, sc Y* twice”). Green is in between; every round is of the form “*2sc, sc X* twice.” And finally, purple is least spread out, with three sc made into the first stitch of each round, and one sc per remaining stitch. I love the spiral shape of the purple one, but it’s really not a cone. The green one has a noticeable puff to its rim in two places (second picture below), and actually a visible slanting line due to the fact that increases tug the previous stitch’s top teardrop up quite a bit. The blue is much smoother.
Now suppose you want to make a stuffed cone. You need a base. For me, a seven-stitch start and increasing by seven stitches per round gives the flattest disk. For the light blue cone I made four rounds, so the last round was *2sc, sc 2* around and had 28 stitches. For the gray disk, I made three full rounds and then did a partial round consisting of three sets of *2sc, sc 2*, for a total of 24 stitches in the round.
The samples here didn’t work out this way, but I have had plenty of examples of cones where the appropriate size disk to cover the bottom opening has fewer stitches around than the base of the cone. In that case, to sew them together, I figure out the overage and space the extra stitches evenly around. When you are sewing this isn’t terribly crucial, but if you want to crochet the edges together, periodically a cone stitch will need to get attached to the same base stitch as the previous cone stitch. I’ve seen a cone that ended with 35 stitches around but had a base disk with only 28 stitches – another round would have made it too wide. Every fifth cone stitch was attached to the same base stitch as its predecessor. Another case was 20 stitches around and a base that was 14 stitches around; every third cone stitch had to be attached to the same base stitch.
Alternatively, you can skip a cone stitch periodically. That might tuck the base of your cone in a bit, though, and make it look like it’s smaller around than it ought to be.
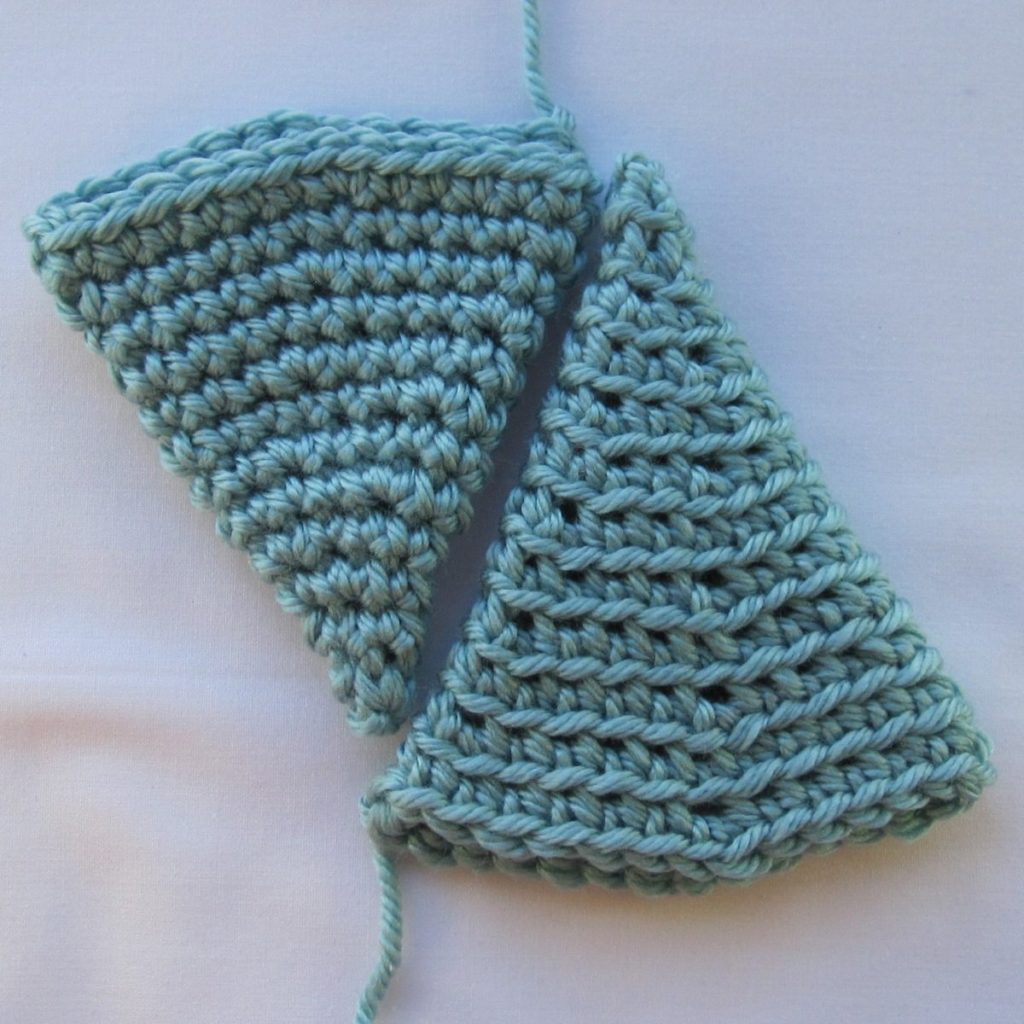
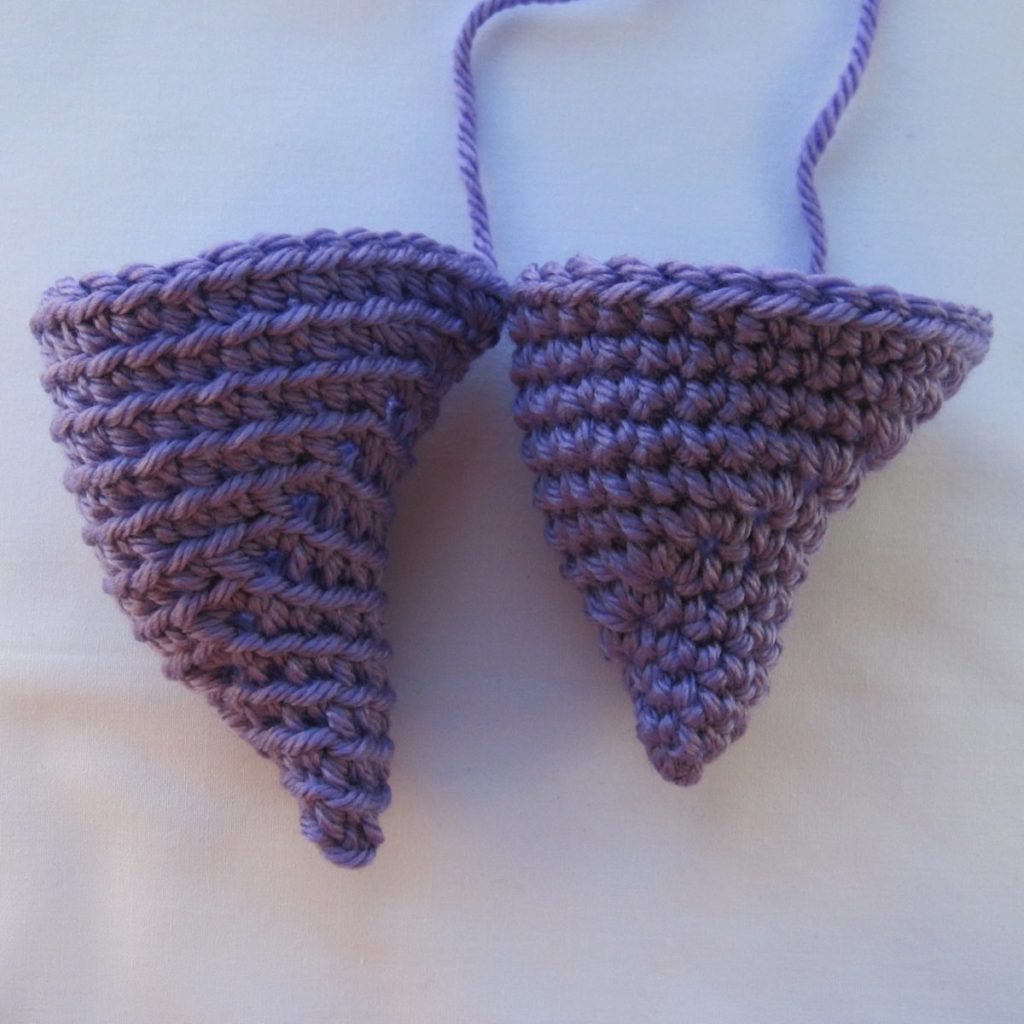
For reasons to be disclosed later, I made some cones stitching in back loops only from round 2 on. Crocheting in the back loop only gives a looser connection between rounds, so the resulting fabric is taller and more malleable than standard crochet fabric. The cones can be pulled up tall or mushed down.
Note that the difference is only in stitch height – the two blue cones fit the same base despite being quite different heights, and the purple twisty cones would too.
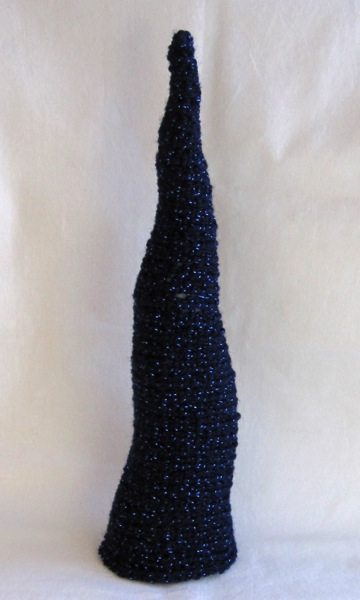
Finally, your trailer for next time. This lovely was made in back loops only, starting with 3 stitches in a magic ring, 2 added in the next round, and 1 added in each round after that – and each time I placed the increase in the stitch after the previous increase (so if the first round had an increase in stitch 1, the next had it in stitch 3, after that stitch 5, and so on). I made three blocks like that, which should have resulted in a 40-stitch final round by my calculation, but I had just 36, so I clearly missed some increasing. It’s still a lovely tall Seussian bit of landscape!
Your website is a treasure and a delight and I’m so happy to have found it. These technique pieces of yours are just what I’ve been looking for. My attempts at this are, ummm, not great. Thank you. I am a fan.
Thank you for the kind words! You are very welcome and please don’t hesitate to ask questions.
I am seriously So glad I find someone who explains this as deeply. I really want to design my own amigurumi, and I really had trouble understanding all this math. So – Thank you!!
I’m so glad it was helpful!
I might use this for a Longhorn cow’s horns. Been looking and looking and I’m not a designer.
Yeah, you’ll just have to experiment with how often to increase – I’d guess for that, only once every few rounds. You can shape to some extent by hand with stuffing, also, and back-loop-only crochet is more flexible than the usual method. Good luck!