I did several photo shoots, and while some refinement is in order (“systematic” is not my middle name), I was able to greatly improve my shots. Here is what worked for me and what didn’t.
The set-up: I had four yarn hippos: red, yellow, blue, and dark dusty purple. I tried many approaches to photographing them against a white paper background, both separately and together. Unless otherwise noted all light came from a large east-facing window.
The goal: Pure, featureless white background with good color and exposure of the hippos in front. I figure if you can accomplish THX 1138-style unbroken white, other pale backgrounds will be easy.
Vocabulary: I cropped basically everything below, even the shots labeled “unretouched,” but shots so labeled are otherwise as the camera uploaded them. I refer to a color or object “blowing out” to mean the situation where the bright parts are so bright that they’ve taken on an unnatural glow, and maybe even whited out.
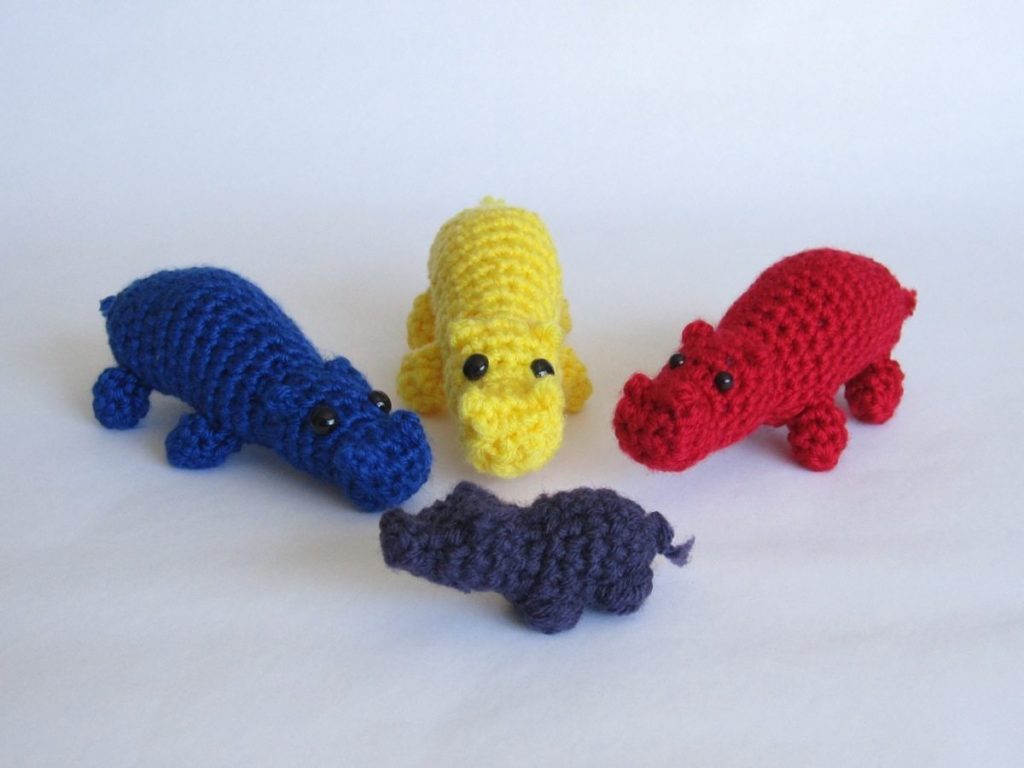
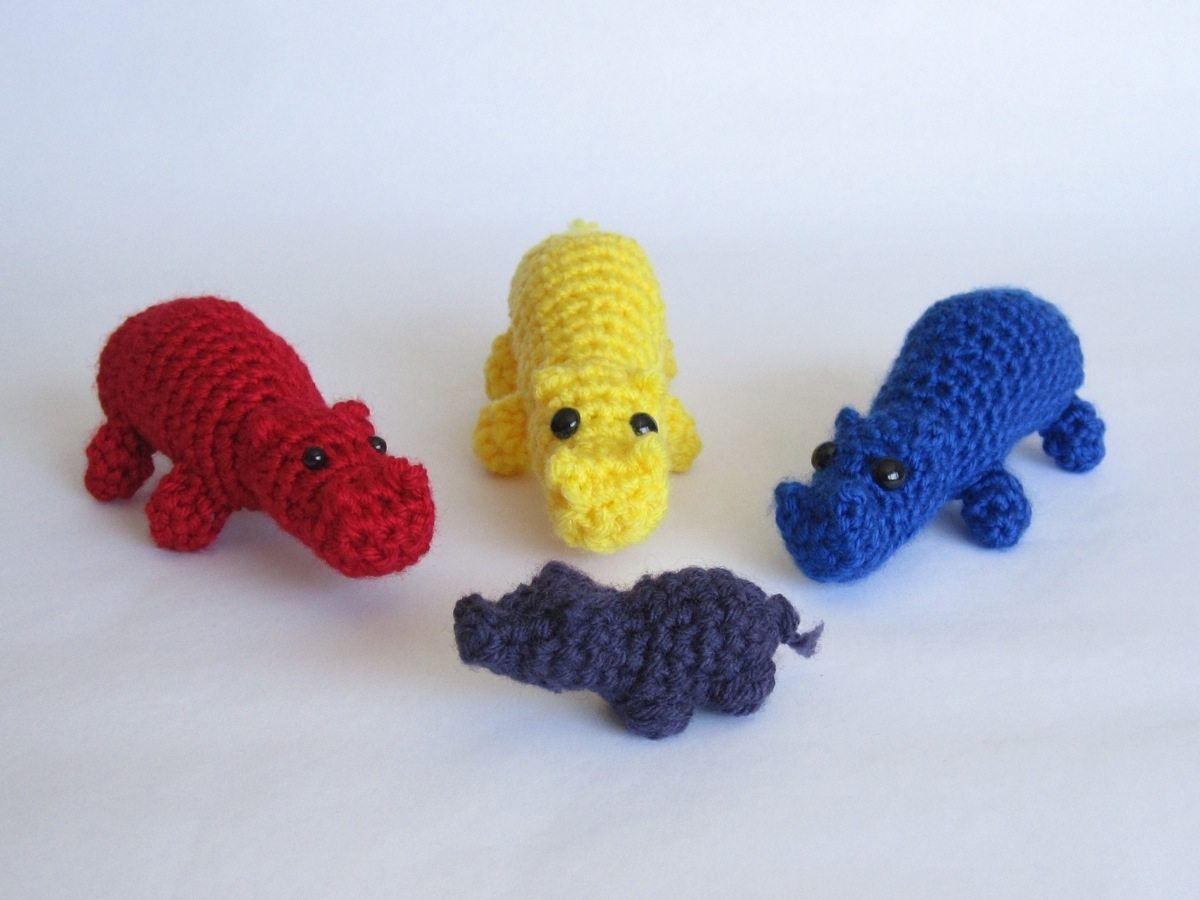
All Together:
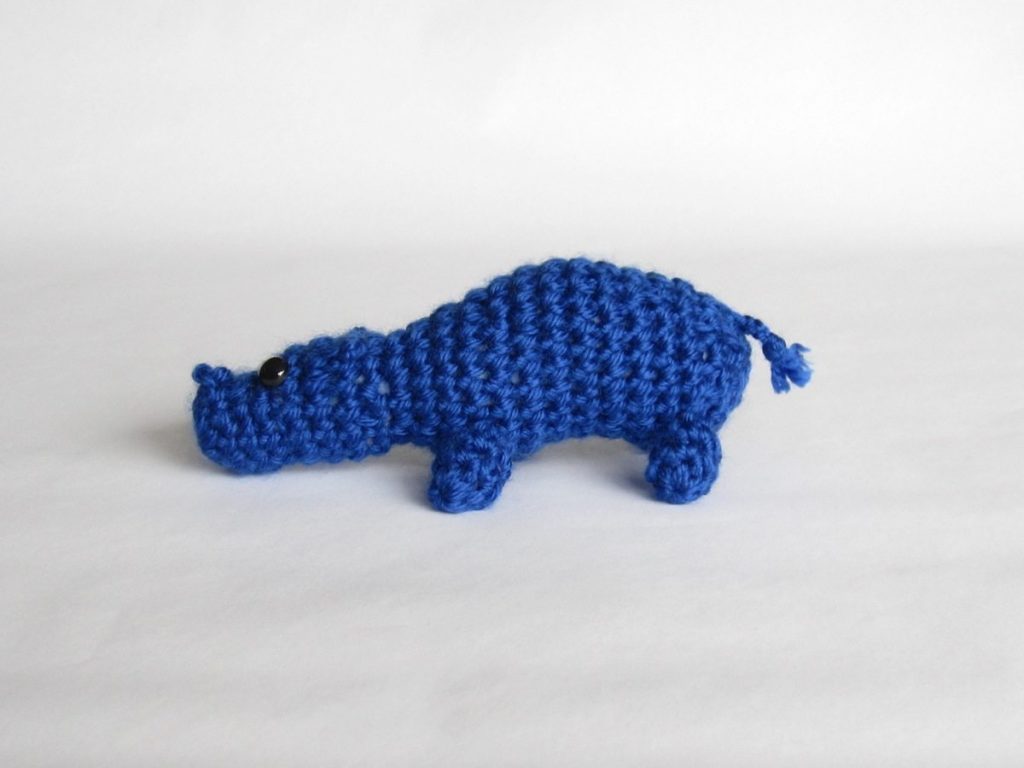
Position matters. Check out the difference between the unretouched photos below, both taken with the Cloudy setting, evaluative metering (iPhoto calls it pattern), +1 exposure, and 200 ISO (chosen by the camera), within two minutes of each other. The photo area is not square to the window; instead, if the center back of the photo is 12 o’clock, the windows are at 4:30 or 5:00. Putting the blue hippo in more light and the red one in less improved the exposure of both. Unfortunately, that’s about as bright as it gets without blowing out the yellow hippo – I can increase the exposure by about 0.1 in iPhoto.
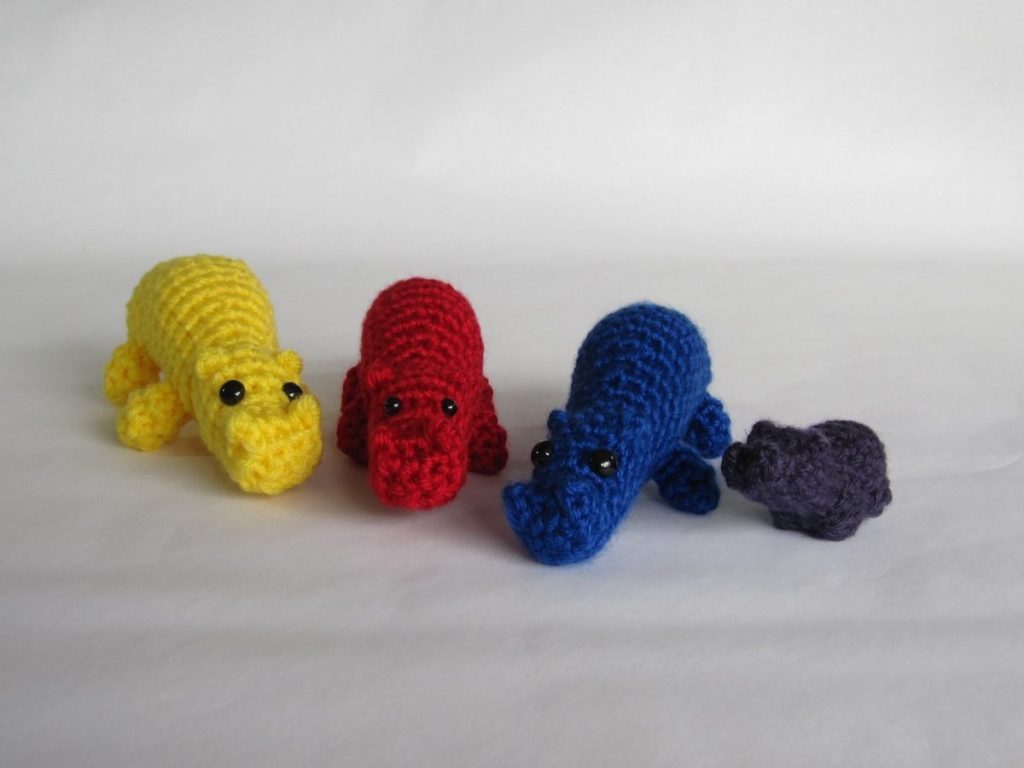
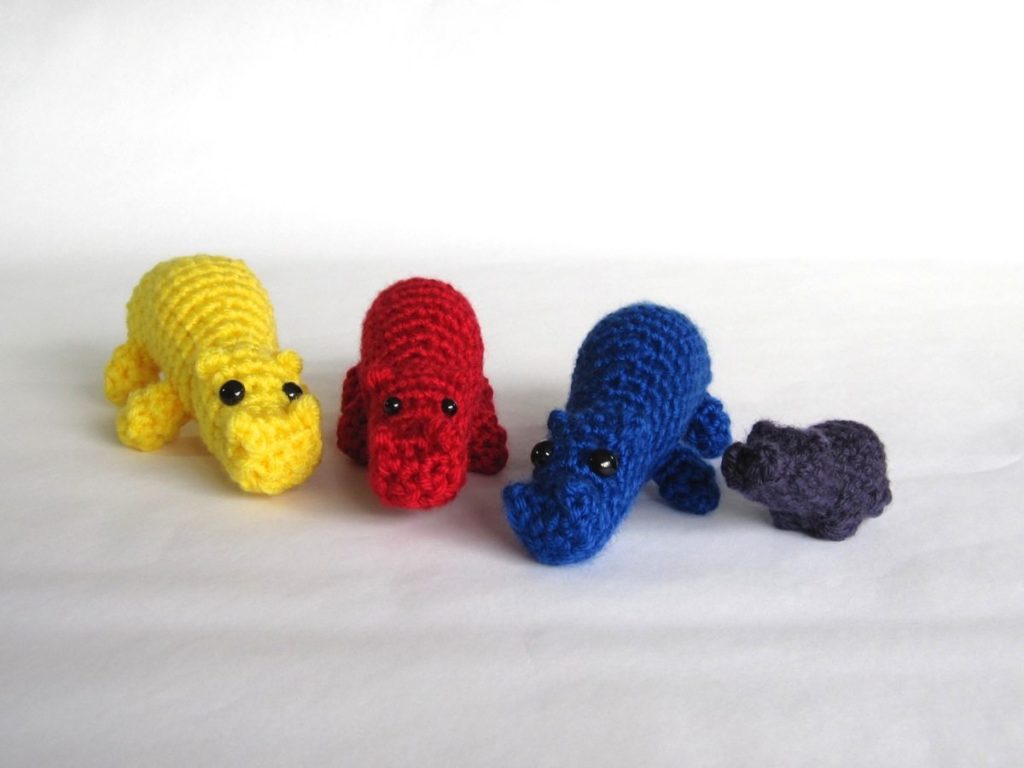
Backlighting seems to help. I wondered whether brightening the backdrop with my Ottlites (true color craft lights, chosen over my actual photography lights because of the smaller region of illumination) would help get a whiter background without blown-out yellow, and I think it did. It is difficult to compare to the shots above, which were taken on a different day. The photos below (unfortunately I forgot to get a comparison shot with the lights off) are the same shot, taken with the Cloudy setting and evaluative metering at +2/3 exposure, camera-chosen ISO of 80, one unretouched and the other with the exposure raised another 0.6 in iPhoto.
Singly:
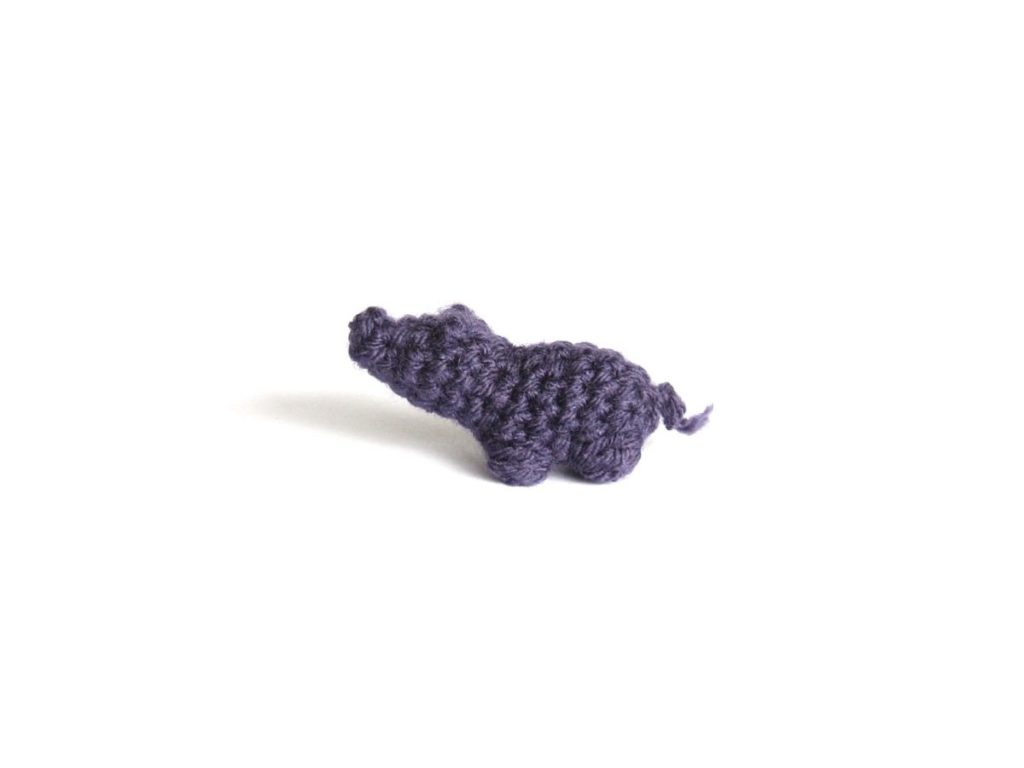
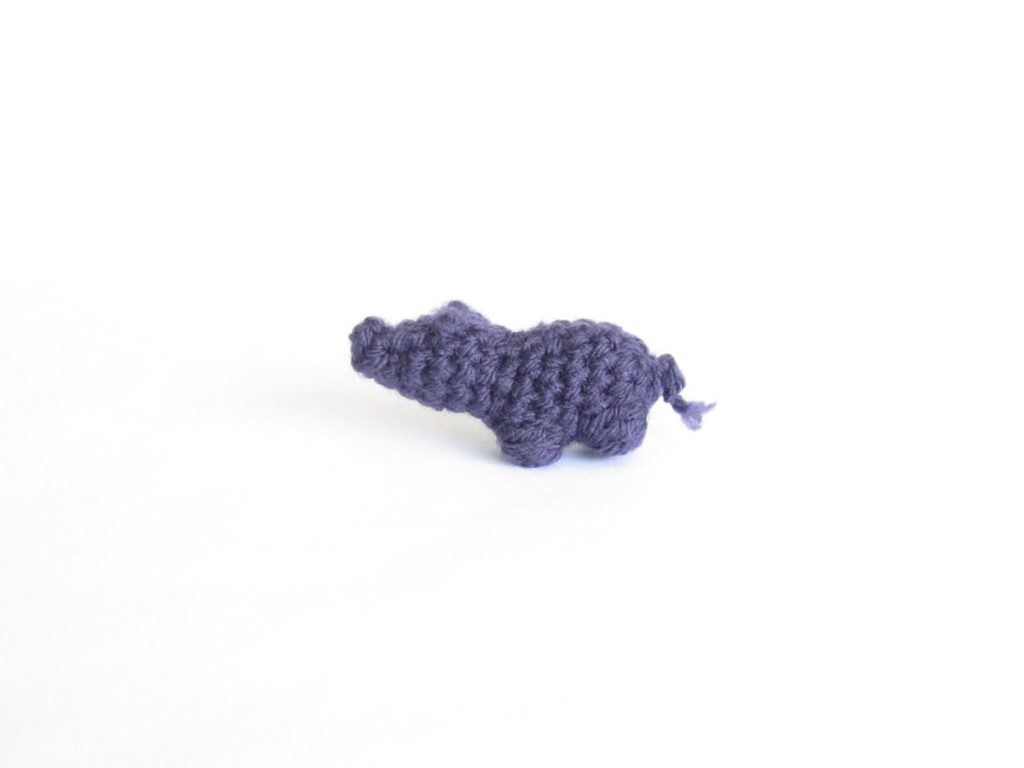
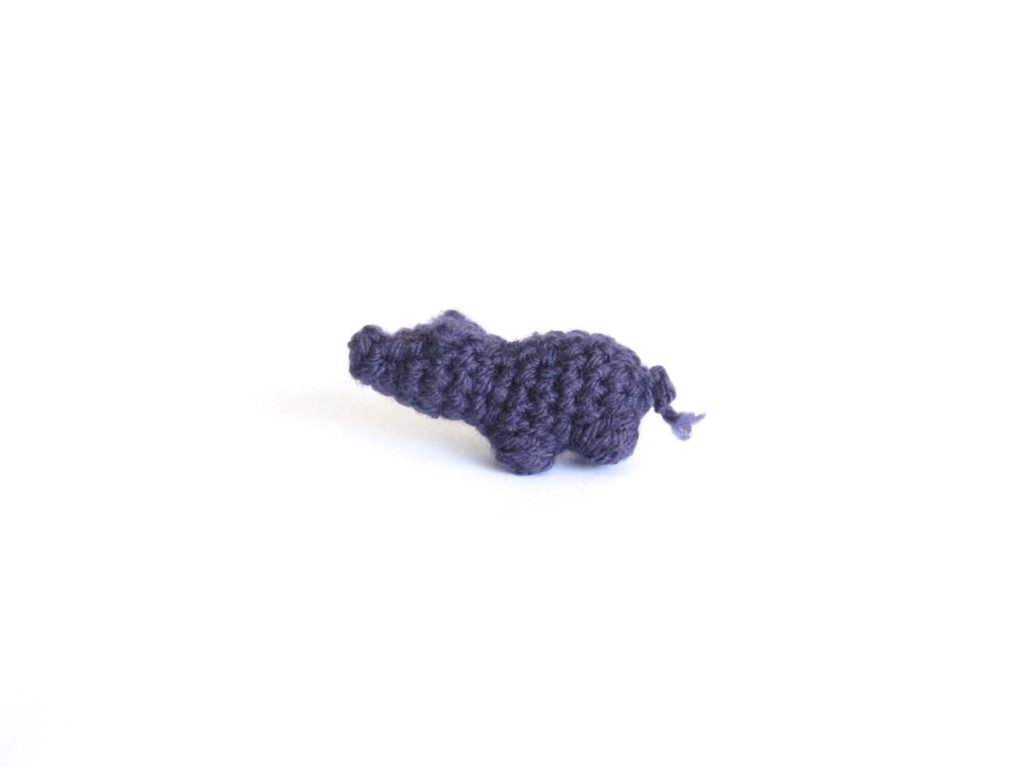
Dark on white is easy. I had good luck simply taking photos of the blue and purple hippos as I would usually: raise the exposure on the camera and crop it on the computer. The (unretouched) photos below were taken with the Cloudy white balance and evaluative metering. The blue one has exposure +1 1/3 and camera-selected ISO 100, and the purple has exposure +1 2/3 and ISO 125. Clearly I could have gone yet higher with the exposure of both.
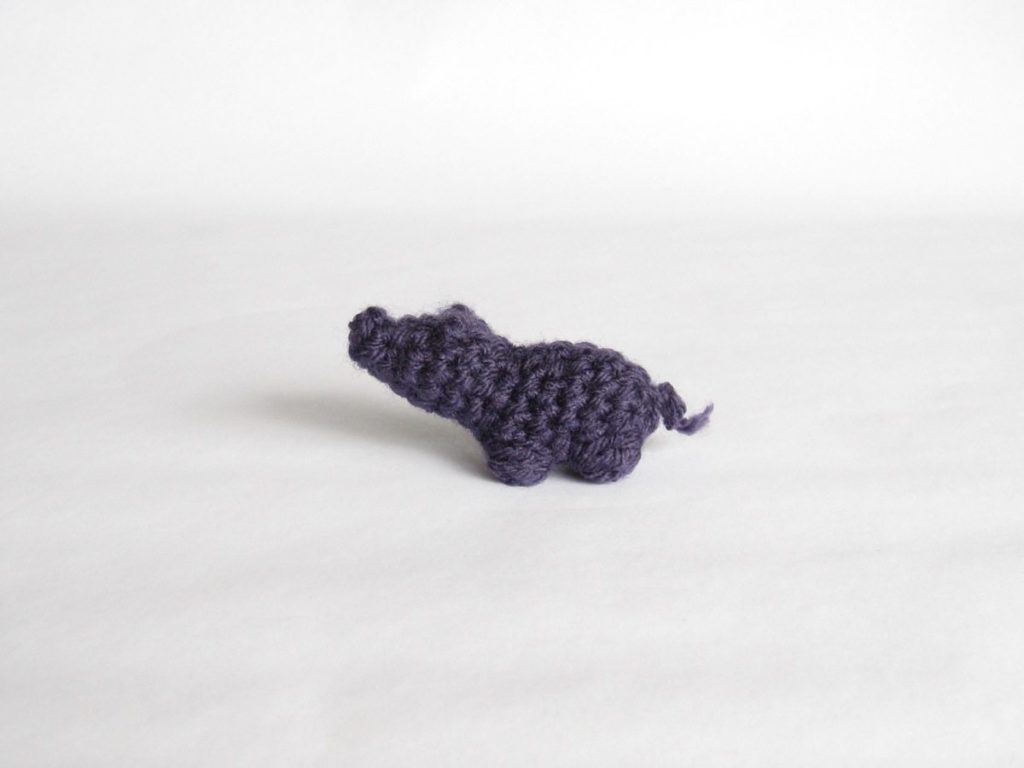
Here’s a brief comparison of some purple hippo photos (though they were not all taken on the same day, so a small grain of salt is in order; in particular, disregard the color differences). The first is the photo above with its exposure raised another 0.68 in iPhoto. The second is a photo taken with spot metering at +1 exposure and ISO 250; it is unretouched. The third is a photo taken with spot metering at +1/3 exposure and ISO 200 (it was taken immediately after the previous shot) with the exposure raised a further 0.46 in iPhoto.
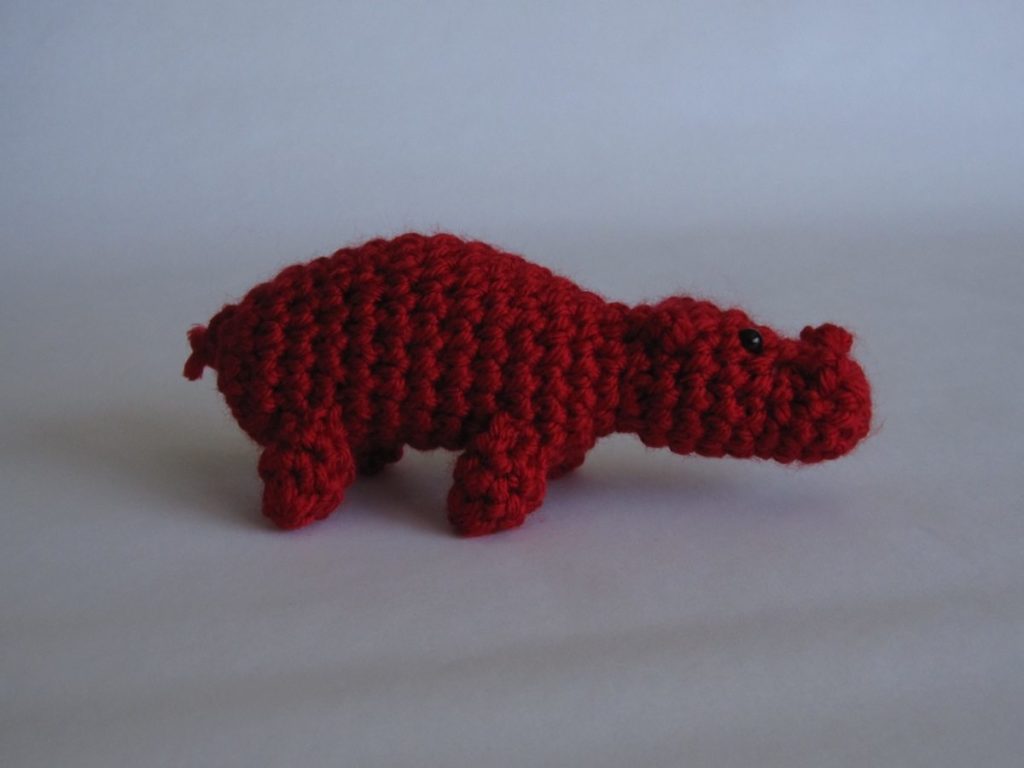
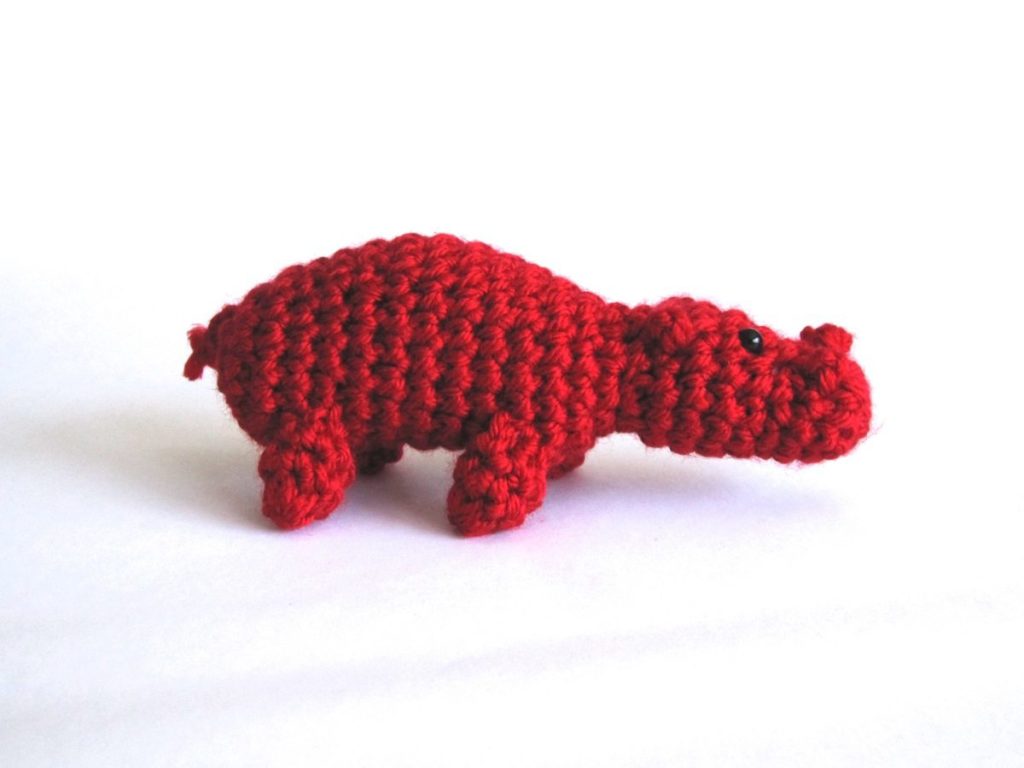
Underexposure helps red. This was my biggest takeaway of the whole experience, although it may not work as well with non-white backgrounds. The theory here is that only a quarter of the color sensors in your camera are for red, so when red is the predominant color the “correct” average exposure tends to blow out the red sensors while the other sensors are barely registering anything. Underexposure was advice I found in a photography forum; your software doesn’t have the physical limitations of the camera, and so when you increase the exposure digitally you don’t have the channel imbalance problem. This doesn’t really mesh with just how easily red blows out, but whether or not the theory is accurately expressed, the method is borderline miraculous. The photos below are the unretouched and retouched versions of a photo taken at -1/3 exposure with evaluative metering and Cloudy white balance, and ISO 80 assigned by the camera. Retouching consisted of raising the exposure until the red blew out and then lowering it again until just below that point, which was somewhere between 2.25 and 2.5 on the exposure slider.
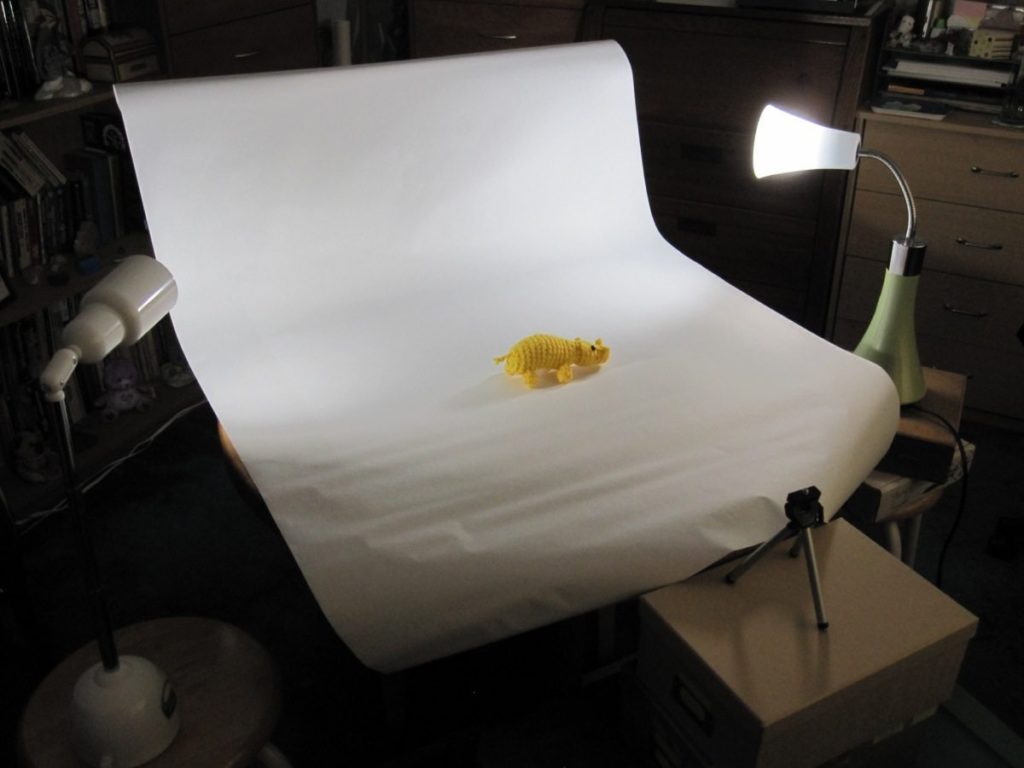
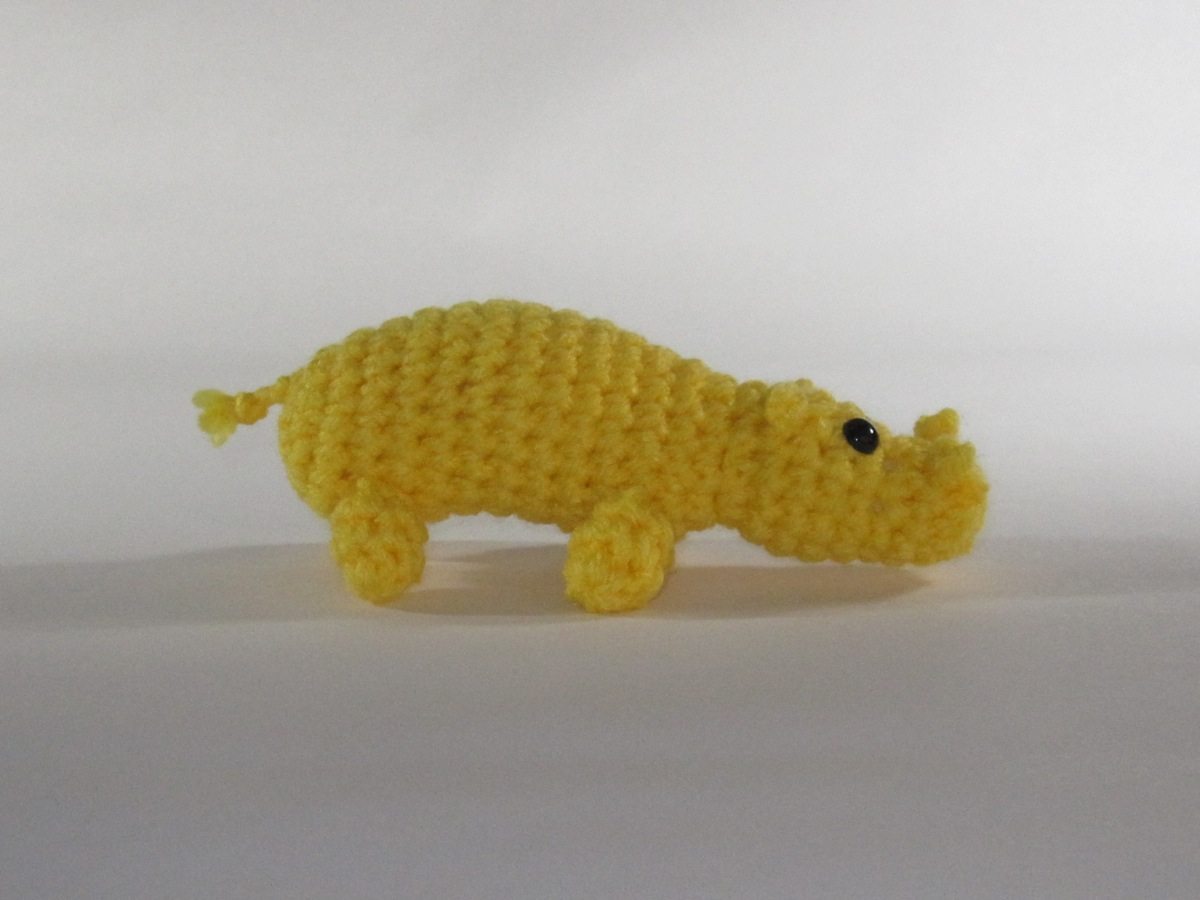
Backlit, underexposed Slow Synchro helps yellow. Here is the main point where more work is needed, but it is already much better than what I had before. There has always been a tight cap on the brightening I can do to a yellow-on-white photo because the yellow blows out so quickly, so the background is perpetually dim. This method uses my camera’s Slow Synchro flash setting, which is intended to photograph people outside at night, using the flash to brighten the foreground and a slow shutter to expose the background adequately. With the curtains closed and room light off, I set up my photo area with two Ottlites pointing at the backdrop and the yellow hippo at the front edge of the pool of light. I angled the lights to get as little shadow under the hippo as possible, which was still quite a bit of shadow, but an item that was not so broad and low would be easier. I used the tripod but in “real” photos would also use the timer to avoid camera shake, because the slow shutter makes it very easy to fuzz the details. My setup is shown below.
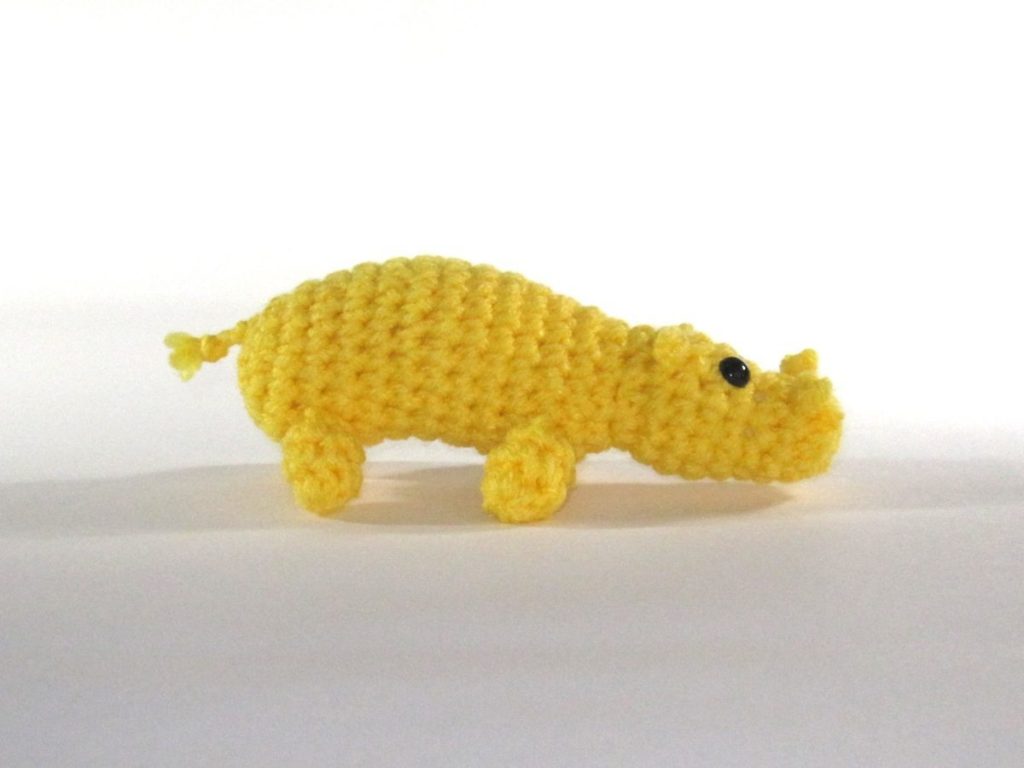
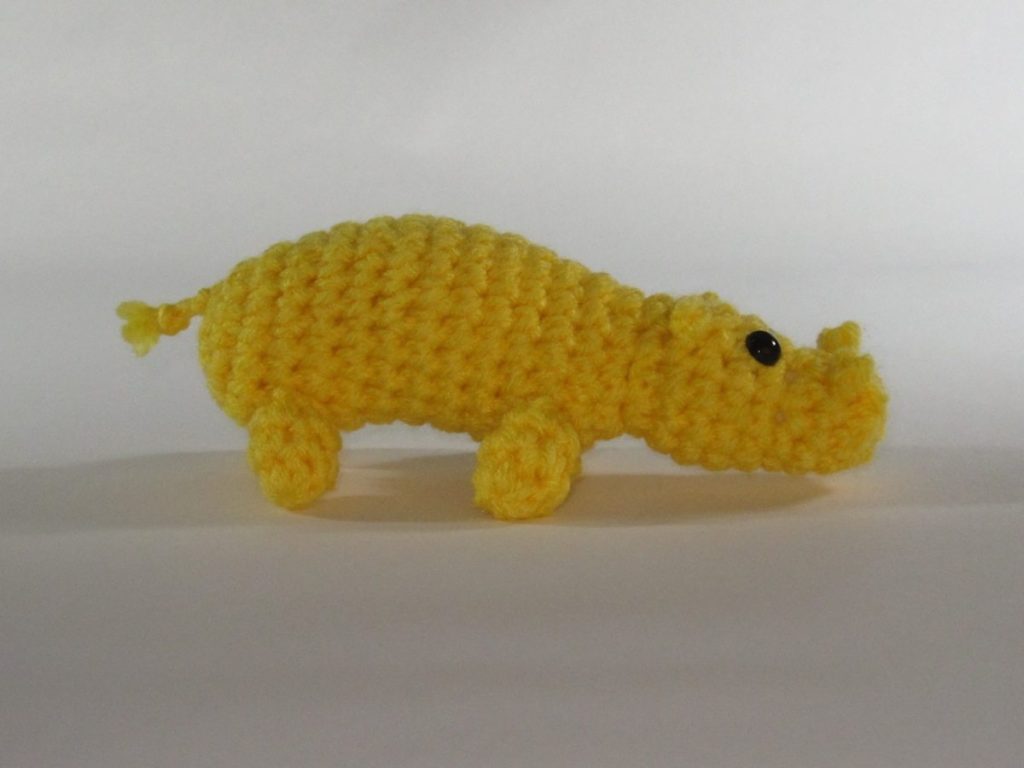
Some experimentation showed that the camera’s exposure setting didn’t affect the brightness of the background very much, so I decided to underexpose the shot and brighten it in iPhoto. I could probably have gone lower, but I took the shots at -2/3. The white balance was set to Fluorescent, metering to evaluative, and the camera chose ISO 160. Below are the unretouched shot and the version where I raised the exposure another 1 stop.
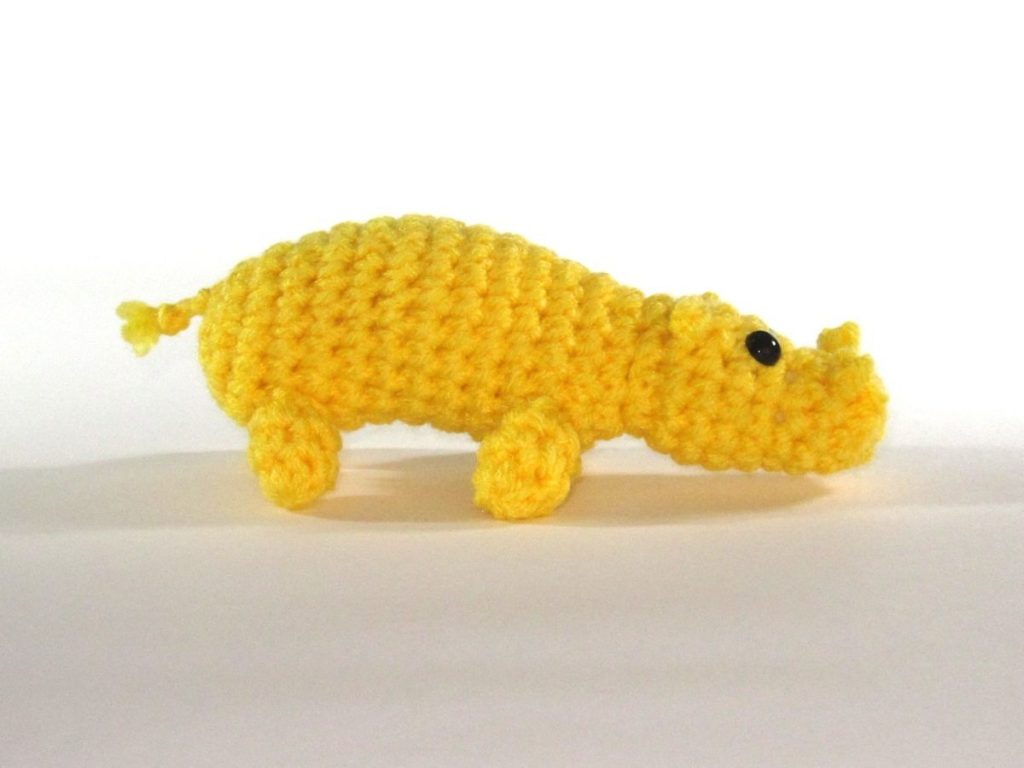
Now, flash gets a lot of flack for being too harsh and bright. I tried again with two layers of milk jug plastic over my flash. Each was a rectangle folded the long way into a tent; one was larger than the other so they did not touch except where they met the camera. They were taped on with ordinary clear tape, carefully avoiding the camera’s autofocus beam. I don’t know whether it was the filter, coincidence, or the slightly tighter crop, but I was able to raise the exposure in iPhoto by 1.3 with this one.
Aside from the shadows, the point where more refinement is needed is the gray region in the foreground. I may need to construct a sort of stairstep of background paper, with the hippo on the edge of the cliff, so the flash could do a better job illuminating the foreground paper. This may require the ironing board, a la the Ami Folklore setup shown in the original photograph post. Having a larger, further-away background might reduce the shadow problem as well. Another thing that might help is a more downward angle: extend the legs of the tripod and tilt the camera so the flash is directed more flatly at the paper. Of course that would make it a different photo.
Things that didn’t help:
Green with red. At least not in the quantity I used, which was a tangle of green ribbon. The exposure of the red hippo was identical with and without the ribbon. When I stop to think about it, though, it would be surprising if it helped, since some of the requests for help I found online were from people photographing red flowers on green bushes.
Beach and Snow settings. In hindsight this is obvious, since they want to take down the brightness of the background so the photo isn’t a big glare.
Spot metering. For yellow and red it did nothing, and for the darker hippos evaluative metering produces just as good results for the same amount of work.
Night Snapshot setting. I tried this with the backlit yellow hippo, both with and without the flash, and it didn’t do a lot. It might be useful to try a flash with backlighting even if you don’t have Slow Synchro, and in that case you may want to use this for the color balance, but I’m not certain it buys you anything over the Program setting even in that arena.
My color cards. I have two index cards on which I painted large blocks of color. One is black and white and the other black, white, red, and blue. Knowing what I know now I would make one with green (with or without black, white, and blue) and see if the red hippo could benefit, but as-is (and most likely even with green) they do nothing for any of the hippos, whether removed between focusing and shooting or left in.
A few references:
I found the blog small object photography helpful, though it appears to be defunct. Two posts that are particularly relevant are on custom white balance (if none of your lighting settings are getting it right) and exposure compensation. Though there was never a follow-up post, Etsy Italia has a nice explanation of the difficulty of photographing red with ideas for mitigating it.
A note on the ‘1’ in the title: Eventually there will be a follow-up with a black background, which was trickier – and less important to me – for the darker hippos than white was for the yellow hippo. If I have enough to say to merit an additional post about white backgrounds, I’ll do that too. There may also be later parts on different aspects of photography, but they are far off.