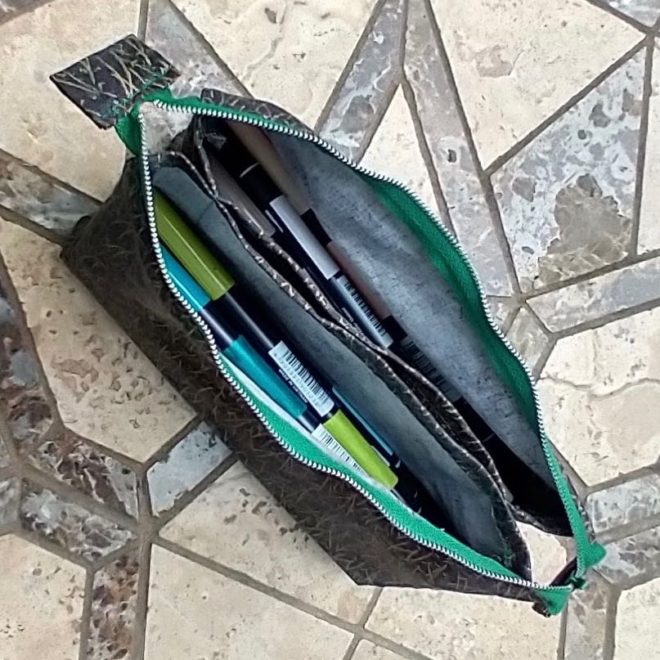
Since early 2020 I’ve made at least 5 zippered pouches, both double and single pocket varieties. The process has been evolving and streamlining and is finally ready for a tutorial (for you – and for me, three years from now when I finally need another one!).

Two of the fundamental construction ideas for this pouch came from So Sew Easy: the accordion-fold corner boxing method, and side tapering. I’m somewhat amazed that, in my decades of sewing, I only first encountered the accordion-fold method a year and a half ago.
I’m going to give the directions for the exact bag I made most recently, then some tweaks and variations for it, and finally the calculations you’ll need if you want to make your own custom size.
There are photos below from both of the two most recent bags I’ve made. I tried to pick the ones with the clearest demonstrations.
Sewing instructions
You’ll need lightweight upholstery fabric or something like canvas or duck, and a zipper that is at least 11″ long. Make sure the fabric is something your machine can sew through four layers of. This is a great remnant project.
- Fabric preparation
Cut 2 pieces of fabric, each 11 1/4″ by 13″. The 11 1/4″ edges will be at the opening of the bag. Zigzag the edges of the fabrics.
Fold each piece of fabric in half, wrong sides together, to make 11 1/4″ by 6 1/2″ rectangles. Pin near the fold, with your pins parallel to it.
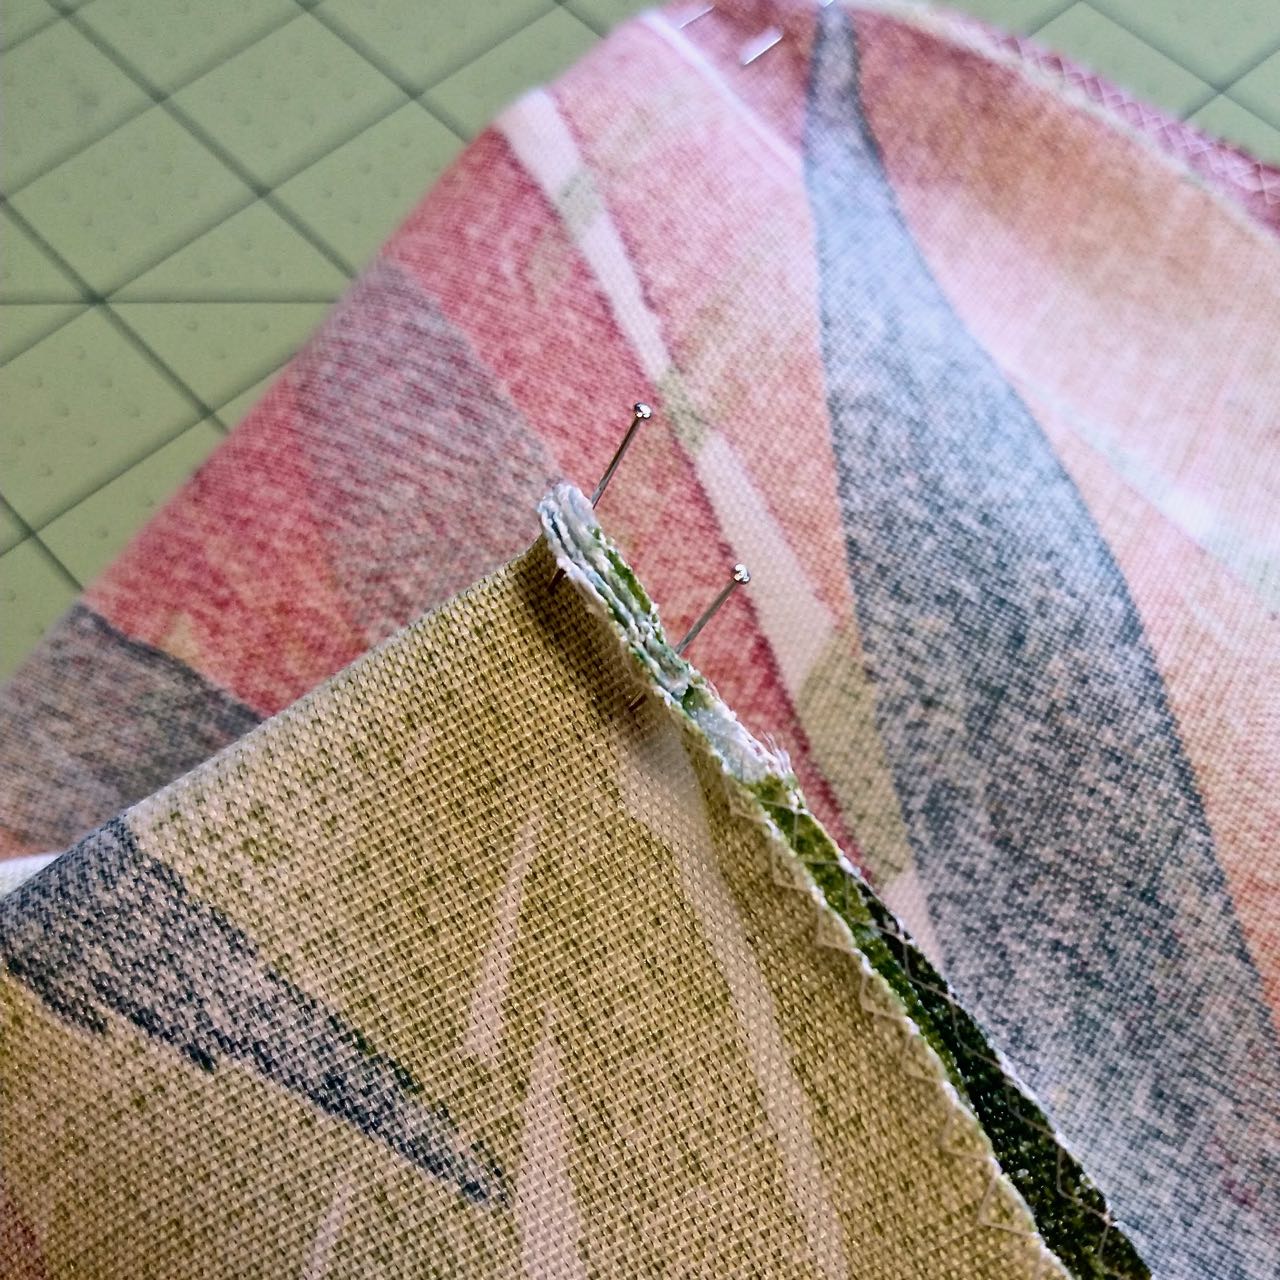
Now fold the loose sides of the fabric back up, resulting in a piece that is mostly right sides together but with a little accordion fold at the bottom. The original fold and the new ones should be 5/8″ apart, and the edges of the fabric should all line up together. Pin all along the edge; press the fold if desired (not shown). If this description and the photos are not clear, refer to Sew So Easy’s video.

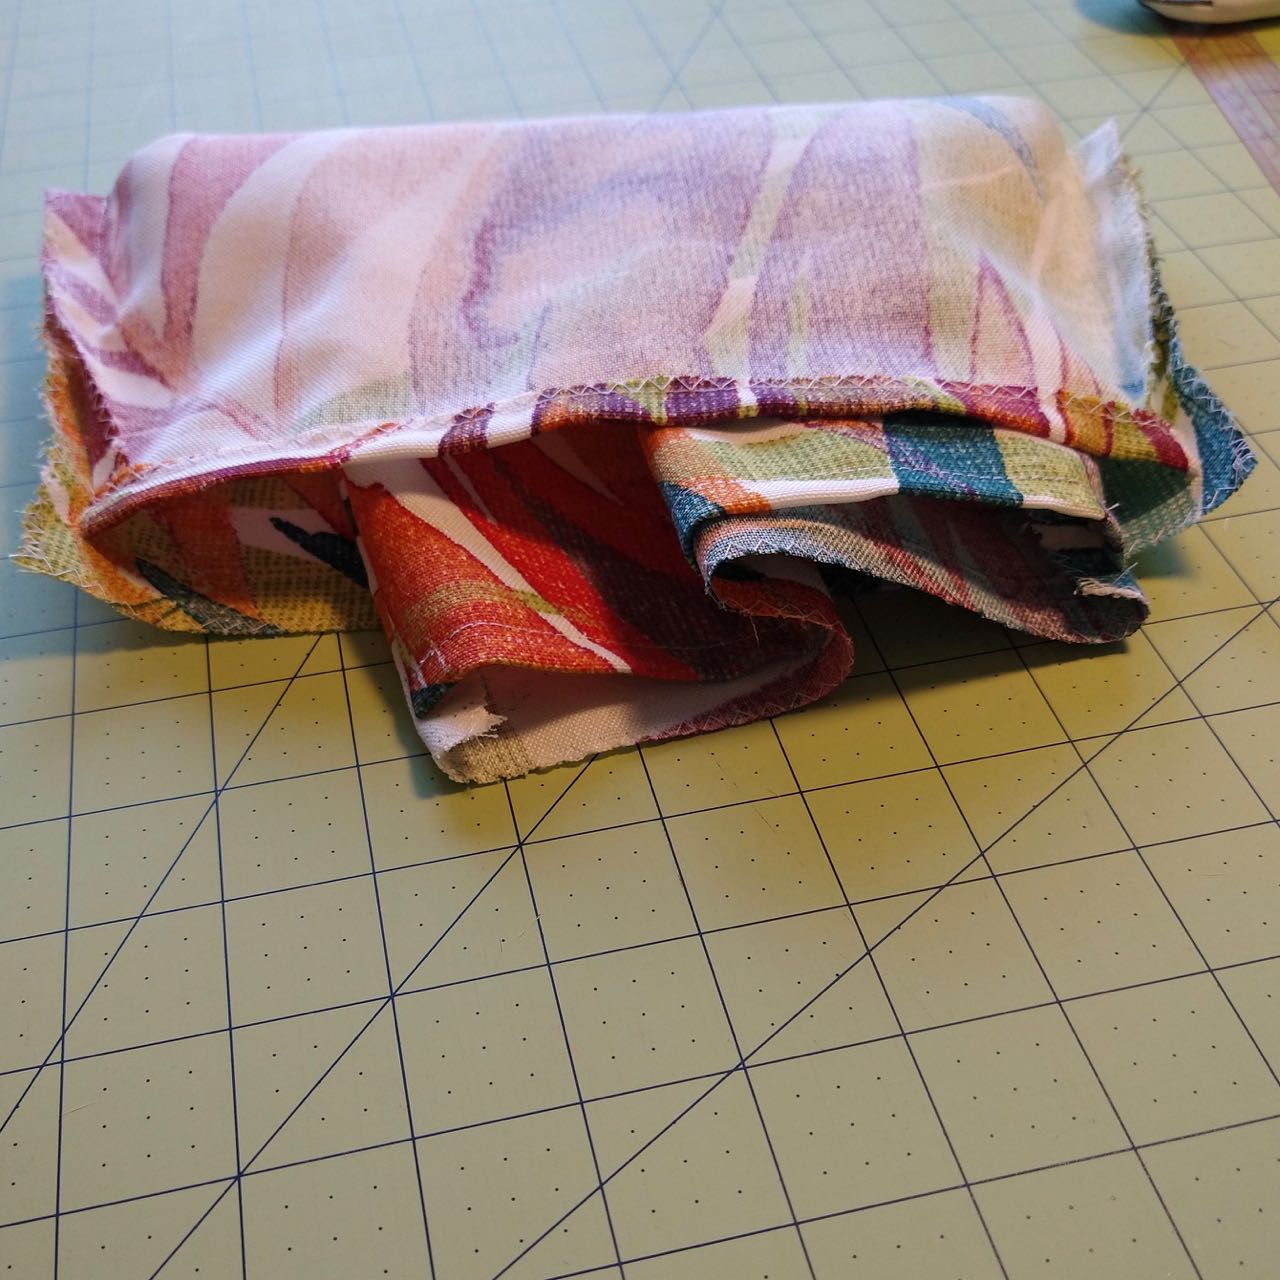
Closeup of pleat 
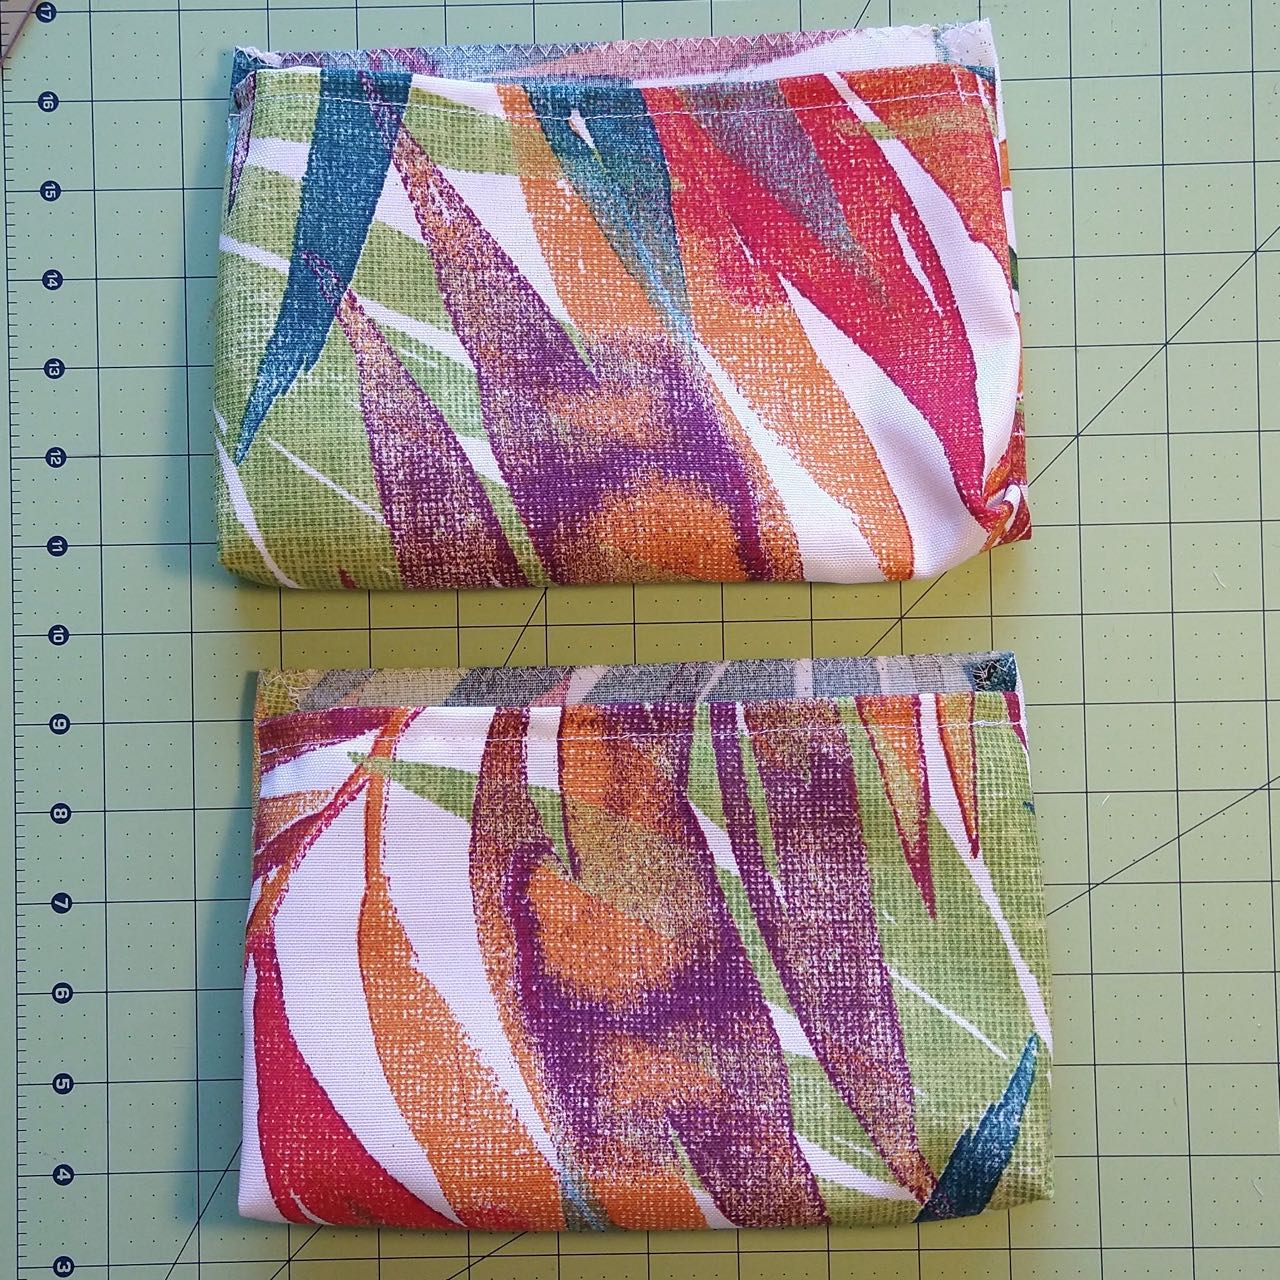
Sewn pouches showing pleat folds at bottom

- Sewing individual pouches
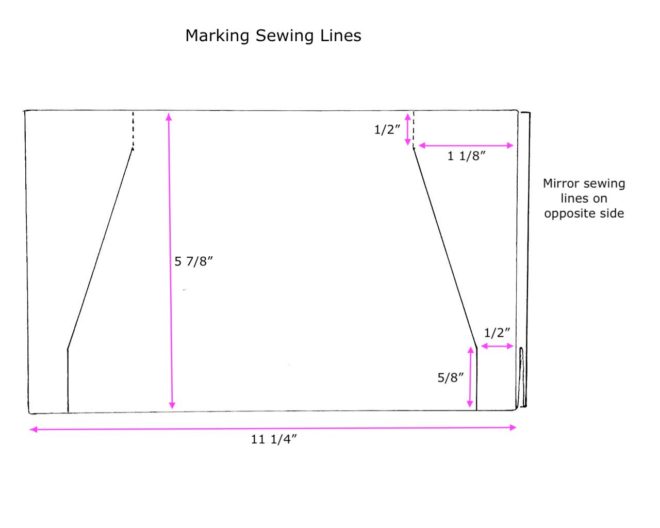
Mark your sewing lines: you will be sewing straight up from the bottom for 5/8″, with a 1/2″ seam allowance, and then diagonally to a point 1/2″ down from the open edge and 1 1/8″ in from the side. The top 1/2″ will be open. Sew all four seams (either direction; I don’t mean to imply they have to come up from the base).
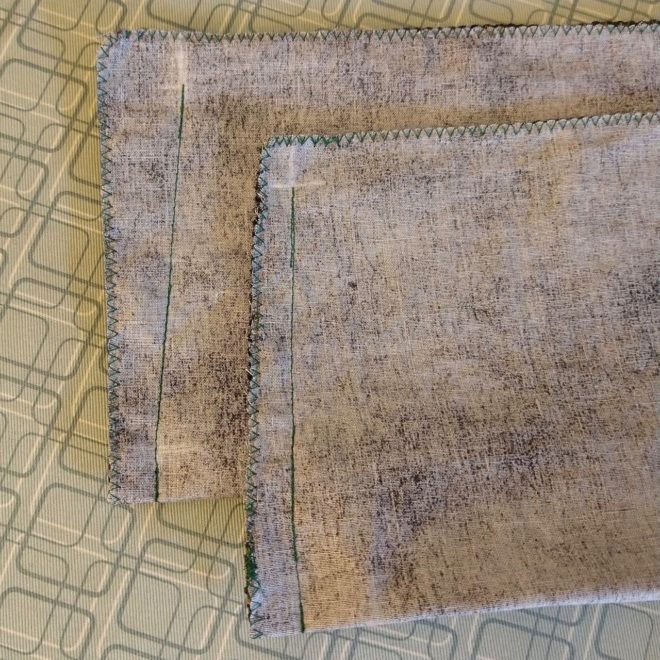
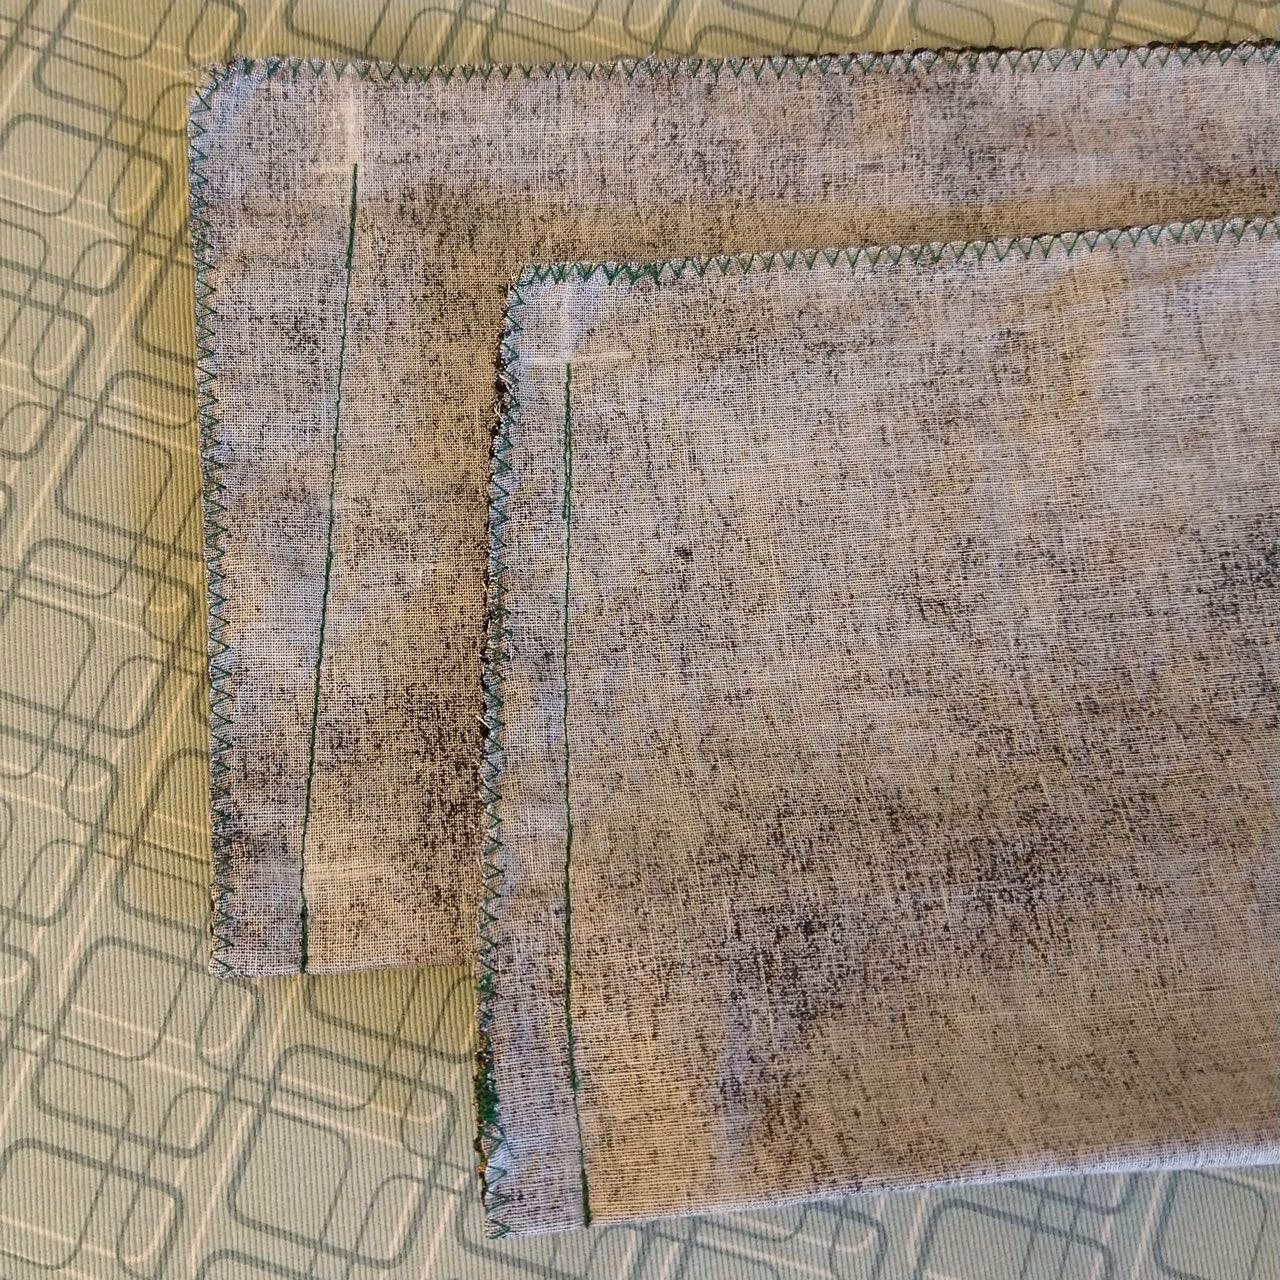
Sewn seams: one trimmed and re-zigzagged, one not.
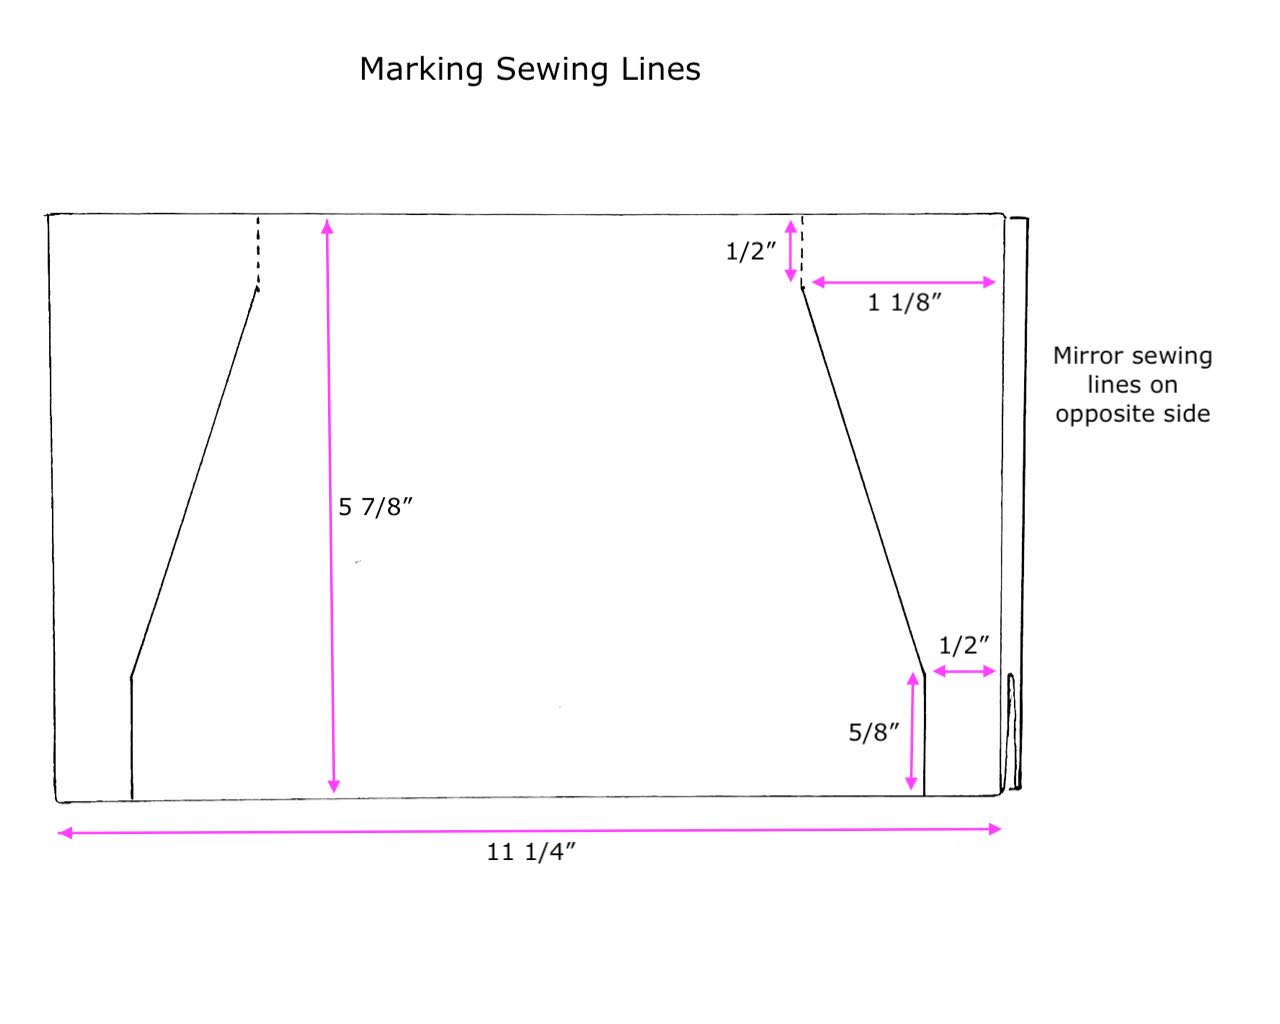
Why not sew a diagonal line all the way from top to bottom? The opening at the top is needed for zipper installation, and sewing diagonally through the accordion fold will cause the gusset triangle to pucker in the finished bag. (I tried it! Passing the savings on to you.)
Trim the seam allowance on each side and zigzag the new raw edge. Press seam allowances open near top; finger-pressing will do.
- Connecting pouches
You now have two individual pouches. Turn each one right-side-out and choose which side will show, and which will be hidden against the other pouch. Hem the hidden sides: fold the raw edge down 1/2″ to the wrong side, with side seam allowances open so they are enclosed in the hem, and sew to secure.
Turn one bag inside-out again and nest them, right sides together. I find it easiest to slide one bag into the other if I pleat it in the middle to make it narrower, then spread it back out again once it’s mostly inside. Pin the hemmed edges together and mark the sewing lines for the pocket: the vertical seams are 4″ long and 2″ in from the side seams at the edge; then connected at the bottom with a horizontal seam. Sew.
Pull the inner bag out and turn the whole thing right-side-out. You should have 2 pouches connected in the middle via sewing that creates a flat pocket, with a raw (well, zigzagged) edge on each outer side.
- Zipper installation
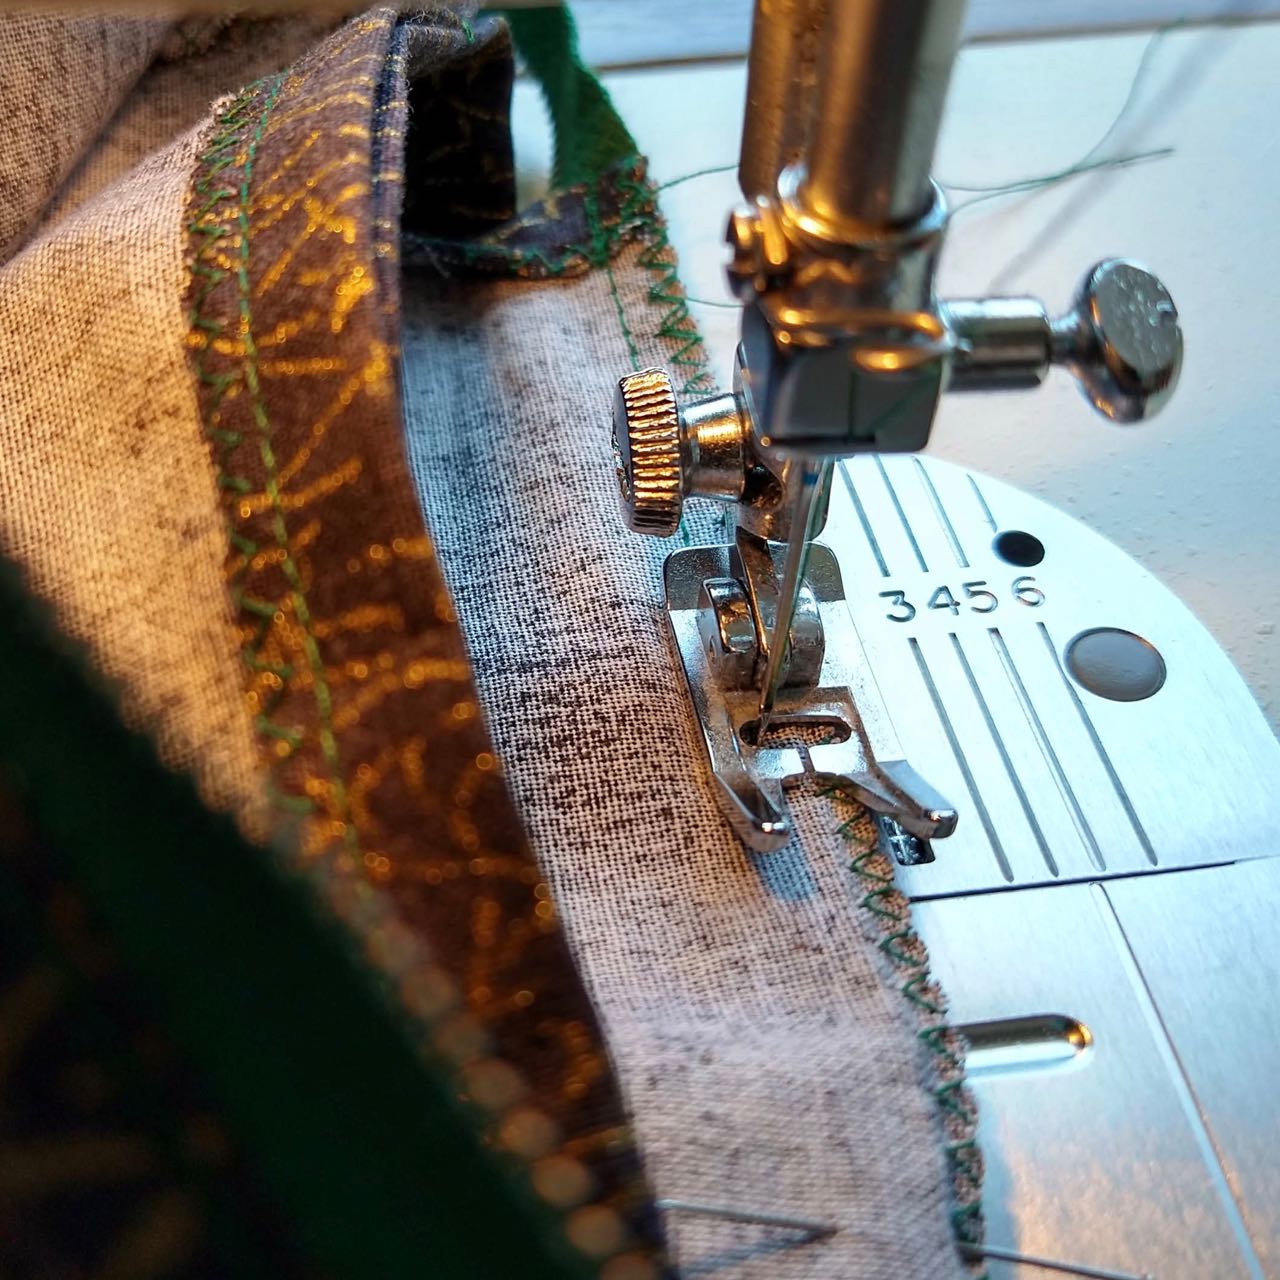
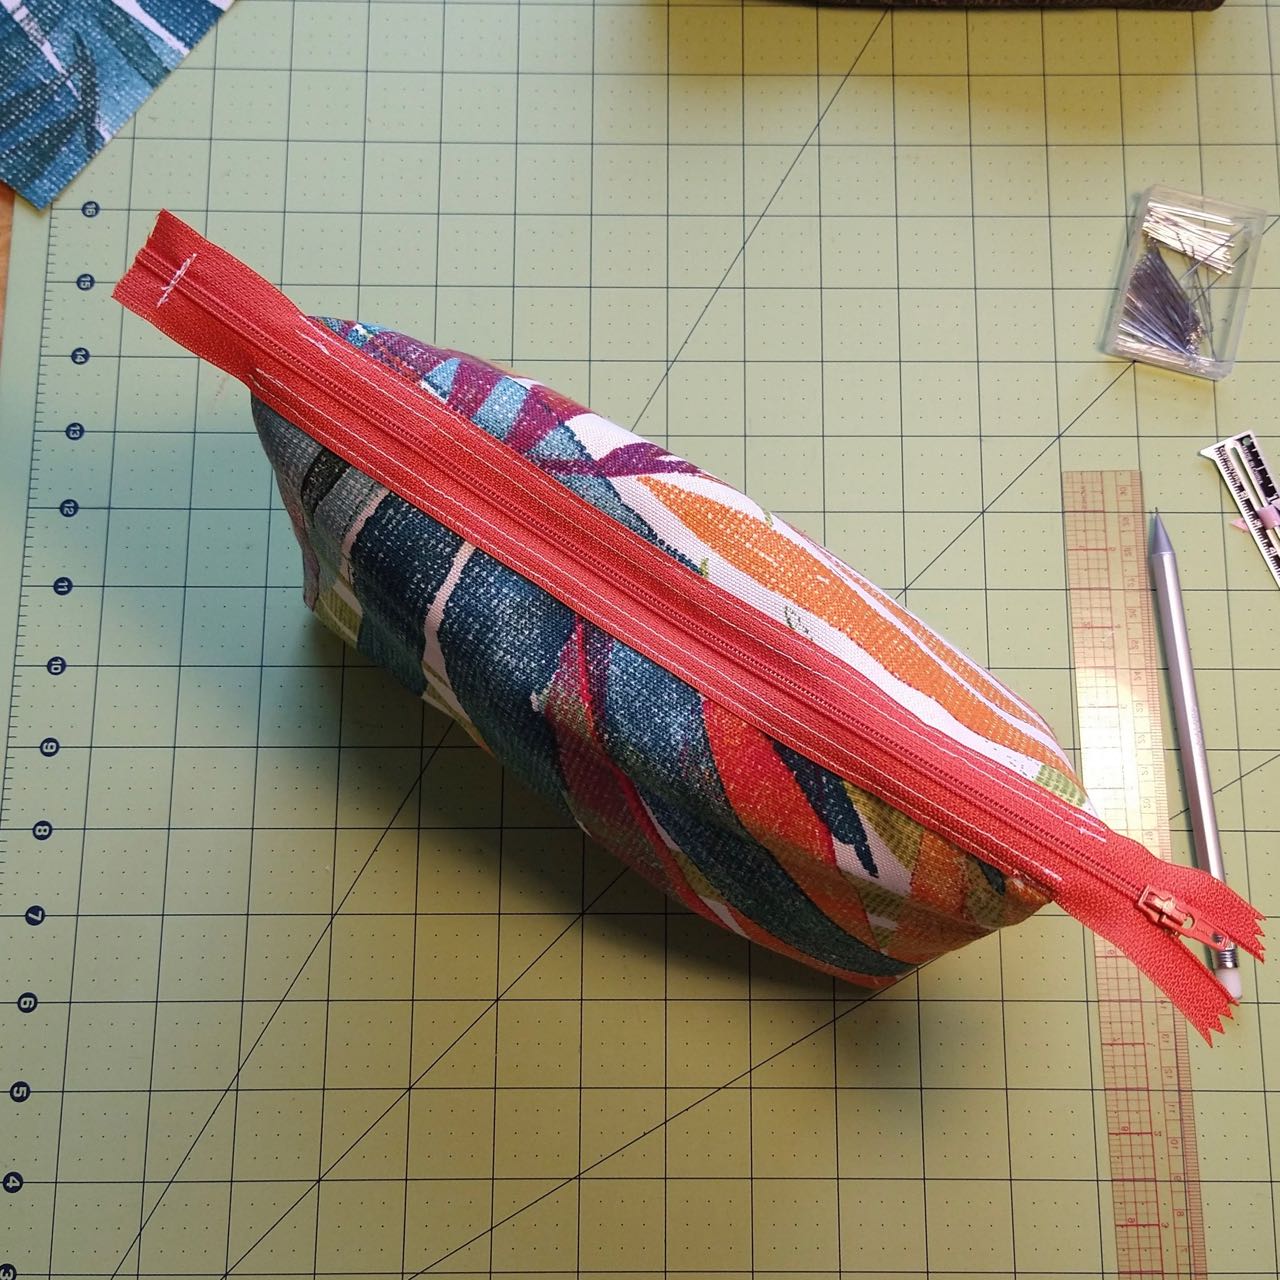
Line up the zipper so the top zipper stops are 1″ outside the side of the bag; any excess zipper length should be at the bottom end. Pin the zipper to one bag opening, wrong sides together, with the edge of the fabric lined up to the edge of the zipper tape. Keep the side seam allowances open so they get tacked down. Sew down the center of the tape. I typically use a standard sewing machine foot bumped up against the zipper teeth, with the needle moved toward the zipper teeth.
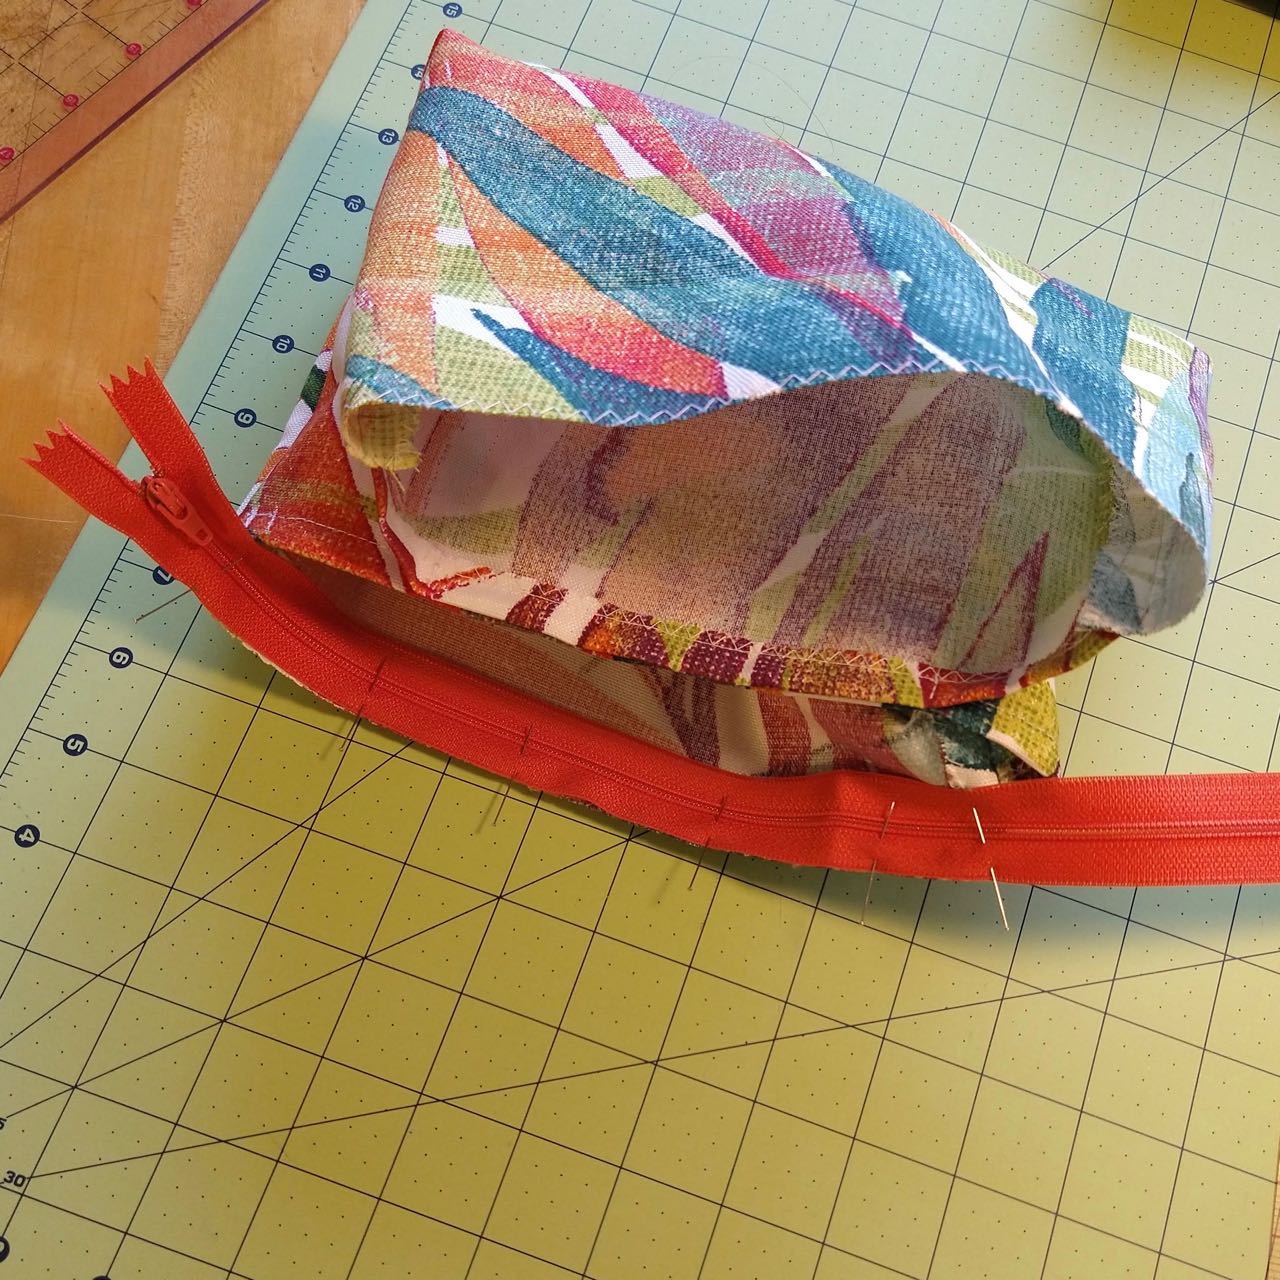
With the zipper closed, line up the other fabric edge and pin the zipper at one end (either one). Open the zipper and pin the rest, sewing the way you did the first side. If you zip the zipper at this point it forms a sort of trough between the sides of the bag, when the edges of the fabric point upward.
Trim the fabric edges as needed so they won’t protrude past the zipper tape, and fold the zipper to the outside of the bag. Make the fold in the fabric tight. Sew near the edge of the zipper tape to secure.
- Finishing
Shorten the bottom end of the zipper if needed: sew across it a couple of times, a little more than an inch away from the bag side seam, and trim the extra length past your stitching (shown in previous picture).
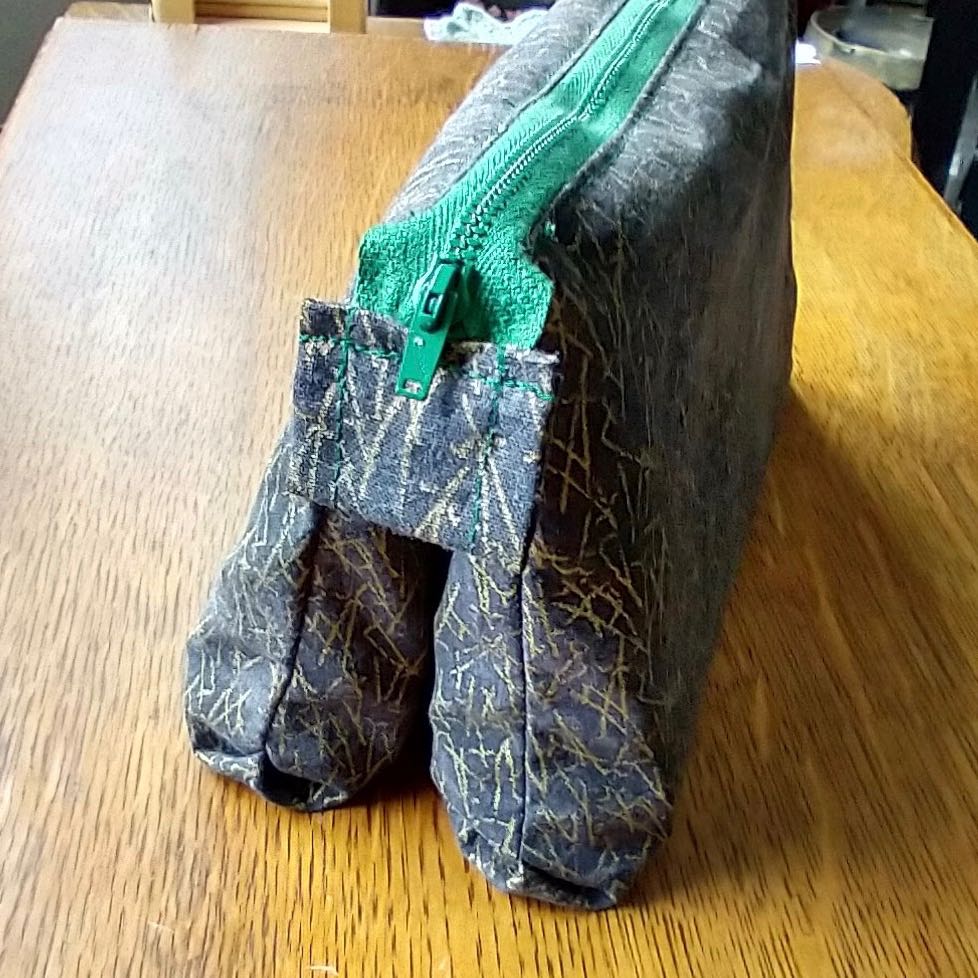
Cover the raw end with a fabric tab: begin with a piece of fabric that was 1.5″ by 3″. Fold the long edges in by 1/4″ and then the short edges in by 1/2″, and fold the whole thing in half to make a 1″ square. Sandwich the end of the zipper inside so that your zipper-shortening stitching is hidden, and topstitch as close to the edge as possible on the non-fold sides.
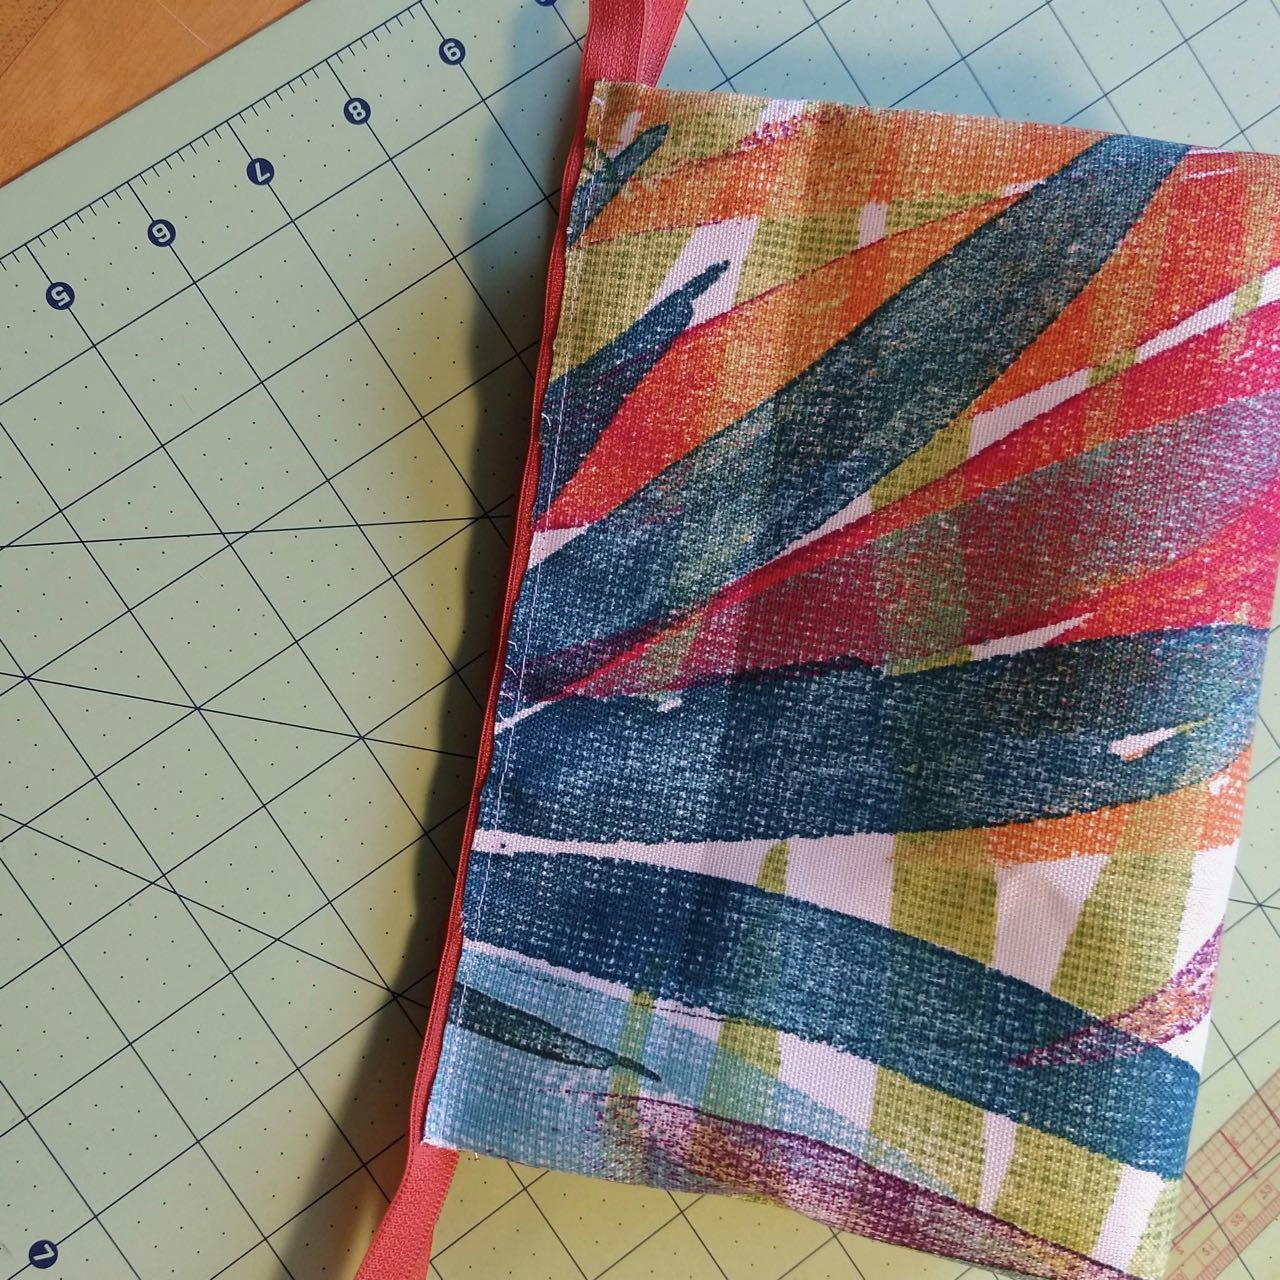
(I make tabs slightly differently each time, and the one on the orange zipper is probably the tidiest one I’ve ever made! A wider tab on the green zipper shown for comparison – that kind is easier to put on the open end of a zipper.)

To fully match my bag, you’ll need a decorative bead zipper pull. I used three beads threaded on a head pin, with a lobster clasp attached via a wire-wrapped loop (not a good one, I didn’t leave an actual stem to wrap around). I added the clasp to the loop after shaping it and before wrapping the wire. Not my area of instructional expertise, so here are written instructions from Goody Beads and a video tutorial from Beadaholique.
Quick tweaks for your bag
- If you need to piece your fabric, cut 4 pieces of fabric each 11 1/4″ by 7″, and zigzag all four. Sew pairs together along long edges at 1/2″ so you end up with two 11 1/4″ by 13″ pieces with a seam down the center. Press the seam allowances open. Note that you’ll be sewing through SIX layers of fabric at the accordion fold in this case.
- In step 4, you could line up the zipper tape so it extends 1/8″ out from the edge of the fabric, and then not need to trim your fabric.
- Often I also add a tab to the open zipper end in step 5. It increases the symmetry and gives you something easier to hold on to when opening the pouch. This is done in the same way, although working with the open zipper end is a bit fussier. I was ready to be done at that point, though, so I didn’t add one to this bag (but I did save a bit of fabric in the inner pocket in case I change my mind later). If you don’t need to shorten your zipper you can also skip fabric tabs entirely, which is seen in two of the five bags at the head of the post.
Variations
- Zipper tape to inside of bag: If you would rather have the zipper tape to the inside of the fabric, keep the two bags nested after step 3. The right sides of the unfinished edges of the bags will be facing each other. Line up and pin the zipper similarly to step 4, except right side of zipper to right side of fabric. Sew down the center of the zipper tape on both sides, then turn the whole bag right-side-out and topstitch through the fabric and zipper tape to secure. For tape-to-inside zippers I prefer to topstitch very close to the fabric fold instead of near the edge of the zipper tape (I bump the regular sewing machine foot against the zipper teeth with the needle centered), but it is a matter of taste.
- Single pocket pouch: It you only want one pocket, cut only one piece of fabric, and skip step 3 entirely. Install the zipper with the bag right-side-out to have the zipper tape show, and with the bag inside-out to have the tape (somewhat) hidden. If you have directional fabric you may want to piece, as in the first tweak above, regardless of how much fabric you have to work with.
- Lined pouch: I have not made a properly lined bag, just one where two layers of fabric were treated as one. If I were to try it, I would start exactly the same way but with 4 pieces of fabric instead of 2, and without zigzagging anything. After constructing the individual pouches I would connect lining to outer fabric of each pouch in place of hemming the hidden side of each pouch in step 3: put lining inside outer (or vice-versa), right sides together, and sew along that edge at 1/2″, with the side seam allowances open so they’re caught in the sewing. Turn the whole thing right-side-out so the lining is nested inside the outer fabric, wrong sides together. Get your seam allowances and so forth tidied up, press, and topstitch close to the seam. Then use the zipper installation to connect the lining and outer fabrics at the other half of the open edge, treating them as a single piece of fabric. Basting or zigzagging them together along the raw edge before installing the zipper might make it easier.
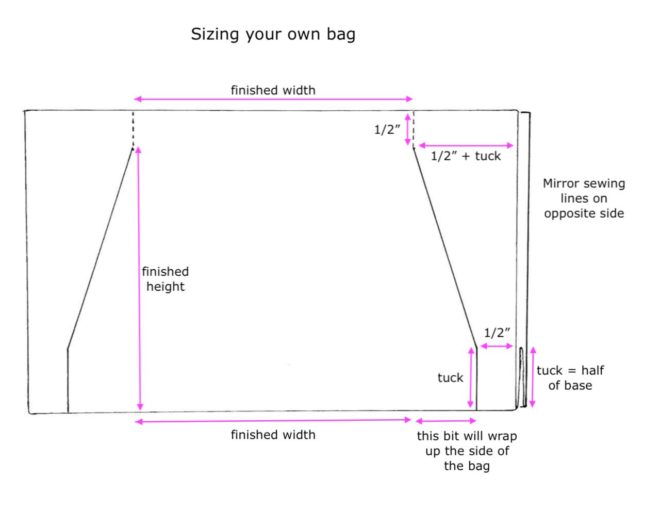
Sizing your own bag
If you know what finished measurements you want for width, height, and base breadth, you can calculate the fabric size needed and where to place the seams. Once you’ve constructed the individual pouches the only thing that will change in the rest of the instructions is the measurements for sewing the pocket that connects them. The important consideration there is to have something that connects them through at least half of their width and height. If you make very small pouches you might not be able to have a pocket, but you should still make two seam lines down from the open end, about a quarter of the way in from each side seam.
Choosing your size
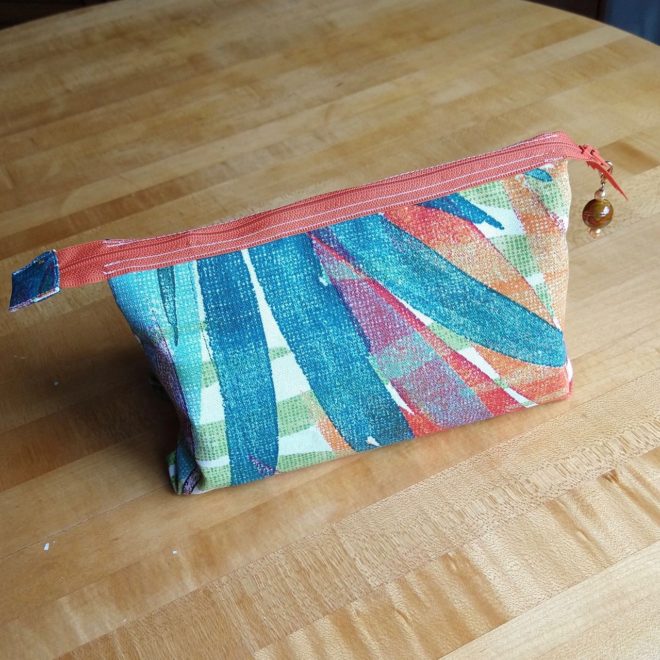
When deciding bag size, note that the sides of these bags are theoretically tall, narrow triangles – but in practice, the contents will settle and the long triangle edges will bulge outward, converting some width into breadth.

Empty bag side view 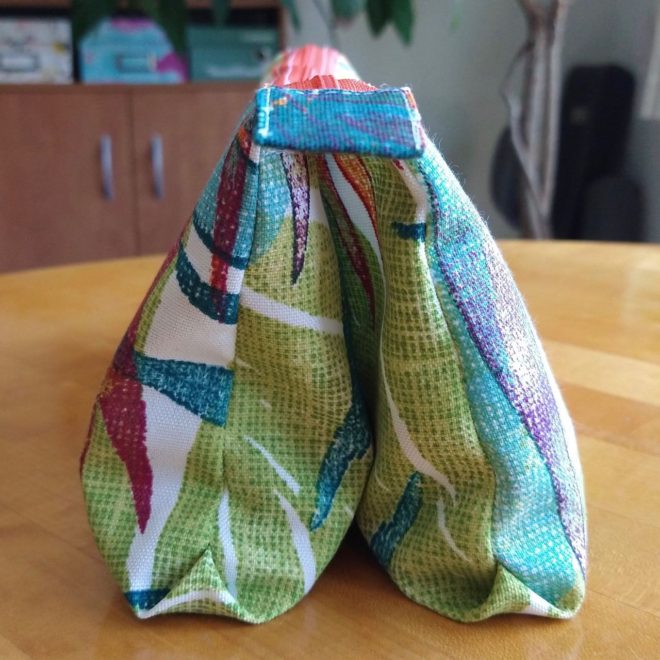
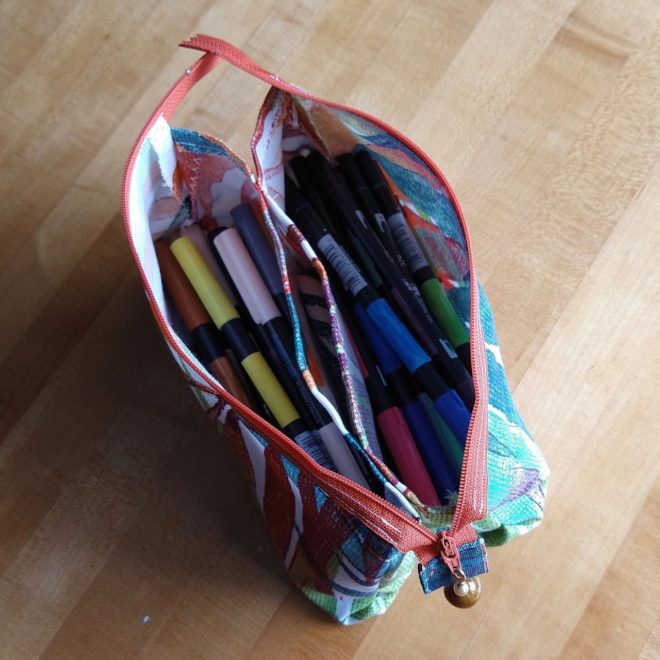
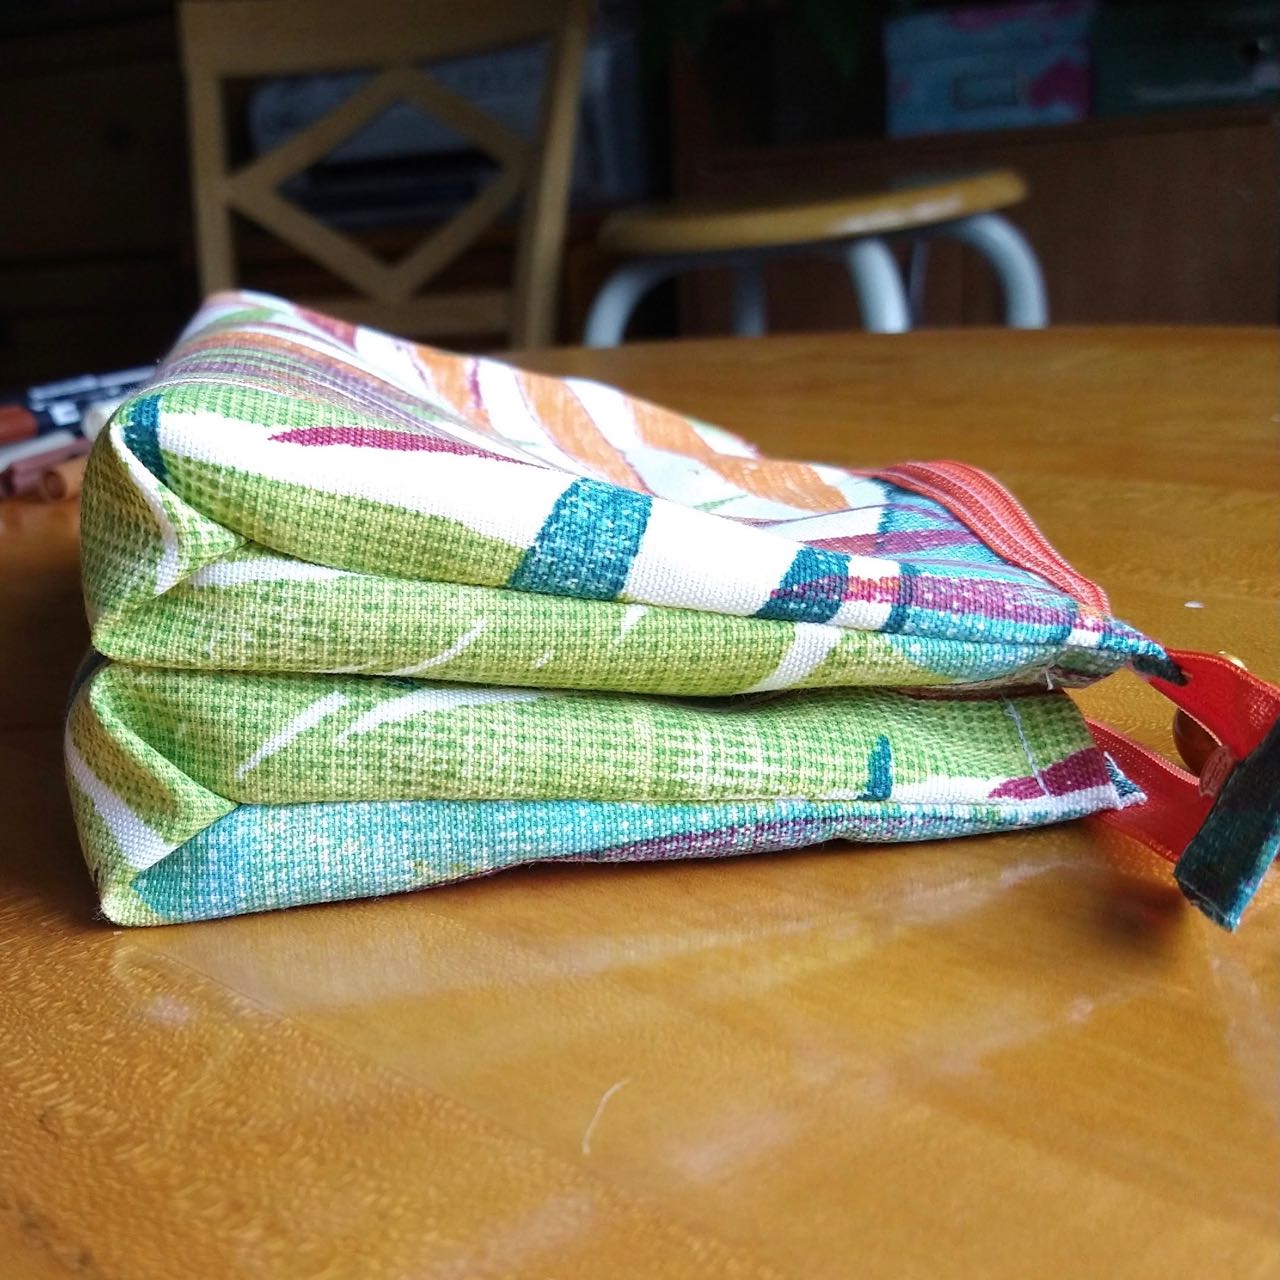
Full bag side view

The combination of that with the intentional flattening of the bag as you go up from the base means you need a generous amount of ease, and the fuller you want to pack the bag, the more ease you need. The marker pouch I describe above has finished measurements of 9″ width and 1 1/4″ breadth. I made it for Tombow brush pens, which are 7 1/2″ long. I’d previously made them a bag with 8 1/2″ width and 1″ breadth, and once the bags were over half full the pens were quite tight in there. The extra base breadth means they won’t reach half-full as quickly, and the extra width means when they get there it won’t be as snug.
I prefer a zipper that sticks out from the bag by an inch on each end, which requires a zipper at least 2″ longer than the finished width of the bag. This helps with the bag opening fully and also makes it easier to sew the zipper to the bag.
Fabric and seam measurements
The whole computation is based on this fact: the breadth of the base will reduce not only the height of the bag, but its width. If you want a 6″ wide bag with a 1″ base, you need 7″ of width to start out with, plus seam allowances. For a 5″ high bag with a 1″ base, you’ll need 11″ of fabric to start, plus seam allowances.
I recommend a half inch seam allowance at the opening, because that works well with the zipper installation and getting the enclosed edges away from the zipper teeth by enough but not too much. You could use a smaller seam allowance on the side edges but that would be asking for absent-minded mistakes in my case, so I use 1/2″ everywhere. To keep things a little simpler below, I’ll assume that seam allowance instead of leaving it as a variable.
In sum, your fabric cutting measurements are:
width: finished width + base breadth + 1″
height: (2 * finished height) + base breadth + 1″
To fold the fabric and mark your seam lines, the important measurement becomes tuck depth, 1/2 of the base breadth. The term “tuck” refers to the accordion fold you make in step 1. After folding your fabric in half wrong sides together, you’ll fold each half back so that the original fold and the two new folds are one tuck depth apart.
Your seam will start 1/2″ down from the opening edge and (1/2″ + tuck depth) in from the side edge. It will angle outward until it is a tuck depth up from the bottom edge and 1/2″ in from the side edge, and then go straight down to the bottom.
If you work in metric would could probably round the half inch seam allowance down to a centimeter, but you might want to turn down a bit more than a centimeter on the enclosed edges (hence start your side seam more than a centimeter down from the opening edge).
Bag sizing examples
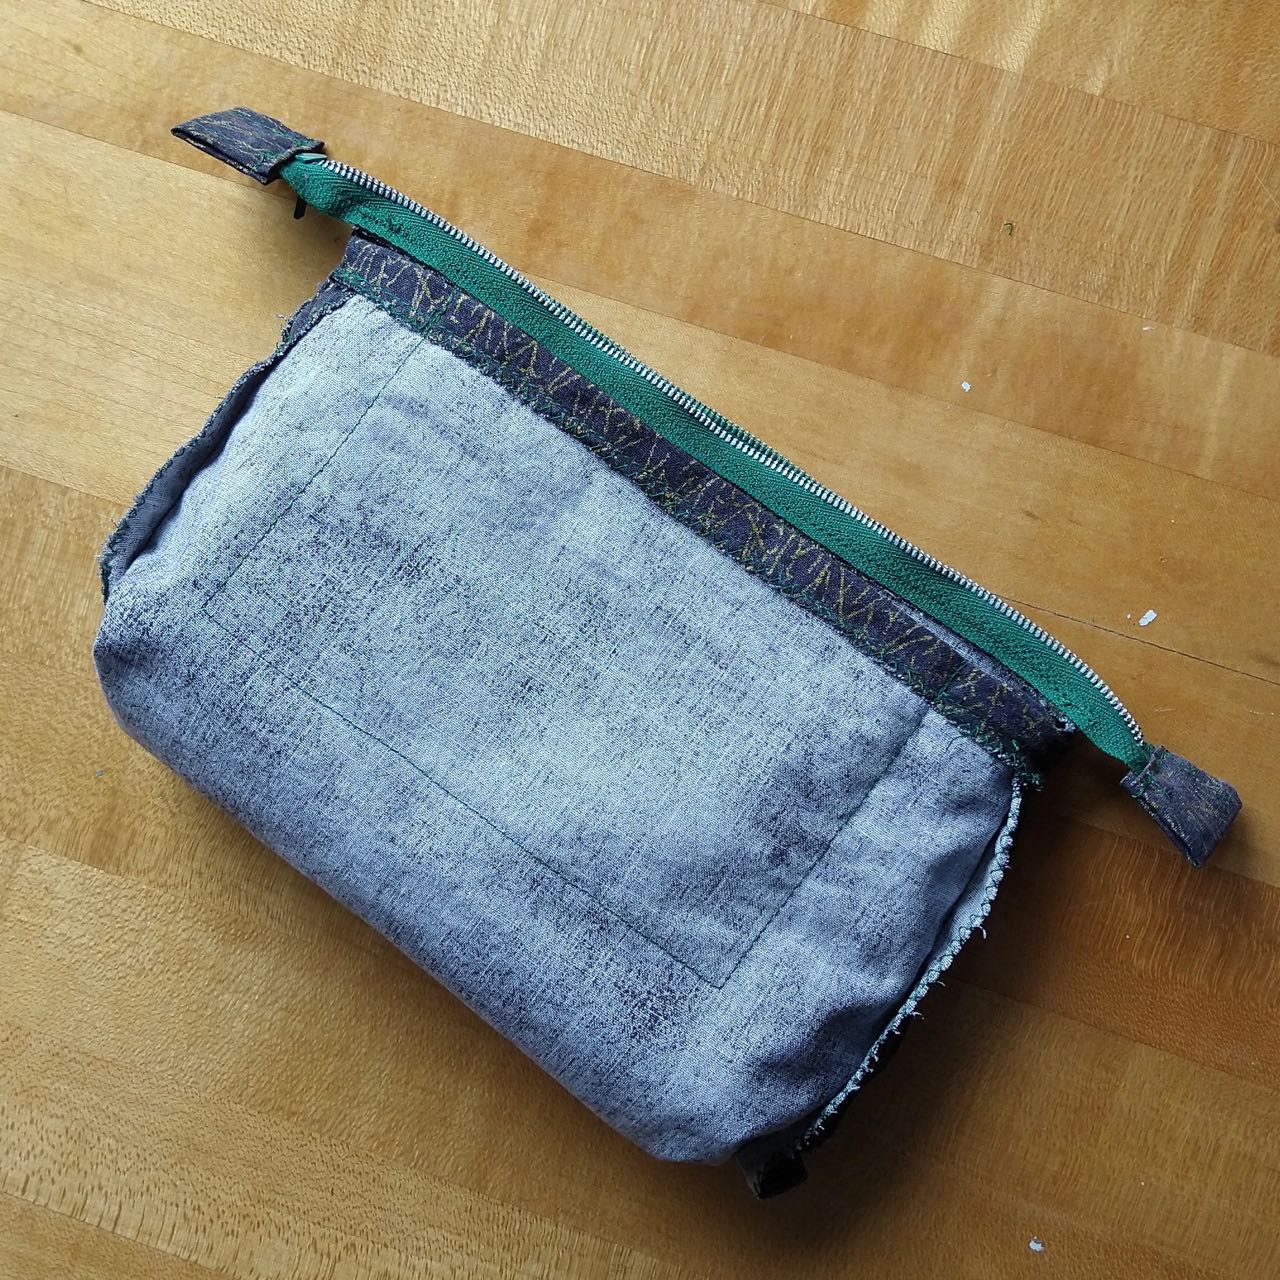
The dark bag with gold accents was the original Tombow bag, the one that turned out to be too snug. It is 5 1/4″ tall (per the enclosed edges – more like 5 1/2″ total because the zipper doesn’t carve off a full 1/2″ seam allowance) and 8 1/2″ wide, with a 1″ base. So my fabric measurements were:
width = 8 1/2″ + 1″ + 1″ = 10 1/2″
height = (2 * 5 1/4″) + 1″ + 1″ = 12 1/2″
With a tuck depth equal to the seam allowance, the seam calculations become very tidy:
start seam 1/2″ down from top and 1″ in from side
sew diagonally down/out until 1/2″ in from both bottom and side
sew straight down to bottom at 1/2″
The bag given in the instructions beginning this post was designed to the the same height but an extra half inch wide and with a 1 1/4″ base:
width = 9″ + 1 1/4″ + 1″ = 11 1/4″
height = (2 * 5 1/4″) + 1 1/4″ + 1″ = 12 3/4″, rounded up to 13″