I did a few projects in March that didn’t merit a post, but for which I have some photos to show. There ended up being 4 so I’ve split them up into two posts. Let’s start with the one that definitely worked out: a tooth!
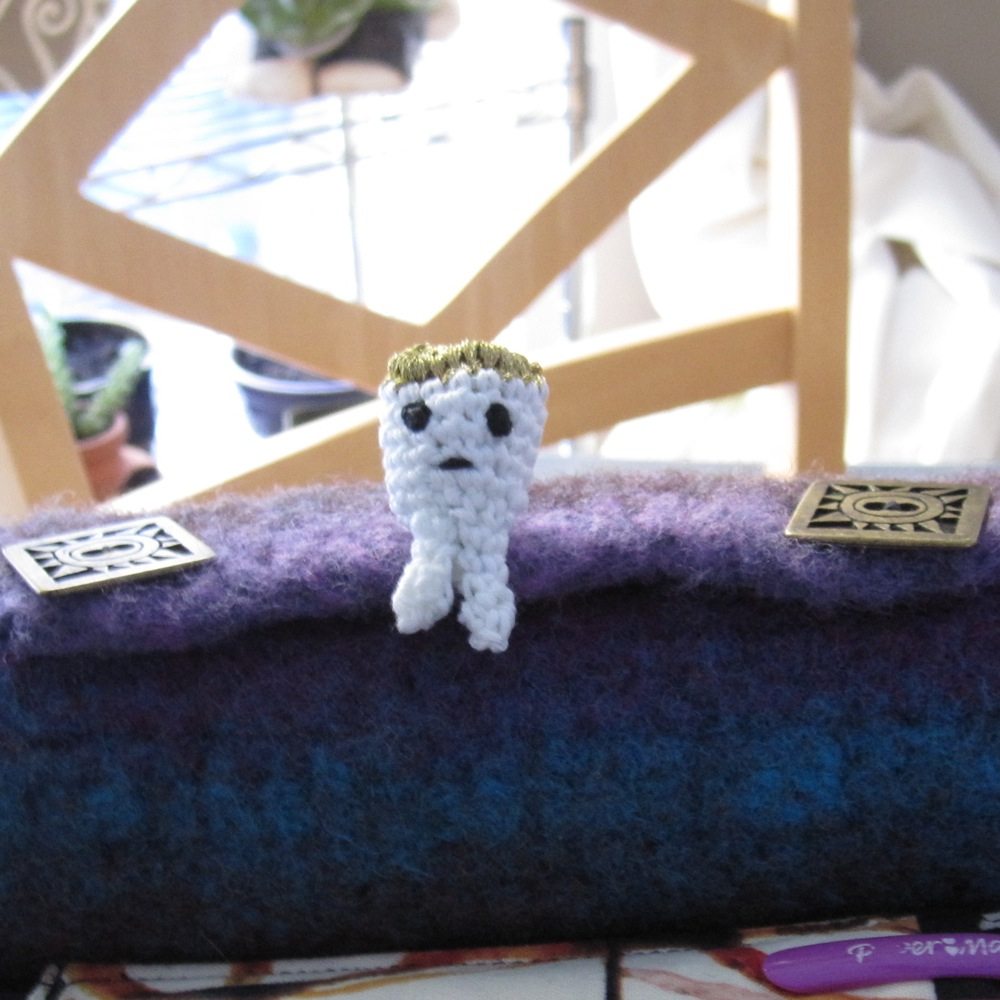
Ages ago I asked on the ReveDreams Facebook page for items I could crochet out of embroidery floss, and my aunt suggested a tooth. There it is at long last. It has only two roots mostly because it’s a pain to work that small, with the reverse-engineered rationale that this way, it can sit on the edge of something.
Second, one that I completed but that really didn’t work out so well: a pair of slippers. If you have a Ravelry account you can see more of the saga on my project page for these, but long story short, after a good deal of effort to resize these, they are a bit loose and not at all the same size as each other. Crochet chain shoelaces mitigate the problem but don’t quite fix it.
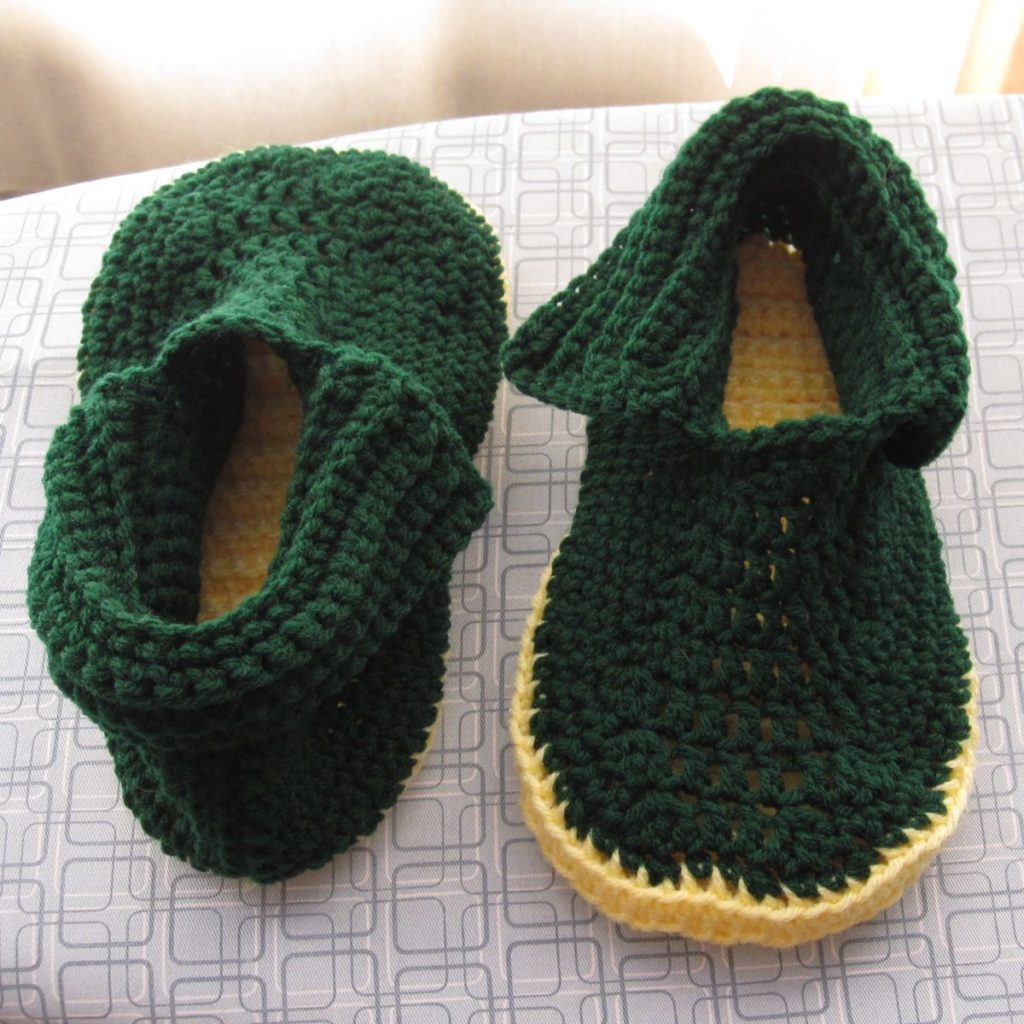
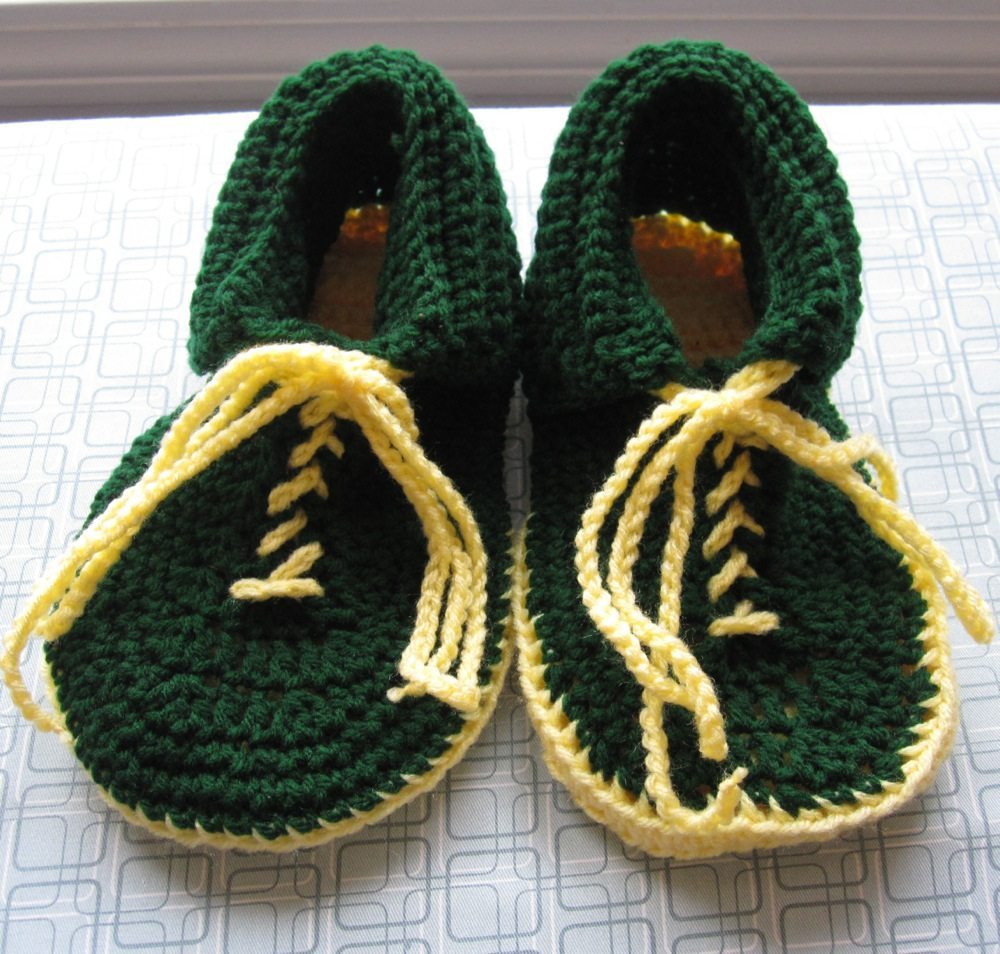
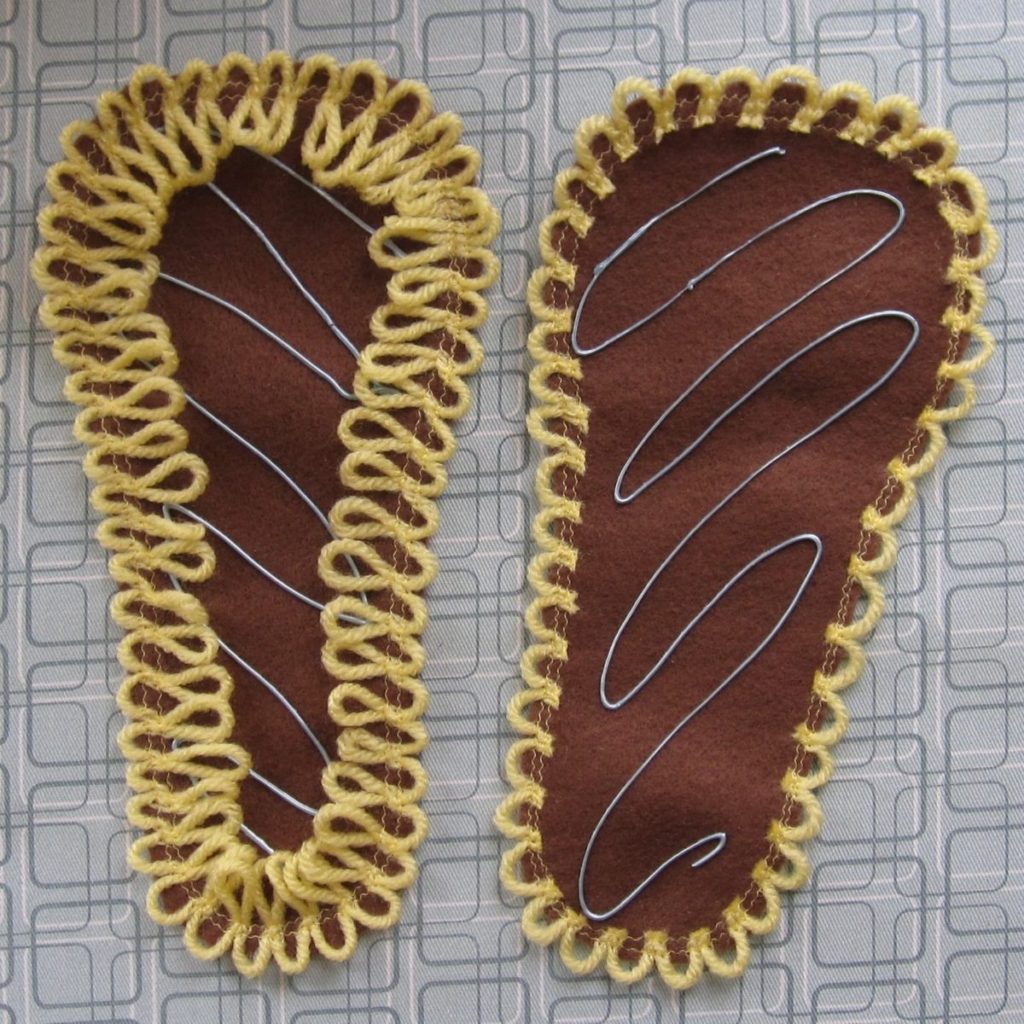
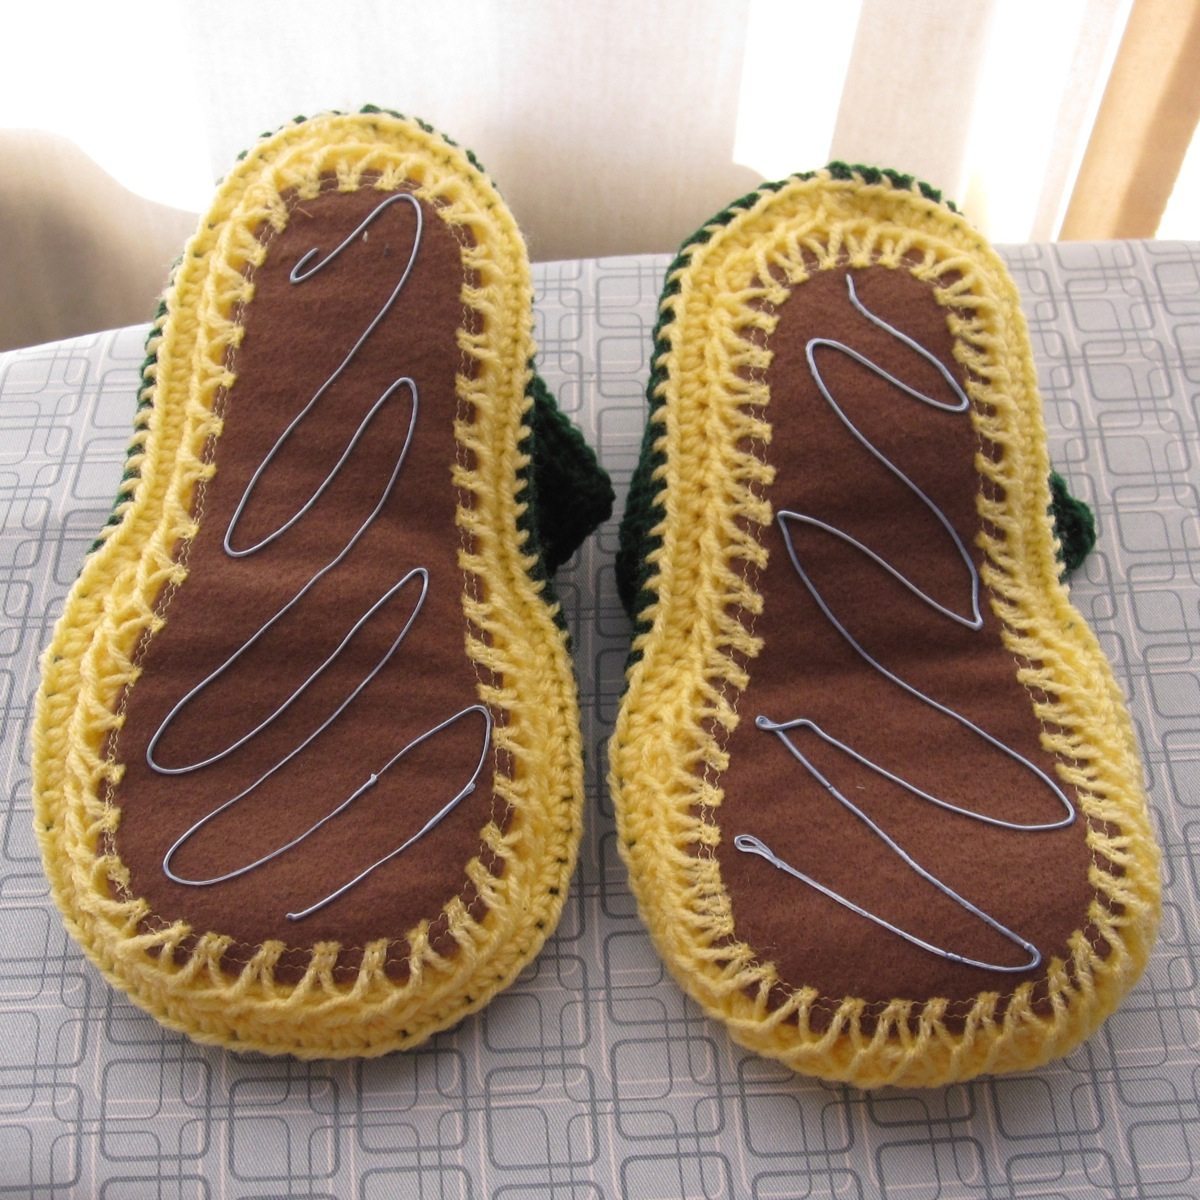
One thing I would consider doing again, though, is adding loops of yarn to the perimeter of a felt sole for ease of sewing it to the bottom of crochet slippers. That way I could use a blunt needle, and should the sole wear out it will be easier to remove and replace than it would be if I’d used a sharp needle to sew it directly on. That’s 3D fabric paint on the bottom, my attempt to add traction. It works better than I expected but we’ll see how well it lasts (likewise the loops of yarn, some of which appear to be pulling out already).
Bis morgens!