Archive for November, 2011

Miscellaneous nonsense

I had grand plans of getting my house cleaned over Thanksgiving weekend and catching up on all kinds of craft projects, but I really just wanted to sit around and read magazines. However, I did a few small things, introducing more nonsense into the world. Perhaps we’ll call it an homage to the new Muppet movie.

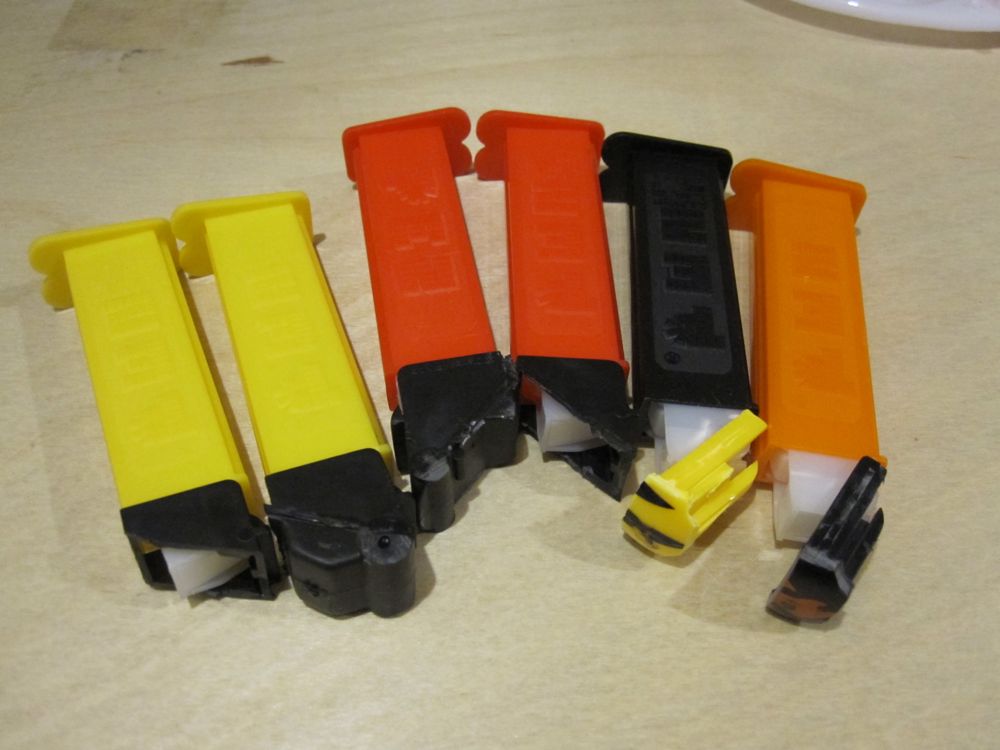
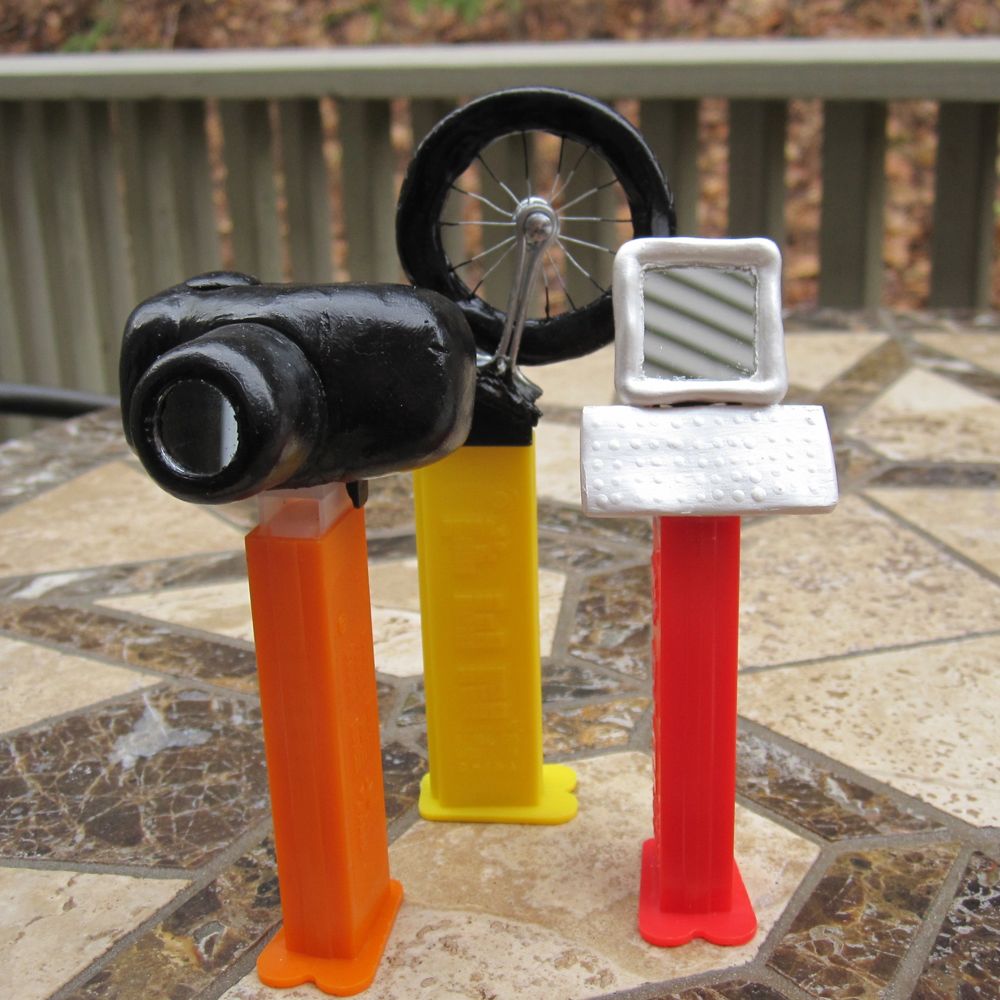
One particular hardware store employee helped me brainstorm and find pieces for my Pez dispensers, so I made him a gift to take to him when I bring in pictures of the finished dispensers.

bug bug

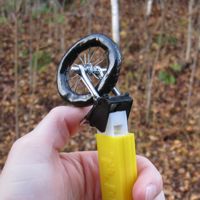
Don’t ask. I don’t have an answer.

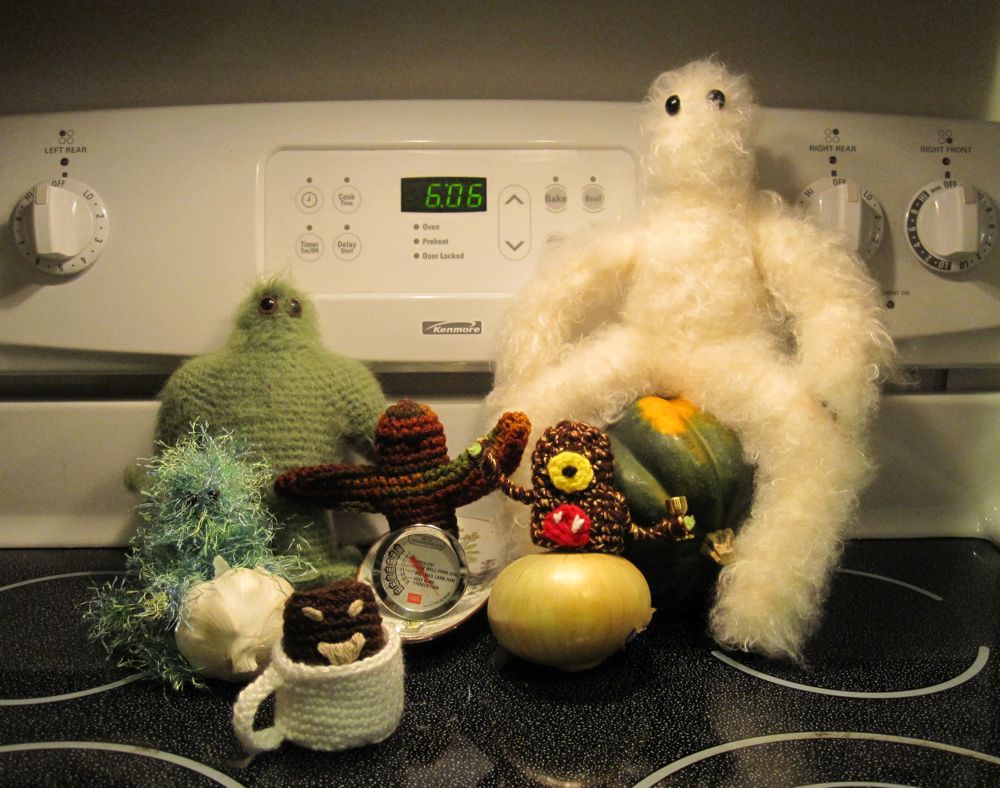
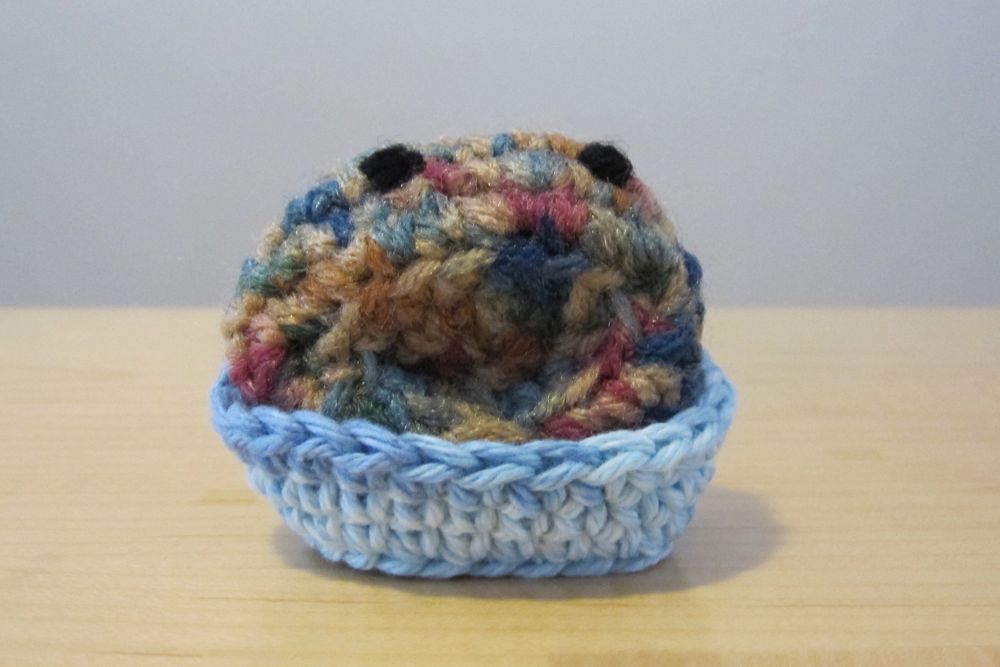
I experimented with crochet shaping on Friday. The first one didn’t turn out remotely like I planned/hoped, but, well, here’s a potato monster in a tree.

up a tree

Of course he doesn’t actually live in a tree; that would be silly. He lives in a basket.

in a basket

That’s all for now!


Thankfulness

Happy Thanksgiving to all the Americans and US residents out there, and anyone else who would like to be wished a Happy Thanksgiving.

This Thanksgiving, in addition to friends, family, health, and financial security, I am thankful for…

MONSTERS!!!

festive monsters

I am also thankful for a little time off. Work has been hectic and intruding greatly into the rest of my life, so this weekend will be good for getting caught up at home and produce some things to show you in the coming days. Have a lovely holiday!


Recapitated Pez

My brother turned 40 two days ago, and he collects Pez dispensers. For his birthday, therefore, I made him some custom Pez. The first step, left a mystery in last Thursday’s post, was ruining several utility knife blades decapitating real Pez dispensers, retaining the mechanism that pushes the candy out. The mixed media was to make new heads, relevant to his interests, and fully operational as dispensers.

Here are the decapitated dispensers. I made some spares in case I needed them. The original heads were football helmets and characters from the movie Cars.

headless

And here are the recapitated dispensers!

front view

He is a computer engineer and loves photography, to the point that he started a side business photographing weddings and other events. He love to bike and do other (nonmotorized) racing sports. He and his wife have a boat that they use as often as possible in the summer, which I tried but failed to replicate in clay. I could have drawn from his hobby of woodworking or the fact that he’s a great cook, but those both seemed harder to capture in Pez head form.

All of the dispensers do still work, although I realized on his birthday – two days after shipping – that I completely forgot to include the candy in the package.

camera computer bike

Here are some more angles. From the top you can see the tread I cut into the tire, and to my surprise, the vent lines I cut into the computer monitor. From the side/back you can see that the computer is a Macintosh, with the power button on the right near the back.

back view top view

Best of all, he loved them. Happy birthday, big bruvver!


Secret project preview

The final pictures of this project will be revealed on Monday, but I have some preliminary ones to show you. I was exploring mixed media, though that ended up being mostly clay with decorations.

The first step of the project, which cannot be revealed right now because it would give the whole thing away, happened way back in the late summer or early fall. I was waiting for the next steps until I’d finished my SF embroidery, figuring it would be better to concentrate on one thing at a time. I did, however, get out a lot of materials the last weekend of stitching.

lotsa stuff

I wanted to do four figures, but apparently I have no idea what a boat looks like. I tried several times, looking at pictures in between, and still, no. It’s a shoe! It’s a bicycle seat! It’s an arrowhead! So, there were three, two in clay + mirror and one in clay + wire.

The wire one was maybe going to be a piece of a commercial toy, but I couldn’t find anything that looked like what I wanted: a bicycle tire. So I wound some wire around a small rod and around part of a large funnel, and then used smaller wire to make spokes between them. That was a pain.

looks bikey

The ones with mirrors were a computer and a camera. The camera, in fact, ended up with two mirrors: one for the lens and one for the viewscreen on the back. The computer had a mirror for the monitor screen. These were surprisingly unpainful to make. Here’s a picture of the three figures after baking:

the unpainted figures

I didn’t have any black clay so I painted the camera and tire after baking them. Fortunately you can still see the tread on the tire, sliced in with a utility knife. The vent slots on the computer monitor, however, disappeared when I painted that figure with pearly white paint. Oh well! I used a bent wire to clean the paint off the mirrors after it dried – the bottom of the U.

The bicycle tire is set up to actually spin, though I can’t show you that picture until the big reveal. This entailed some time at the hardware store looking at all the options (fortunately one of the guys who works there was very enthusiastic about this project and helped produce ideas), but worked out pretty well and with minimal cutting and bending of wire.

Until Monday!


Simple cross-stitch patterns

I went through a phase some time ago of cross-stitching personalized gifts for people, often with my own designs. Some were in-jokes, some I no longer have the patterns to, and some were not really good enough to share, but I have a couple to show you. The first is an old-fashioned desktop computer:

oh, the majesty

I have the pattern available as a jpg should you want to make one yourself. There are no markings for the solid-color regions; the backstitching and keyboard keys are shown, and the rest is filling in appropriate regions. I wrote a personal message on the screen in backstitch; you can make your message more or less subtle by varying the color contrast. All color numbers are DMC, and of course the selections should be adjusted to your taste.

The one I have to share that I am more proud of, however, is the following.

camera!

The camera and ticket may be stitched together or separately; the pattern specifies DMC color numbers, but you merely need black and dark yellow of some flavor.


Soapmaking

I occasionally like to buy fancy soaps, though at places like TJ Maxx. I had a very large bar of orange-scented soap that came in a lovely tin (in fact I have gotten enough use out of the tin that I should probably consider the soap to have been a bonus with buying the tin rather than the reverse), and I put it in the shower. After a while of use, it got craggy, had a grain like wood, and had somehow worn down to a crescent-shaped cross-section with sharp edges. It was not very nice in the hands. Finally, it broke in half the long way.

There was still a lot of soap left and I hated to waste it, so I took it into the kitchen, chopped it up with a knife, put it in a bowl with some water and microwaved it. I stirred it up with a fork, added more water, and microwaved it again. Then I scraped it out onto some plastic wrap, wrapped it up, molded it by hand into a soap bar shape, and let it cool. It worked! It still had texture – you could tell I chopped fairly coarsely and didn’t melt it gently or thoroughly – but it was cohesive and usable. You could also tell I added water to it, but that’s actually a good thing because it was too hard before.

Since then I did it again – I have decided to make a concerted effort to use up the random toiletries that are taking up space in my cabinets, and I had some miniature bars of soap. One I had already been using at the sink; it had been about 2.5″ by 1.5″ but had worn down a lot. I had a second of that size, and one that was only about 1.5″ square. I probably didn’t need to include the soap I had previously remade, but I did. Unfortunately one of the small bars of soap was very dark, and the resulting soap is about the color of chocolate chip cookie dough, with a citrus scent. That turns out not to actually be a very appetizing color! [Hence, no pictures.] However, it will be easier to use up the soap in one big block than in a bunch of little blocks, and the previously remade soap was somewhat gritty, so diluting that a bit was nice for the texture.

I’ve always stuck the last bit of a bar of soap onto the new bar so as not to waste it, but this is the first time I’ve gone to any greater length to avoid throwing out soap. It was actually kind of fun. Next time I do such a thing I’ll try to find a reasonable container to use as a mold, because the bar I made the second time is a little long and broad for comfortable use, but could be thicker without a problem.

I don’t have time to add a new project right now, but in the future I could see myself making a batch of soap once or twice a year. I’ve bookmarked Miller’s Homemade Soap, Teach Soap, Soap Making Fun, and eAudrey. Those are the pages that at first blush seemed the most useful.


SF in stitches

This is my entry to the Feelin’ Stitchy “Covered in Stitches” embroidery contest. I love the covers of 60s and 70s (and even some 50s and 80s) science fiction books – all lurid colors and crazy images. This was the only one on my shelf I felt I had any chance of doing justice to, though:

SF embroidery

I am so pleased with how it came out.

SF embroidery

I just stitched without any grand plan, and couldn’t have foreseen how well his hand would come together.

SF embroidery

My other favorite detail is his left shoulder; I love how the threads blended and it looks like abstract art.

SF embroidery

Of course, I have since discovered that the colors on my copy were not as vivid as they had been originally and in particular some formerly different colors had become indistinguishable from each other. However, it still looks good to me.

To make this, I first made three or so blown-up color copies on my home printer. Then I just pinned one to my fabric and started cutting out sections. Here’s a shot near the beginning:

SF embroidery

And here’s a shot of when I finally started thinking, “maybe this will actually work.”

SF embroidery

And it did!

SF embroidery


Public Notice

I am planning to have a craft post today, but it is not ready yet and may not go up until fairly late in the evening. It will be worth the wait!


First Friday

If you have a First Friday gallery event to go to, go get your art on! I’ll be at a museum having dinner.

But before you go, The Hug Monster wishes you a happy fall.

I love flowers!

Even if Irene knocked a lot of our leaves down early and then, as mentioned yesterday, we got snow before Halloween, thus sort of skipping fall altogether.

Snow! So what about snow art? Really our snow was more like this kind:

snow ghosts

More of those sort of things can be found here, and much fancier snow sculptures here, including a Space Invader.

It’s not cold enough for ice art, but if one could start, one might be able to end up with these melting snow people:

ice men

Coming attractions… well, I guillotined Pez dispensers in the recent past, and that project should be done by mid-month. And am still hoping to finish my entry to the Feeling Stitchy book cover contest by its Monday deadline.

One more of Hugs before you go.

I love flowers!
wuv woo


Peacoat project 2: reconstruction

This continues the post from three weeks ago.

When our story left off, the coat had some tricot interfacing ironed into the back and new outer buttons sewn on. The lining had been removed and half of it disassembled, and paper pattern pieces made with a half-inch seam allowance.

This time around I cleaned off my dining table, which is not so easy on the back as a cutting table but is the only sufficiently large surface to use, laid out the fabric and cut my pieces. Using the un-disassembled side of the original lining as a guide, I distributed them into a left half pile and a right half pile.

Now, patterns that are sold come with all kinds of markings to let you know what attaches where and how. Homemade patterns from a disassembled garment do not. Sometimes I just had to plunge on and trust all would work out, as in the first picture below, which looked questionable but turned into the second picture below.

I dunno all is well

In constructing the lining, I was concerned about two things: getting the pieces mixed up left/right, and setting the sleeves in correctly. For the first one I just made sure to sew the two halves together individually before sewing the center back seam (in a commercial pattern the steps would almost certainly be to assemble the back, side, and front pieces, and then assemble the sleeves, and then set the sleeves into the armholes). That let me maintain two separate piles. For the second, I started out by eyeballing the original lining for how much distance was between the seams of the armhole pieces and the seams of the side body pieces (it was convenient that the sleeve was two separate pieces). After doing one, I measured and made the other match, though it took me two attempts to mirror-image myself and do it correctly (fortunately only pinning was involved).

I ran into an unexpected issue: my sleeves were much larger than my armholes. Not by an unreasonable amount, but far more than I expected. I did the Lazy Gather: pin smooth until some reasonable distance away from the shoulder seam (about 3″ on each side), and then by folding find the centers and pin them together, find the centers of each half and pin them together, and repeat until you have it pinned at reasonable intervals (after the first two rounds I eyeballed the centers instead of folding to find them). The bumps sew down into little pleats, but no one is going to see the shoulders of my coat lining so I didn’t care.

lazy gather

The fabric was much less stiff than I thought it would be. For a while I was afraid it was going to be the kind of fabric that never stays squared and is miserable to sew, because you have to square it up and then pin it every centimeter to get clean stitch lines. Fortunately it was not so bad, though it did fray a fair bit. After sewing my seams I zigzagged the seam allowances, and then zigzagged all the raw edges.

My last lining-only step was to put the pleat into the center back that had been in the original. Since lining is typically made out of non-stretchy fabric, ease is added to the lining via extra size, which is then pleated or gathered down to match the outer fabric. If you didn’t add some ease, you would find your mobility restricted. Here’s the finished but uninserted lining.

assembled lining
If this were a blouse, I would run away. But it made me excited as a lining!

Next came putting the lining into the coat, and this is where I found myself relying on my deconstruction photos. I decided the best order would be to sew the lining in at the top and slightly down the front opening, then do the sleeves, then figure out the hem, and finally finish sewing the lining at the front opening. In hindsight, it would perhaps have been easier to do the sleeves first, but I was worried I would get them attached all twisted around.

I did the first step and then put the sleeve linings down into the sleeves and hung up the coat to check their orientation. Glory hallelujiah, the coat sleeves were in two pieces also, and the seams were meant to match up (I later realized I had this information in photo form). Time to put them together. But how? There are not many lined jackets in my life, so this was a skill I had not exercised since I was seamstressing for a living. I stood there talking to myself – “do you have to do them from the outside? but no, then it would be a loop and you’d never get it right side out” – and figured it out. In the first picture below, the sleeves are lying with their shoulder sides together. In the second, I slid the lining up a bit and folded up the coat sleeve, and that is how they are supposed to meet.

lined up flat folded to meet pinned to sew

To pin them I folded the lining up a bit at the cuff and slid it inside the coat cuff, as in the third picture above. After stitching that seam I folded the coat cuff up on its existing fold line and hand-sewed the edge to the two seams to keep it up.

Before sewing the rest of the front seams I wanted to hem the lining. I’m glad I allowed 1 1/2″ in the pattern, because I only folded up 1″ in the center back. It was 1 1/2″ on the outside edges, though I could have gotten away with less, I think. I didn’t do an invisible hem, just a regular machine hem (I really kind of hate hand-hemming). Then the last attachment to the flaps folded in from the front of the coat, and hand-tacking those flaps to the outside of the coat at the bottom.

After the lining was in I could sew in the interior button. As it turned out, I had two interior buttonholes, and just the one interior button. So I dug into my grandmother’s button box (magical wonderland that it is) and replaced the ugly clear plastic button with two black buttons.

yee-haw new choices

Unfortunately it took me two tries to sew one of the buttons on, and it ended up slightly off from where it was supposed to be. It still works, and I don’t often use the inside buttons anyway, so in the interest of not sewing it a third time I just left it.

After the buttons the only thing left was a swing tack to keep the back hem of the lining in the vicinity of the back hem of the coat. I think I’ll make a separate post on swing tacks; they’re worth knowing about.

Lastly, for completeness, I put my pin back on. This pin was a gift from a dear friend, who got it at a Chicago art gallery or museum. It’s an Edward Gorey drawing that made him think of Where the Wild Things Are, which made him think of me. I had removed it, but it so perfectly fits this coat’s lapel that I was very happy to reinstate it.

cat pin all done!