Archive for October, 2011

Little pumpkins

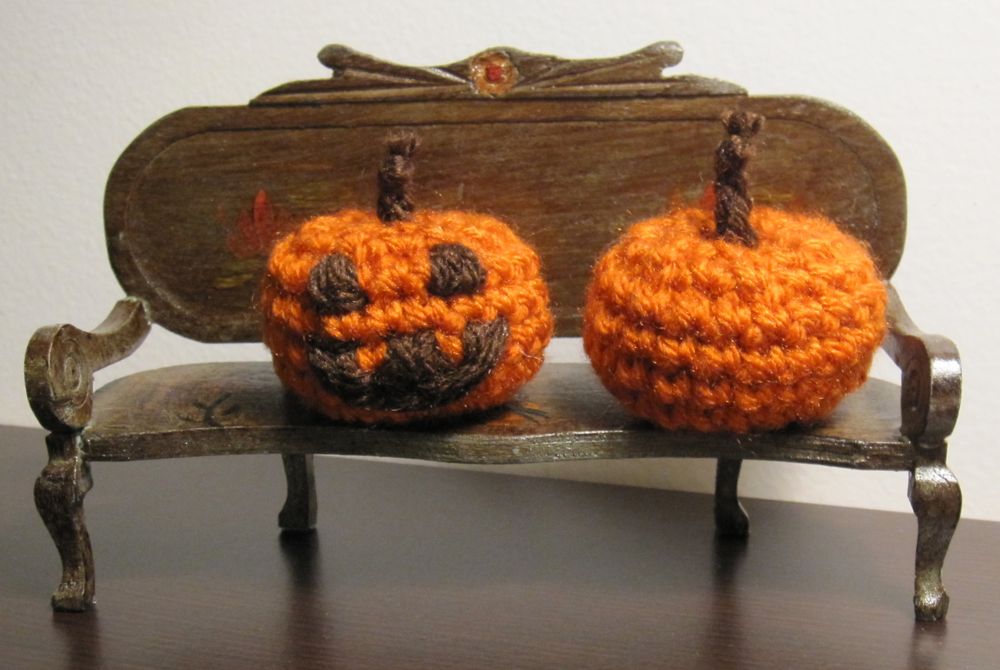
I was really hoping to show you a monster today, but there were technical difficulties. So here are some emergency pumpkins.

pumpkins

And here’s the pattern!

1. In a magic ring, sc 5. tighten.
2. sc, (2sc, sc) x2 (7 sc). finish off beginning yarn end.
3. 2sc around (14 sc)
4. (2sc, sc) around (21 sc)
5-8. sc around (4 rows)
9. (dec, sc) around (14 sc)
10. dec around (7 sc) — stuff
11. sc, (dec, sc) x2 (5 sc)
Use the perfect finish and thread the yarn through the middle of the pumpkin and out through the magic ring before you tighten; stitch back and forth between rounds 1 and 11 to pull the middle of the pumpkin top and bottom together. FO.

Add a stem or a face as desired. I threaded two pieces of brown yarn into the top of the pumpkin, crosswise, and interleaved square knots (right over left for each pair followed by left over right for each, etc) and then made an overhand knot to finish off.

Happy Halloween!


Setting hexes

Sometimes, you want something a little different. Sometimes, you want a hexagonal fabric coaster. It should be comparable in size to your square coasters, and so the pattern should be five inches between parallel edges, to stitch down to four inches across. But how long does that make each edge? How far is it point to point?

There are probably automatic ways to do this, but because I have an unhealthy love of doing high school math the long way, I hauled out the geometry and trigonometry.

The first step in finding the lengths we need is to figure out the triangle we’re dealing with. I can never remember that the interior angles of a regular n-gon are each 180 – 360/n degrees, so I do that the long way as well.

first page

Okay, we have a 30-60-90 triangle, and we know the length of one of its sides (one of them is half the distance between parallel edges). We could have done that a shorter way remembering that hexagons tile the plane meeting three to a point, so each interior angle is 360/3 degrees. Regardless, now we whip out the trig.

second page

The sine of an angle is the opposite edge over the hypotenuse. You could also use the tangent (opposite over adjacent) and then the Pythagorean theorem to find the hypotenuse. Or you could use the sine and cosine of the same angle, one to find the hypotenuse from the known leg and the other to find the unknown leg from the hypotenuse.

Anyway, we now know our edge length, and the length point to point (it is edge length plus two times the originally-unknown leg length).

third page

In my case, with the desired distance 5″ between parallel edges, my edges were 2.89″ (which I would round to 2 7/8″) and my distance point to point was 5.77″ (rounded to 5 3/4″). The horizontal distance from the left point to the next two points around is 1.44″ (almost exactly 1 7/16″), which I would use in actually making these: make a rectangle 5″ tall and 5 3/4″ wide, mark the center of each shorter edge, mark in 1 7/16″ from each corner on each long edge, and connect each of the first two markings to the neighboring pair of the second four markings. And I would do that on paper so I then had a pattern, instead of having to re-measure every time!


Sketchbook update

This time around I have a page and a half to show you. I finally finished the back side of the very first page I stitched:

brown quilt

Since I have a lot of crafts with near-term deadlines, I didn’t do any hand embroidery this round. There will be plenty more of that, but I wanted to get something completed without spending several days on it. Hence, more machine embroidery. This time I colored the page before doing the stitching, and made the page pastel and the stitching black, like scratch-off coloring pages that are black over colors. I also switched from regular zigzag to a special diamond-shaped zigzag.

black diamonds

That was actually the underside while I was stitching. You can tell the kind of thread I had in the needle: copper metallic. Metallic thread is hateful stuff, but I am continually drawn to it despite that. Here’s the upper side:

copper and leaves

I worked it out and if the cover is included, I have to do a page a week from now on to finish the book on time. I’m not going to do exactly that; I’ll leave more for Thanksgiving and winter breaks. However, it was a boot to the rear to see those numbers! Starting in late November you can expect sketchbook updates to come slightly more than monthly.


Look what I found!

in context in context

I was just enjoying the fall prettiness, and almost kicked this. That would have been unneighborly.

a closer view

Apparently some Polynesian fairies have moved to the woods near my house. I don’t know how they’re getting along with New England weather, but it looks like they’re planning to stay.

interior
Is this an invasion of privacy?

I hope they have a tarp for this baby before the snows hit. Of course, the little sprouts here don’t seem to think winter is on its way – fairy magic?

sprouts


Finished sampler and class

Tonight is my embroidery class! I am all set. I have my sampler:

sampler

I have other examples of embroidery to show them:

examples

(not shown: Children’s Book Quilt embroideries, Saturation, a couple more cross-stitch pieces, as well as some pictures of pieces I found online)

All but one of the pieces above are by me; the tea towel was a flea market find.

I have a blog post on the Sew-Op’s blog with informative and inspiring links.

I have a box of floss:

floss for class

I have handouts!

handout

(not shown: a few hand-drawn rub-on patterns of simple things)

Incidentally, I wound all that floss by hand, half a skein per bobbin. At some point I decided to unwind and halve a whole bunch of skeins at once, thinking I might like it better if I could just wind and wind and wind. I almost didn’t want to wind any of it because it was such a pretty installation art piece:

floss waterfall

Wish me luck!

P.S. Happy birthday, Mom!


Peacoat project 1: deconstruction

I have a gray peacoat that has been with me at least since the late nineties. I don’t remember exactly when I got it. It’s still around partially because it’s a well-made wool coat, but partially because I haven’t worn it in several years. Why?

lining rips
Why, indeed.

And that’s after I repaired it! Back pockets (and, I believe, a set of keys always kept in the same front pocket) are hard on coats. (And armpits are too.) A couple of years back I made a stab at adding a second layer of lining to the coat, but it didn’t go well. Here’s the “before before”, which has that lining in it, though you can’t see it well.

before-before

As a secondary issue, the coat was missing two buttons. I didn’t care for the originals enough to track down replacements, so some years ago I also bought ten new buttons to put on.

I like them better

This fall I decided to do things properly and really get this coat fixed. I found some heavy satiny material in the clearance section of the store that I fell in love with, all rich watercolor leaves on a black background, and bought what was left of it (about two yards). Then I took out the lining of the coat and took half of it apart. Incidentally, I did some searching online for directions to replace a coat lining, and the one that had a yardage estimate said 3-4 yards. I figured the coat is only hip-length and if necessary I could use plain black fabric for the sleeves, but I don’t think that will be necessary.

lining laid out
This is wider than standard lining material, but really.

To replace a lining you have to make a lining. You can see the process in the picture above: take apart your original lining to make a pattern. I cut off the seam allowances (trimming at the stitch line) with the plan to make paper patterns with new seam allowances of known width. I only took apart half the lining, so the other half can show me the order the pieces go together, and I took a bunch of pictures of the coat before and as I took it apart. Digital cameras are a beautiful thing!

My sophisticated pattern-making setup:

pattern making pattern making

I added a half inch all around. The lining had sagged badly, then been folded and sewn up at the hem rather grotesquely, so I also measured how long I needed it to be and adjusted the length of the pieces accordingly. Incidentally, my pattern paper is almost all from TJ Maxx. It’s the paper they use generously to wrap anything that might be fragile before bagging it. It is perfect for patterns.

Before making and inserting the lining, I changed out the buttons and ironed in some flexible black tricot interfacing, to give the wool in the back some oomph and help keep future rubbing from wearing it out. I stitched along the stitch lines already visible from the outside to help the tricot stay in place. The buttons look much better – those old shiny ones were just too much.

new buttons!

The new buttons are black, they just don’t look like it in the picture. There is a clear flat button for the solo buttonhole on the inside flap, but it cannot be sewn on until the lining is in.

I haven’t finished the project yet – there will be a sequel when I have the lining cut out, assembled, and inserted, and the last button sewn on.


I love Halloween

Really I do. I love the autumn, I love costumes, I love pumpkins and cats and goblins and witches. I love committing myself to serious costumery:

bearded lady costume
The cash box says “Step Right Up!”

I had to take the beard off to eat, though. Otherwise I’d have ingested a lot of plastic.

I love making excessively seasonal food:

pie with leaf and acorn crust cut-outs

Okay, that was for Thanksgiving, I’ll admit. But these weren’t:

witch and pumpkin apple slices

jack o'lantern radishes

What do you do for autumn and/or Halloween?


First Friday

Friday again! Places to go, people to see. I would love to go to a First Friday event tonight but my parents are coming into town in the middle of the evening and I need to make sure I’m ready for them.

This month, how about crafts out of their usual element? For example, ribbons and lace in cake icing and fondant. Apparently you can get a lovely lace fondant strip by running a strip of actual lace and a slab of fondant through a pasta roller together. Alternatively, by laying lace over fondant or buttercream and thinly frosting with buttercream on top of it (in a contrasting color if desired), then removing the lace and the icing on it so the remaining buttercream fills the negative space.

There is even a technique in cake decorating called brush embroidery, where icing is piped and then blended with a paintbrush to create a lacy or embroidered effect. Wilton has a very brief tutorial, and Cakes, Etc. by Dana has a collection of links to video tutorials. You can get more of an embroidery look, or a lacier look with this technique. And I love these.

How about more craft cakes? Even still more?

Stained glass goes with everything, of course. Stained glass and stained glass quilts can be hard to tell apart in thumbnail. You can even embroider stained glass patterns.

Finally, Sad Monkey Design has a detailed tutorial for getting an embroidery look for an image, using Adobe illustrator.


Quarterly Noms

I got a new toy this quarter: my parents went to Alaska and brought back an Ulu knife for me.

Ulu knife

The company mine is from does not have a real webpage, so I turned to Great Northern Products for some instructional videos. It didn’t actually tell me anything I couldn’t figure out on my own. The verdict? I don’t think it’s as sharp as they claim, but it is certainly great for mincing things, especially with the bowl. In the picture above it’s full of fresh ginger.

The quarter started with me out of town, so my first dish to present is from early August. It’s nothing new to me, but it’s a wonderful summer salad. At least if you don’t have the gene that makes cilantro taste like soap! I’m not sure what you would substitute… half parsley and half mint, perhaps, though it would be a very different animal at that point. Or throw some red pepper flakes in?

jicama mango salad

Jicama-Mango Salad
Peel and dice 1 jicama and place in a large bowl. Halve 1 lime and squeeze the juice over the jicama. Really get in there with a citrus reamer or your fingers. Toss the jicama and lime juice to try to coat (I do this by hand).
Next, peel and dice two mangos. Add to the bowl. Finally, add enough chopped cilantro that there will be a leaf in every other bite or so. Mix it all up.
This is best if it sits overnight before serving. The jicama really sucks up liquid, so if it seems dry I add a bit of water.

At about the same time, and with the same bunch of cilantro, I made white bean and chicken chili. I periodically try to get into cooking dried beans instead of getting canned. The canned ones are so convenient that it’s hard to get away from them, but I repeatedly read about how much tastier they are if you cook dried beans yourself. I made a package of navy beans (most of which are in my freezer now) and about a cup uncooked went into the following chili:

chicken white bean chili

In this shot it’s heaped on a piece of maple cornbread, from the King Arthur Flour Baker’s Companion. I recommend that recipe: there’s not so much maple as to be overpowering, but there’s enough to tell it’s there. In the picture you probably can’t tell there are beans at all; navy beans are small and they drank up the yellow coloring from the turmeric and curry powder I put in, so it just looks like I put in a lot more corn than I did. Simple is good, though. Onion, garlic, green pepper, two cans of tomatoes with juice, a chicken breast and thigh, beans, corn, apple cider vinegar, cilantro of course, and an assortment of spices from my cabinet, including the aforementioned turmeric and curry powder along with red pepper, chili powder, and some kind(s) of hot sauce. And salt and pepper, of course. Simmer for a long time; it’s another dish that gets better with age.

Finally, one without a picture: cold seafood risotto. I made this because I try to eat lunch with a friend once a week or so and it is convenient to bring food that doesn’t have to be heated up. I wanted to experiment with non-sandwich options, and was craving shrimp, so I went for it.

I started with one 6 oz can of crab meat, rinsed and drained, one sliced bunch of green onions, 1 1/2 cups each of rice and water (I used half brown rice and half arborio), and saffron, Old Bay, salt, and pepper. Bring that to a boil and let it cook down a bit. I under-spiced mine a bit – it was fine for eating hot, but flavors diminish when food is cold, so I should have over-seasoned it to account for that. Since I used a 3/4 cup measure for the rice, I just used it to add more water. I added water 5 times, letting it mostly boil away in between. With the third addition I threw in about a half pound of salad shrimp; it was still mostly frozen so there was a much longer lag between the third and fourth water additions! When it was essentially done I added a generous cup and a half each of baby peas and sweet corn (both frozen) and 2 oz cream cheese (technically Neufchatel). Stir to mix thoroughly and remove from the heat. Chill and you’re done; it is better brought closer to room temperature before eating.

That’s enough for this edition. See you in January!


Saturation

The finished quilt: a 6″ by 6″ piece titled Saturation. It will be shown at an art fair on Wednesday.

complete!

The title came before the design; I was considering a quilt of leaf-patterned fabrics but just wasn’t feeling it, and the Feeling Stitchy August stitchalong was on my brain as well. I started looking at the fabrics and seeing what I liked, and the rich, saturated colors were the ones that grabbed me. Colors are saturated when they are very far from a gray of the same lightness. I think of saturated colors as being Very: very intense, very themselves. They don’t have to be dark or primary colors, but they are not going to be neutral.

On top of the saturated colors I saturated the quilt with embroidery. I tried to find a way to put an additional level of saturation into the quilt but I didn’t want to be so literal as to make it evoke the molecular structure of a saturated fat, or the mathematical structure of a saturated bipartite graph. Two levels will do.

close-up close-up