Archive for August, 2011

Feeling Stitchy Stitchalong

Feeling Stitchy hosts a stitchalong each month, with different themes. Often it’s a pattern that everyone embroiders in their own way. This month it was about embellishing printed fabric with embroidery. That’s something I’d been wanting to try for a while, so I went to Jo-Ann’s and looked at the fat quarters, picked out a black and white piece on which to embroider colored details, and went to work.

…except that project seemed insurmountably big and didn’t really hold my attention. I had given up hope on participating in the stitchalong until this weekend, when I was pondering the upcoming employee art fair at work. I would like to submit something, but the deadline is a week from today and has to include a photo of the piece. With nothing begun nine days before the deadline, what could I possibly accomplish?

Answer: a small art quilt. By small, I mean six inches square. The thoughts flowed while I ironed prewashed remnants Saturday morning, and while the original idea I pulled fabric for was not the one I settled on, I was decided by that afternoon.

Of course stitching didn’t start until Sunday afternoon. It was a perfect Irene-rain activity. The quilt isn’t done, of course, but here are the first two bits of embroidery.

orange orange

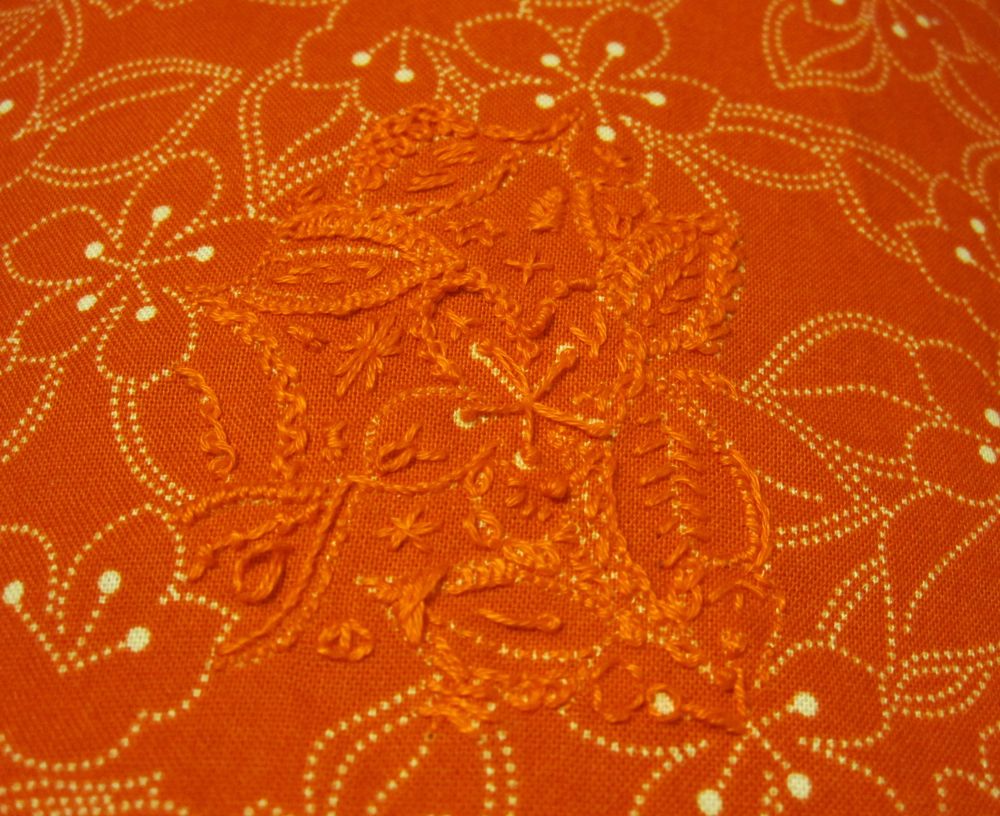
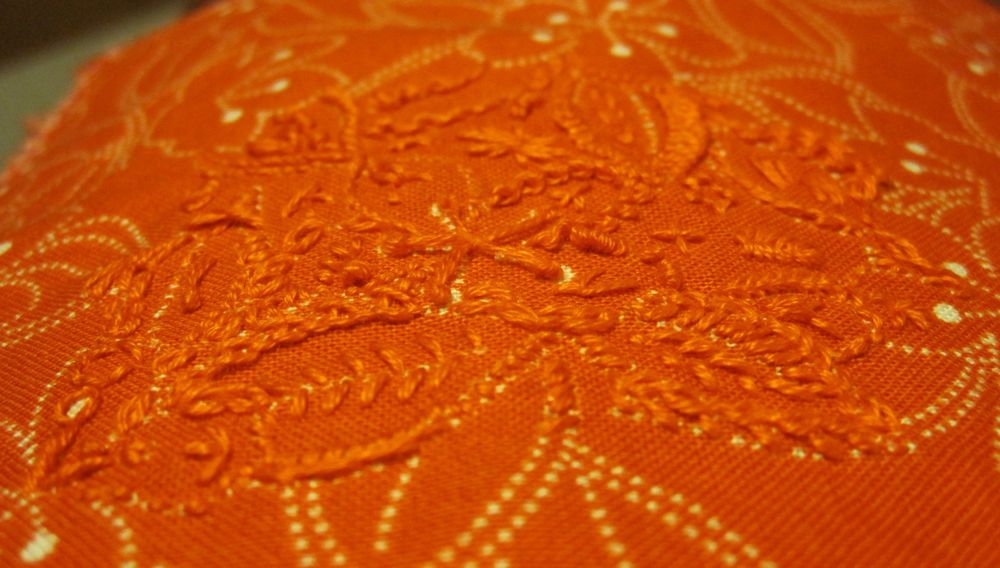
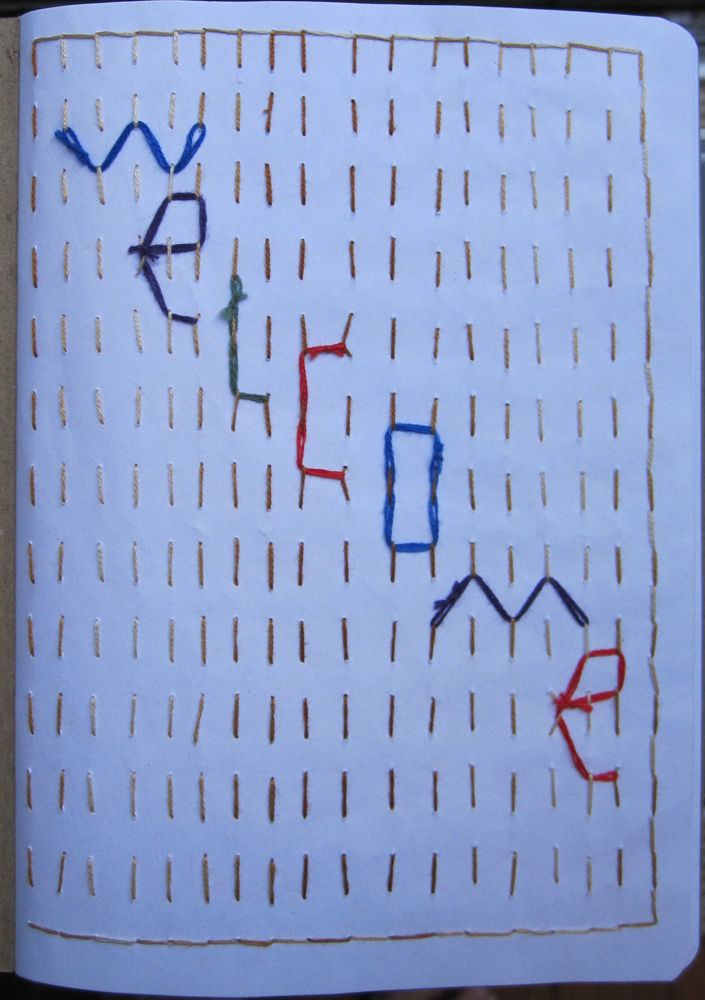
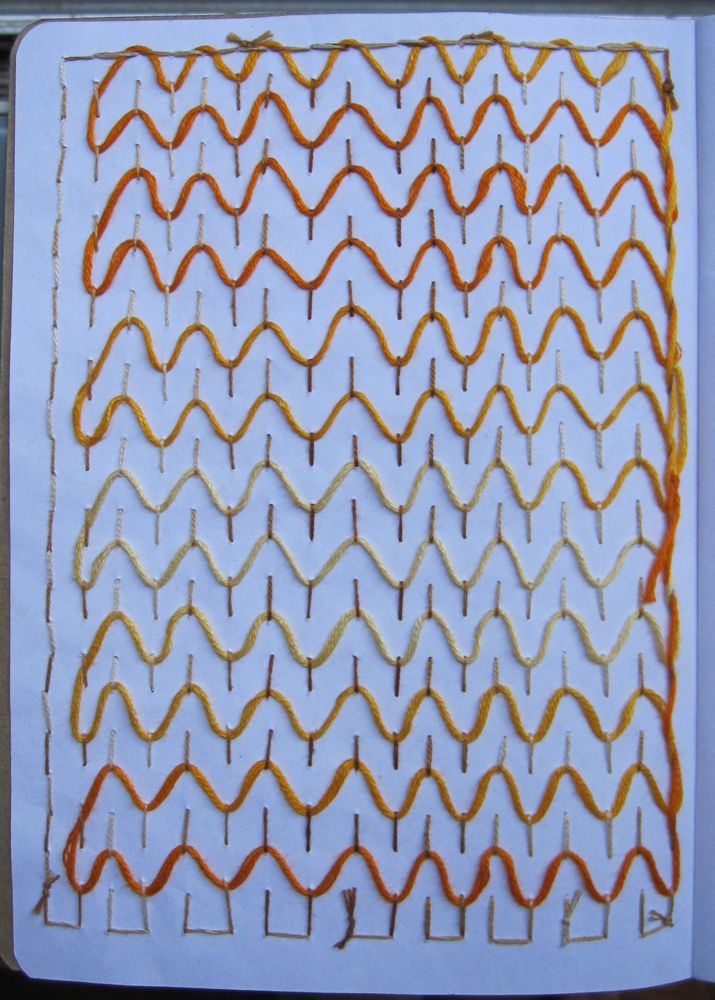
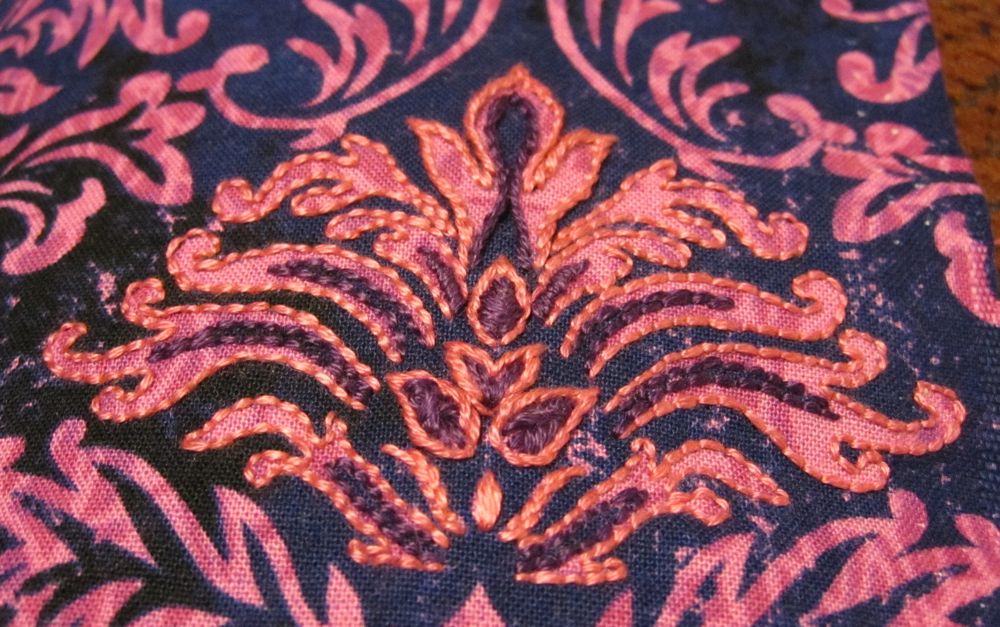
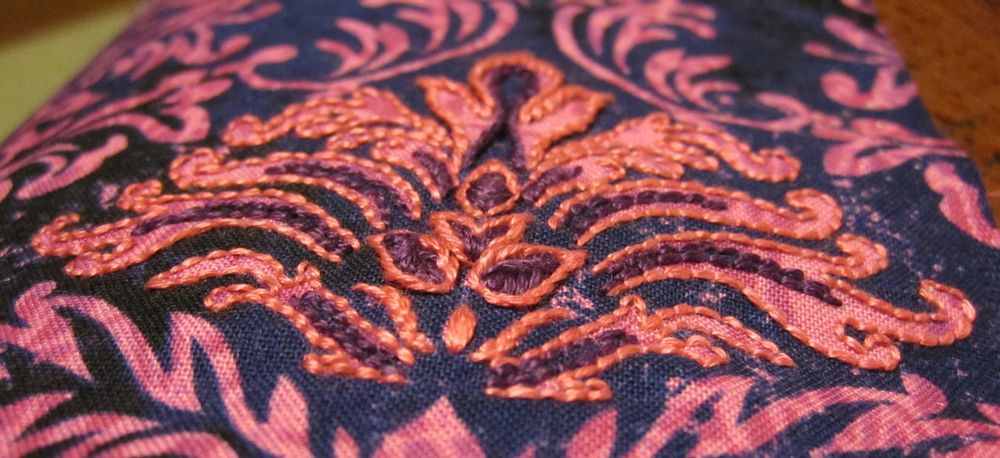
I started with a fun tropical orange fabric with dotted-line drawings and just stitched along the lines and doodled in the open spaces. Next I chose a classic pink and indigo fabric and embossed its design.

purple/pink purple/pink

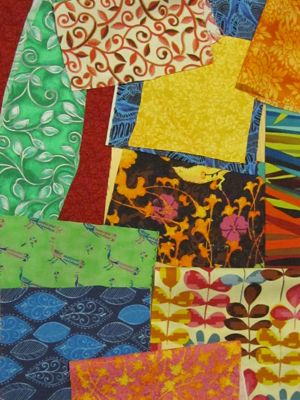
The quilt is likely to include bits from the following fabrics as well:

the selection


Sushi fish

Oh man, did these ever take forever for me to finish. According to my Ravelry records, I’ve only been working on them since mid-April, but it feels much longer.

But without further ado:

sushi fish

sushi fish

Fish to sushi, a clever pattern from Irene Kiss, AKA Irka. She also has a chicken-to-egg pattern and a rags-to-ballgown Cinderella pattern. The post is in Spanish but there is a link to an English pdf at the top.

sushi fish

I just had difficulty, unrelated to the complexity of the pattern. The first sushi rolls I made were too tight, so I remade them in a soft acrylic instead of cotton. Then I apparently miscounted drastically on one of the seaweed wraps, because when I went to sew the rice on it was way too short. I decided it was easier to start over on that one (and I’d only sewn the solid rice side onto it, the easier one to redo).

I did have trouble with the fin and tail patterns, and ended up designing my own instead.

Then, of course, there was all the sewing. So much sewing! Four fins and two eyes per fish, all the way around twice plus the seaweed seam per sushi roll, and finally sewing the roll to the fish. I don’t think you could achieve the same effect without all the sewing, but I have trouble forcing myself to sit down and just do it.

A note of advice to anyone who wants to make this pattern: crochet loosely. Go up a hook size from what you would usually use on the yarn at hand (actually, lately I use an E hook with worsted weight, and used an F with this – and I wish I’d used a G or H). Nothing has to be stuffed, and looser, more flexible fabric will make the transformation much easier. Mine are kind of hard to stuff back and forth, though I’m hoping they will ease up with use.

sushi fish

sushi fish


Sketchbook update

Oh boy. Unless I pick it up, this is not going to be done by the deadline. Anyway, I have scheduled myself monthly update posts, so as to give me intermediate deadlines to have something new done.

I did a little more than what I’m about to show you, but did not complete any other pages. The one I finished, front and back, was the first page of the book:

recto

verso

I should be getting my sewing machine back from the shop tomorrow, so I’ll have it to try out per melydia’s suggestion.


Abandoned Anansi

The June 2011 Amigurumi Army mission was mythical creatures. Having already made a dragon, and thinking anything horse-based would be too difficult, I looked at Wikipedia’s list of legendary creatures and was reminded of the spider Anansi. I grew up with a book about Anansi by Gerald McDermott, very bold and colorful, and had already decided to include it in my children’s book quilt, probably as an applique. I decided to crochet an applique Anansi. Unfortunately Anansi was too thick for the quilt, and started looking a little Sloth-ish, and ultimately I decided it would be a waste of embroidery floss to finish him, especially when I have other things to finish by the end of the month. Here he is anyway, original and legless copy.

original

copy

For the first time, I noticed the Anansi book is based on an animated show. I did some searching, not having known Gerald McDermott was an animator, but did not find Anansi. However, you can watch a different two of his animations online.


Knots and crosses

It’s going to be Embroidery Monday here for a while as I work through my embroidery sampler. Maybe before the end I’ll have my sewing machine back from the shop and be able to put it together into its finished form, which will involve more decorative embroidery along the seams.

Oh, French knots. It took me so long to successfully, consistently make French knots. Of course, it didn’t help that I was trying them on Aida (cross-stitch) fabric, which has enormous holes — the better for your knot to pull through and completely come undone, my dear. They are one of the few stitches I think it is easier to make neatly on ordinary fabric.

This installment of the embroidery sampler tour covers multiple kinds of knots, and cross-stitch. I wasn’t sure I should even include cross-stitch, since it is so well covered elsewhere, but we’ll look at it in brief.

knots!

The knot panel of the sampler was originally supposed to also contain satin stitch, but I omitted that almost entirely, so it’s just a little light instead. I didn’t show the back, either, because it’s not illuminating. Here is the key to all knots: tighten the thread down around the needle before pulling the needle all the way through the fabric. If you leave the thread wrapped up around the needle while pulling the needle through, it will not stay neat. Tug on the loose end to get the wraps tightened down where the needle meets the fabric, and then put your thumb on them while pulling the needle through. Much better results.

The most common knot is the French knot, which is made simply by wrapping the thread twice around the needle and inserting the needle right next to where it came up – or even in the same space. I have seen directions to wrap clockwise and counter-clockwise, and I did both in the course of making the knots below. Can you tell any difference?

knots! knots!

The shooting stars in the lower left are tailed French knots, made the same way as regular French knots except that the needle is inserted further away from where the thread came up. Tightening the knot before pulling the needle through is vital in this one. The little corkscrew is my effort to show the wrapping; the purple thread that goes through it is the needle, and it should point down and to the left. That is, the wrapping proceeds from eye to point. The green knots were made with four strands of floss instead of two.

A tailed French knot with several additional wraps becomes a bullion knot. Well, sort of. To make a bullion, after bringing the thread to the front of the fabric at a point we’ll call A, insert the needle a distance away and back up at A, without pulling it through at all (it should be going through the fabric like a safety pin). Wrap the thread five or six times around the needle, from eye to point again, and then pull the needle through. This is one where tightening the wraps on the needle too much is problematic, because it becomes difficult to get the needle through. However, if you tighten them gently and put your thumb on them while pulling, they should still make a reasonable bullion.

knots! knots!

The second picture above was made with bullions and French knots. In the first picture, again, the green floss was four-stranded and the rest two-stranded, and the upper green bullion shows you what happens when you don’t put your needle in a full bullion-length away.

The colonial knot, on the left below, is supposed to be a larger knot than the French knot, and the Chinese knot, on the right, is a smaller one. I didn’t get an enormous difference among the three, honestly, but someone who’s worked more knots and has more consistency probably would. In both of them the thread is tacked down by the stitch. With thread on the front of the fabric and needle pointing toward the top of the work, the colonial knot is made by bringing the thread over the needle to the right, under the needle to the left and below (eye-side of) the first wrap, over the needle to the right again and under to the left and above (point-side of) the first wrap. Then the needle is inserted next to where the thread came up, the wraps tightened, and the needle pulled through.

knots! knots!

The Chinese knot has a nifty feature where you can leave it untightened to get a loop. The thread coming out of the fabric is looped so the loose end is underneath the end coming out of the fabric, and the needle is inserted into that loop next to where the thread comes out of the fabric. The wrap can be tightened on the needle to make the simple knot, or left looser to get the loop effect.

Finally, the four-legged knot is almost a woven stitch. Make a vertical stitch and bring the needle up at one end of the horizontal stitch. Hold the thread straight across, slide the needle under the vertical stitch and over the thread that loops back from the horizontal bar to the eye of the needle. Tighten that down on the middle of what will become the cross, and insert the needle through the fabric at the opposite end of the horizontal stitch.

knots!

I don’t have a lot of patience for knots, but there are some who use them exclusively. Here are some links to knotwork projects: pillow cases, a collection of projects, and commercial kits for small rugs and similar pieces. All in knots. They give an impressive texture.

Finally, we come to cross-stitch. My first ever needlework project was in cross-stitch, and I would guess it predated any of my sewing efforts as well.

xstitch

A basic cross-stitch is made by making a diagonal stitch in one direction, and topping it with a diagonal stitch in the opposite direction. When you wish to make a row of stitches, it is neater and more efficient to make all the bottom stitches first, and then move back across the row with the top stitches. In fact, if you can stand it, make all the bottom stitches there are before making any top stitches (at least in a particular color). Cross-stitch definitely benefits from having all crosses made with the same diagonal stitch on top, and in fact you will be dinged for having stitches that don’t go the same direction if you enter a competition.

knots! xstitch

The method is to go diagonally down in front and straight up in the back. The back then ends up looking like a bunch of doubled vertical stitches (a vertical from laying down the bottom half of the cross-stitch, and a vertical from coming back across with the top halves).

As an aside, you have two options for starting the next stitch when moving across a row. Suppose you have made a diagonal from northwest to southeast. You could go due north or due east to start the next one. Embroidery stitches in general look nicer when you take the thread in right angles or tighter than when the angles are obtuse. In our example, going due north will take the thread 45 degrees from its previous direction, and going east will make the angle 135 degrees. Therefore, north is preferable.

This leads us to double cross-stitch, which makes a star. This stitch, even when used in the same manner as cross-stitch, is made one star at a time. Make either the cross first or the plus first, but be consistent, and when you move from one to the other take the thread across the back, not to a neighboring spot. That is, if you make the cross first and end in the southeastern corner, go to the north or west spot to start the plus, not the south or east part.

knots! xstitch

Finally, herringbone stitch. This relative of cross-stitch is not just a spread-out version – in fact you can make it quite tight together. The corners of your crosses no longer meet, and you alternate diagonal directions with each stitch. The method: make a diagonal stitch. Bring the needle back up horizontally behind where it went down, and make another diagonal stitch. Repeat.

Of course cross-stitch is most often used to “color in” regions and make pictures. You can see I free-handed the one below, but you can cross-stitch successfully on plain fabric by making pencil lines to guide you.

xstitch

It is easy to find cross-stitch patterns online, free or for purchase, so I’ll just give you two links. One full of more classic patterns, and one with geeky patterns.


The very flower of nerdiness

The July CAL on Ravelry was flower themed. I had, of course, just recently made flowers for an Amigurumi Army mission, so I worried about ideas. However, I had also just been in Colorado for a wedding and become enamored of wild lupine, so I thought I would make something purple. My thought was penstemon, or beard-tongue, but my efforts turned into more of a bellflower, so I embraced that. The pattern is simple (as always, abbreviations here): sc 6 in a magic ring. *sc 3, 2sc* four times so there are 10 sc in the round. *sc, ch 2, sc in back bump of second ch from hk, sc in next st of rnd* five times. Sl st, sl st, ch 1 [do not sk any sts], sl st, sl st, FO. (The ch 1 helps with the point of the first petal, which seems to need it.)

bellflower

bellflower

Since it turned into the kind of flower it did, I made a calyx for it. If you’re making a calyx you probably want to leave the loose ends of the flower yarn hanging out the back center of the flower. Each sepal is a chain with stitches down it, and this works best (stays flattest) if you stitch into only the top loop of the chain. Make a slip knot. *ch 7, and starting in second ch from hk, sl st, sl st, sc, hdc, hdc* five times (each time you’ll have a ch left over). Sl st to join and then sc around the inside opening, one sc per sepal (5 total). Put the loose ends of the flower yarn through the center of the calyx, stitch them through a loop and tie them together. Braid them with the initial end of the calyx and sc onto that braid with the working end of the calyx yarn. You’ll need to tighten it down on the braid and have the top of the stitches spiral around the braid to make it stable and straight.

[Alternatively, of course, you can make a stem however you like, or just finish off the yarn and have a brooch-style flower.]

bellflower

The Amigurumi Army mission for July was nerdy crochet. I thought about something from a fandom, but couldn’t come up with anything I wanted to make. However, as we know, I am mathematically minded, so I looked in that world and found this:

binary tree

A binary tree.

binary tree

I made it from the top down, sewing as little as possible: when the second piece of each pair was made I just continued into the next segment down, stitching around the first piece without a gap. This required just a little thought about the order of operations. The only significant sewing was the leaves, though that was pretty significant. The smallest bits are 5sc in a magic ring, continued without increase. Then I just put pieces together and stitched around without counting, trying to keep things fairly compact, which is why nothing is exactly symmetric after that. The whole shebang is held up by eight pipe cleaners, one inside each of the smallest branches.

I finished it while visiting a friend with a jewelry tree, so I asked them to pose together.

trees together


Embroidery for edge finishing

The edges I am thinking of here are in particular the binding for the quilted potholders I make.

I’m in the process of making an embroidery sampler for the class I’m hoping to teach in the fall, so I’ll work from the blanket stitch panel of that. There are four stitches I’ve used for potholder binding: blanket stitch, closed blanket stitch, up and down blanket stitch, and Cretan stitch. That last is usually classed with the feather stitches but it also has the feel of a blanket stitch family member.

blanket stitch sampler panel

In the upper left corner we have a front and back view of standard blanket stitch. The right end of the stitching is intended to help clarify the making of the stitch: come up through the fabric on the line you would like thread to run along (the edge if you are edging a blanket or stitching down binding). This is the northwest corner of a square. Stitch down through the fabric at the southeast corner, and before you tighten the thread, come up at the northeast corner and under the thread. When you tighten the stitch you should get two sides of a square. You’re now at the northwest corner of a new square.

blanket stitch

I’m not a very good judge of lefty/righty business, since I make my stitches upside-down pretty regularly and, though nominally left-handed, stitch preferentially with my right hand, though my left will come into play if the space is too awkward for my right. However, it is easiest to stitch toward your stitching hand with this (it allows you to pull toward the next stitch and give resistance to the caught thread right at the corner), so if you are left-handed, either turn this over and stitch with the straight line on the bottom, or stitch up northeast, down southwest, and up northwest.

I’ve used this on a number of potholders, but none I’ve blogged about. You can imagine it, I’m sure.

To start a new thread, at the last corner of a square make a tiny stitch over the caught thread (this is also how I finish the whole thing) and knot or otherwise finish your initial thread. Take the new thread up where the final upward stitch of the previous thread had been (i.e., catching the thread a second time) and continue.

Ordinary blanket is convenient because it looks the same on the front and the back provided you are working at an edge, so you can continue the same stitch around your potholder loop.

Closed blanket stitch is very similar. It alternates a stitch with a short crossbar and a vertical that pushes out to the right further with a stitch with a long crossbar and a vertical that pushes out to the left, meeting the vertical of the previous stitch. It too looks the same on the back, and stops and starts the same way as standard blanket stitch.

closed blanket stitch

I used closed blanket stitch on the butterfly potholders.

I started getting somewhat bored with blanket stitch and more recently tried a fancier version called up and down blanket stitch. You can see the finished potholders for this and Cretan stitch in the potholder tutorial entry. This has two steps, and the closeup spreads out the legs of the stitch before trying to show the construction:

up and down blanket stitch

Up and down blanket starts exactly like standard blanket, but instead of progressing to a new stitch immediately you take the needle down through the fabric next to where it has just come up, and bring it up next to the bottom end of the previous vertical. Catch the thread before tightening the stitch, and you’ll get a doubled vertical with a little holding stitch making the corners with the crossbars to the left and right.

To start a new thread it is best to finish after the standard blanket stitch portion. Start a new thread as for blanket, and make the second half of the current stitch.

Unfortunately, although up and down blanket is almost the same on the back, the verticals are further apart (at least mine are). You can either simply deal with that and use it on the potholder loop, or you can do what I did, which was to make paired whipstitches where the thread joining the pairs to each other went between the layers of bias tape. This was kind of laborious, though the look was good.

brown potholders closeup

The process: after coming up, wrap around the edge of the tape, come up through one layer, slide the needle between the layers about a quarter inch over and then come up through the second layer. Repeat.

Finally, I tried Cretan stitch, which isn’t called a blanket stitch typically, but resembles a blanket stitch with the verticals alternating between going upward and downward from the crossbar. It didn’t feel as sturdy though it shouldn’t have enough stress on it in the context of potholder binding to matter.

Cretan stitch

To do this one, well, you could start exactly as you do for blanket stitch. When you come up at the northeast corner, it is now the southwest corner of the next square. Put your needle down at the new northeast corner and up through the southeast corner, catching the thread. You’re ready for the next stitch, at the northwest corner of the next square. The closeup starts halfway through that process and does the standard blanket second, and has the more-proper Cretan trait of not putting the northeast (for blanket) and southeast (for the flipped blanket) corners on the same horizontal line, but having four distinct lines of stitching.

To edge the potholder loop on this pair I just did a short whipstitch, matching the length of the verticals of the Cretan stitch.

blue potholders closeup

And since I have them, an explanation of the remaining stitches:

long and short blanket stitch

Long and short blanket stitch is anything you create by varying the lengths of the verticals.

double blanket stitch

Double blanket stitch is simply two separate rows of blanket, the second made slightly above and trailing the first.

buttonhole stitch

Buttonhole stitch is blanket stitch made very close and tight together, even slightly tighter than the middle section of this example.

blanket on a curve

And finally, if you put blanket stitch on a curve it can be used for motifs rather than just edging. You can see you get a very different look depending on whether the crossbar is on the outside or the inside of the curve.


First Friday

Hello! Last month I was partying it up in Boulder at a bachelor/bachelorette party that included a ghost tour; this month I may go to a museum’s First Friday and hear a talk about unusual Russian museums. Or I may stay home; it’s been a busy time in Reveland.

I wasn’t sure what to put in this edition of First Friday, my link round-up and inspiration-source-sharing post. However, going through some old files I discovered a cache of images I had downloaded to give a friend for sculpture inspiration. The source of the images, indirectly, was Google Images, which I had used with various adjectives as the search terms. Unfortunately I don’t remember where I got that idea, since it is a good one and I would like to give credit. However, I will pass it along. Some adjectives don’t work well – less abstract ones or ones that are associated with a major product (“effervescent” gets you a lot of Alka-Seltzer; “coy” gets you a bunch of misspelled fish). I did some searches before writing this; “symmetric” is good and “dynamic” is interesting. You get to see what each adjective is most commonly applied to: “silky” nets you a pile of terrier pictures. “Hilarious” is illuminating if not necessarily heartening. Let me know if you try it and find a really good or interesting one.

In addition, let me share a Random Stripe Generator that was passed along by someone on Ravelry. You choose your colors, the total number of rows, and the acceptable widths of stripes of each color (from 1 row to 20), and it generates a random stripe pattern. For example, I selected three colors and the widths 2, 4, 6, with a total of 100 rows, and it gave me this pretty thing:

sample output

Finally, since I just came across it today, I want to share this impressive array of silhouettes.

Incidentally, as an update on other projects, I did finish both July crochet challenges on time and they will appear in the usual Ravelry post, next Thursday. I did not, however, finish the QR embroidery on time. It has been tabled but should still eventually see the light of day. Too bad. However, as of Saturday afternoon I was short on sleep and looking at 12 hours’ work (or more) plus washing to finish. I declared stitchy bankruptcy and haven’t regretted it!

Coming attractions: the remaining June crochet challenge, something fishy, and possibly the August Stitch-Along on Feeling Stitchy.


Bright ideas

I was struggling for today’s blog post, because I have a lot of works in progress but nothing super-near finishing. I was concerned about deciding the topic and then having to stay up until midnight finishing the project! However, I found my way. The other day I finally started Planet M File’s firefly, which was a quick project.

from the front from the back

Using bright red instead of country red makes him look kind of like a vampire, to me, so I adjusted the facial embroidery accordingly.

I vant to suck your blood
He vants to suck your blood.

Thinking of ways to make this a longer blog post, I brainstormed other things that light up. I figured there was no way that starting on Tuesday evening I would finish another animal that lights up, but I could do a lightbulb. So I did. A compact fluorescent lightbulb, in fact.

eco-friendly

And then I made an incandescent light bulb to be his friend. I don’t know why cartoon lightbulbs are traditionally yellow, but I have a huge amount of mildly nasty-feeling yellow yarn so I went ahead and used it.

traditional

The incandescent was freehanded to match the CFL in size (which did not quite happen), but I have a pattern for the CFL.

Compact Fluorescent Lightbulb (modeled after a 60 Watt equivalent, but is larger):
You need: small amounts of white and gray worsted weight yarn, appropriate hook for a tight stitch (I used E/3.5mm), two white (or silver or beige) pipe cleaners, and a small amount of stuffing. I also used small rocks in the bottom of both bulbs to get them to stand up.

In white: sc a tube 20″ long and less than 1 1/2″ around. This will depend on your gauge; for me with soft worsted weight yarn and an E hook, 5 sc around gave 1 3/8″ circumference. It does not matter how you start the tube because the ends will be hidden; magic ring, ch 2 and sc in first one, ch and join with sl st. Dealer’s choice.

After about 12″, stop and insert the first pipe cleaner. Your tube should be barely big enough for it. I like to fold the end over so the cut end can’t snag the yarn, and I recommend cutting about 1 1/2″ off the pipe cleaner to put the join closer to the middle of the tube. You will find that you can only push the pipe cleaner in from the end for so long, and then you have to scrunch the tube onto it. Finish the 20″ and leave a long enough yarn tail to sew the tube ends to the base of the bulb. Insert the second pipe cleaner to meet or slightly overlap the first, scrunch the end of the tube down a bit, cut the loose end off (should be about 3″, or 1 1/2″ if you cut the first one) and unscrunch the tube.

There is only so much you can do to get the tube into shape before it’s sewn onto the base, but to have the ends in the right places and orientation for sewing you should twist it now and fix it up later. At about 3/4″ from each side of the center point, fold the tube in opposite directions. You are looking at the top when it makes an S shape. Now coil the long ends around; each will make 1 1/2 rotations, interleaved with each other, before folding down to meet the base.

from the top

I’m not completely thrilled with the base, but as long as you shape it by hand it’s okay.

In white:
1. sc 7 in magic ring
2. 2sc around (14)
3. *2sc, sc* around (21)
4. *2sc, sc 3* 5x, sc (26)
5-8. sc around (4 rows)
This is a good time to sew the bulb onto the base. Center the ends of the tube on row 2, across the center point from each other.
9. *dec, sc 3* 5x, sc (21)
10. *dec, sc 2* 5x, sc (16)
sl st and FO white.
In gray:
Put slipknot on hook and sl st to row 10.
11-15. sc around (16 sc; 5 rows)
Stuff! I used fiber until I got the the gray part and then switched to rocks.
16. *dec, sc 2* around (12)
17 *dec, sc* around (8)
FO. I had to stick some more rocks in before doing the final drawstring. Shape by hand; you could get a better form on the bulb if you stitched the coils together but I didn’t feel like it.

all together!


Quilted potholder tutorial

The description of the construction of potholders ended up rather long. The outline: make 7″x7″ fabric faces, quilt them to 7″x7″ pieces of fleece, zigzag the two halves together, stitch extra wide double-fold bias tape around the edge, attach a loop of bias tape, and hand-sew the free edge of the bias tape down. The instructions will be for a pair of potholders.

Making faces:
The simplest way to make the fabric faces is to find a fabric you like and cut four 7″x7″ squares. There are a huge number of variations, though: you could stitch ribbon along a plain piece of fabric, or applique other fabric onto it, or employ any quilting technique. The two sets of potholders I made most recently were patchwork and confetti piecing.

For patchwork, I was rather imprecise: I have several 7″x7″ squares of paper, and I folded one in rough thirds diagonally, using a ruler to make sure the folds were parallel, and cut fabric with a(n unmeasured) 1/4″ seam allowance along the folded edge or edges. I had four kinds of fabric so I cut one inside third and two outside thirds of each, matched them up so no two faces had the same combination of fabrics, and sewed them together with a 1/4″ allowance. Then I pressed the seams open.

patchwork pieces patchwork faces

Confetti piecing may take longer but requires no measuring. You need more fabric for it than the total surface area of the finished faces, but you can also add more later if you discover you didn’t cut enough. I usually cut five to six faces’ worth of material for the four I am making. The different pieces should be sewn together with a 1/4″ seam allowance, but not necessarily squarely. You may lay one diagonally across the other, sew along the diagonal, and trim off the excess beyond the seam allowance. That excess may then be lined up with some other part of the material and sewn on. Press the seam allowance open after every seam, to minimize bulk. You may also cut a straight line across the material and stitch the halves together in a different orientation. Repeat until there is some region that looks like a good potholder face, cut out a 7″x7″ square, and sew the remainders together again as before (I think of this as “rolling out the scraps”). You can see why this takes a lot of material: lots of seam allowance, and risk of little pointy bits sticking out unusably from the edges.

starting confetti pieces back of confetti piecing

cutting a face
Try to continue the straight line of the template all the way across the fabric, to make using the leftover fabric easier.

rolling out the scraps
“Rolling out the scraps.”

confetti faces

Construction:
I use fleece remnants for my padding. Any color is fine, so long as you line thinner/paler fabrics with muslin or white cotton to keep the fleece color from showing through. Cut four 7″x7″ squares and pin your fabric faces to them. Stitch around the edge at about 1/4″ and quilt them down the center in some way. My butterfly potholders had a stitched triangle somewhere in the middle, my patchwork potholders are stitched along the two seams, and my confetti-pieced potholders are stitched along some assortment of seam lines.

If the faces have an upper corner, align them so those match when you pair the halves up. Zigzag around the edges of the potholders. You could also straight stitch, but zigzagging keeps the edge from puffing unattractively under your bias tape and makes straight stitch unnecessary.

pinned for quilting
I cut a 14″x14″ square of fleece and pinned all four faces at once. I don’t think I recommend that, since it is still advisable to stitch around the edges of each face.

ready for binding

Edge binding:
Each pair of potholders uses about two yards of binding, or 2/3 of a package. You want extra wide double fold bias tape. Unfold it and pin one raw edge along the edge of the potholder (if the tape is folded unevenly, use the narrower half), curving around the corners. This takes a fair number of pins. Make sure you start a bit away from a corner so you don’t have to join the cut ends on a curve; to make the join, fold the right-hand raw edge (with the edge of the potholder facing away from you) in on itself and overlap the left-hand raw edge over it. See the pictures below: you want the exposed tape ends to point toward you when you sew the seam on your machine.

pinned for machine sewing

pinning the overlap
You want your raw edges downstream.

Stitch in the fold line all around the potholder. I often have to walk the machine with the handwheel around the corner curves, and even with that I sometimes have to redo one or two. Afterward, trim the potholder corners to match the curve of the bias tape, and zigzag around the edge again. Cut a 5″ to 5 1/4″ length of bias tape to be the hanging loop. If you have a desired top corner, make sure you pin the loop to it. Fold the bias tape in half so the open edge faces out (see picture) and pin to the opposite side of the potholder from the edging. I usually pin the edging down so it can’t get caught in the stitching. Sew the loop on in a straight line close to the corner edging stitch. Trim any bits that stick out past the edge and zigzag the loop ends down.

pinning the loop

Fold the edging over to the loop side and pin down. At the join, unfold the original bias tape folds so that the outer layer of tape is completely wrapped around the inner layer. You may need to change the original fold on the inner layer, making the strip a little narrower, in order to get a smooth line.

pinning the last edge

There will be a separate post with my thoughts on choice of embroidery stitch for the loose end of the binding, but whatever stitch I use I proceed in the same way: start at the near edge of the loop and stitch the binding down underneath it. Proceed around the potholder until you reach the near end of the loop again. Pin the loop up, stitch across the base, and then stitch up the far side of the loop, around, and back to where you started (this is why the open edge of the bias tape should be outward: your stitches will seal it off).

I also wash the potholders in a mesh laundry bag and give them a press before wrapping them. As long as your embroidery is sturdy, there should be no problem machine-washing the finished project.

finished confetti potholders finished patchwork potholders